Have you ever found yourself craving something sweet but didn’t want to commit to making (or eating) an entire cake? That’s where desserts in cups come to the rescue! As someone who’s been baking and creating sweet treats for over a decade, I’ve fallen head over heels for the charm and convenience of cup desserts.
These single-serving delights aren’t just adorable—they’re practical, portable, and perfect for portion control. I’ve spent countless hours perfecting these mini masterpieces for dinner parties, family gatherings, and those nights when I simply need a bit of indulgence without the guilt of leftovers calling my name from the refrigerator.
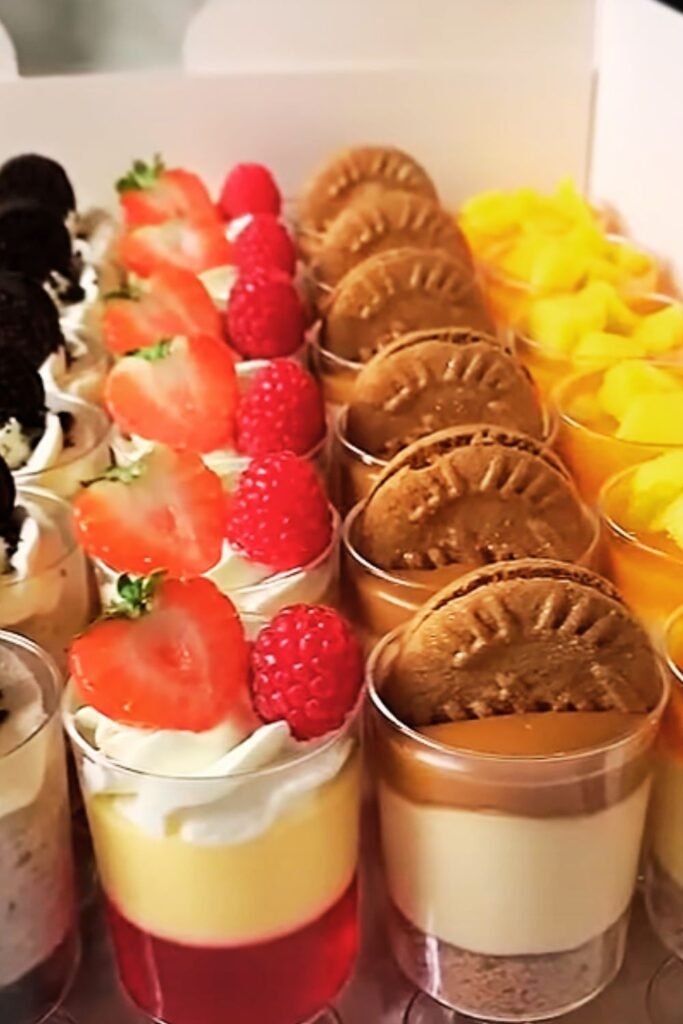
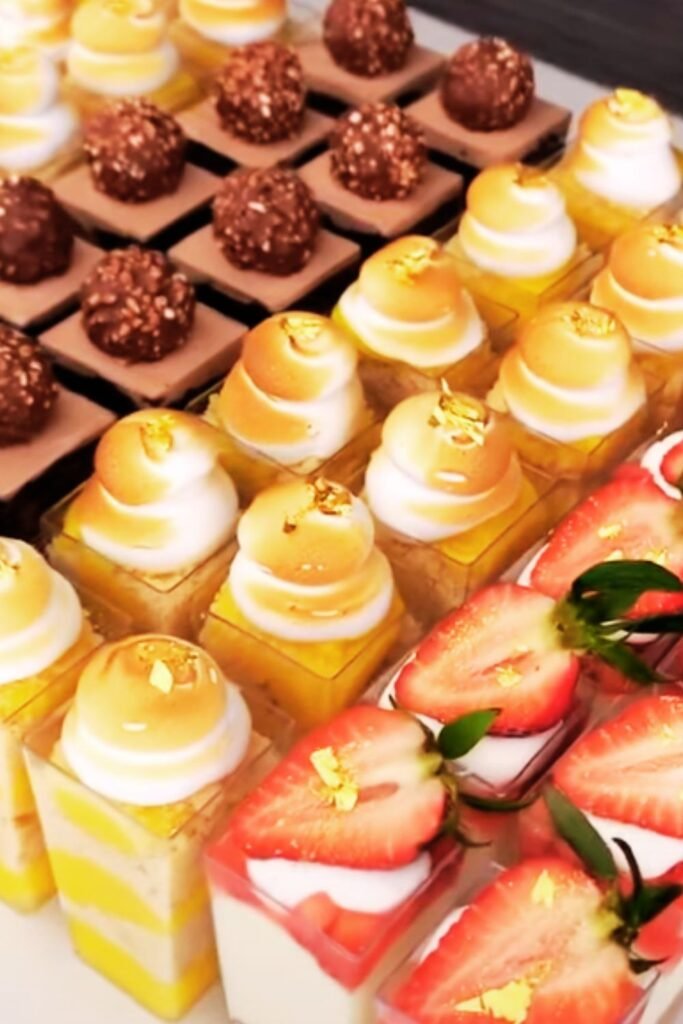
In this article, I’m sharing my 15 absolute favorite desserts in cups that have consistently impressed friends and family. From classic tiramisu to trendy layered creations, these recipes combine convenience with that wow factor that makes dessert time special. Let’s dive into these sweet little cups of happiness!
1. Classic Tiramisu Cups
There’s something magical about the perfect balance of coffee-soaked ladyfingers and creamy mascarpone in a tiramisu. When served in individual cups, this Italian classic becomes even more appealing.
I love making tiramisu cups because they actually taste better after sitting overnight in the refrigerator, making them the perfect make-ahead dessert for gatherings. The flavors meld together, creating that signature tiramisu taste that’s simply irresistible.
Ingredients:
- 8 oz mascarpone cheese, room temperature
- 3/4 cup heavy whipping cream
- 1/4 cup granulated sugar
- 1 tsp vanilla extract
- 3/4 cup strong coffee or espresso, cooled
- 2 Tbsp coffee liqueur (optional)
- 12-16 ladyfingers, broken into 1-inch pieces
- Unsweetened cocoa powder for dusting
- Chocolate shavings for garnish
Method:
- In a medium bowl, whip the heavy cream until soft peaks form. Set aside.
- In another bowl, beat together the mascarpone, sugar, and vanilla until smooth.
- Gently fold the whipped cream into the mascarpone mixture until just combined.
- Mix the cooled coffee with the coffee liqueur (if using) in a shallow dish.
- Quickly dip ladyfinger pieces into the coffee mixture (about 1 second per side) and place a layer at the bottom of each cup.
- Add a layer of the mascarpone mixture over the ladyfingers.
- Repeat the layers once more, ending with the cream mixture on top.
- Dust with cocoa powder and refrigerate for at least 4 hours (overnight is best).
- Just before serving, garnish with chocolate shavings.
Serving suggestion: For a special touch, serve these with a small chocolate-covered espresso bean on top.
Visit Amazon for any required items
2. Lemon Cheesecake Cups
When I need a refreshing dessert for warmer days, these lemon cheesecake cups are my go-to. The bright citrus flavor cuts through the rich creaminess of the cheesecake, creating a perfect balance that leaves you feeling satisfied but not overwhelmed.
I particularly love the contrast between the crunchy graham cracker base and the smooth, tangy filling. The yellow color also makes these cups look like little pots of sunshine – perfect for brightening up any dessert table!
Ingredients:
- 1 cup graham cracker crumbs
- 3 Tbsp melted butter
- 1 Tbsp sugar
- 8 oz cream cheese, softened
- 1/3 cup granulated sugar
- 2 Tbsp lemon juice
- 1 Tbsp lemon zest
- 1/2 cup heavy cream, whipped
- Fresh berries for garnish
Method:
- Mix graham cracker crumbs with melted butter and sugar.
- Press about 2 tablespoons of the mixture into the bottom of each serving cup.
- Beat cream cheese and sugar until smooth and fluffy.
- Add lemon juice and zest, mixing until well incorporated.
- Fold in the whipped cream gently.
- Pipe or spoon the mixture over the graham cracker bases.
- Refrigerate for at least 2 hours.
- Garnish with fresh berries and additional lemon zest before serving.
3. Chocolate Mousse Cups
As a self-proclaimed chocoholic, I couldn’t create a list of cup desserts without including a decadent chocolate mousse. This recipe creates an airy, rich chocolate experience that’s surprisingly simple to make but tastes like you spent hours in the kitchen.
The secret to a perfect chocolate mousse is using good quality chocolate and carefully folding in the whipped cream to maintain that light, airy texture. I like to add a touch of espresso powder – it doesn’t make the mousse taste like coffee, but rather enhances the chocolate flavor.
Ingredients:
- 6 oz high-quality semi-sweet chocolate, chopped
- 3 Tbsp unsalted butter
- 3 eggs, separated (use pasteurized eggs if concerned about raw eggs)
- 1/4 tsp cream of tartar
- 1/4 cup granulated sugar
- 1/2 tsp vanilla extract
- 1/2 tsp espresso powder (optional)
- 1/2 cup heavy cream, whipped
- Chocolate shavings or berries for garnish
Method:
- Melt chocolate and butter together in a double boiler or microwave in short bursts, stirring frequently. Allow to cool slightly.
- Whisk egg yolks into the chocolate mixture one at a time.
- In a separate bowl, beat egg whites with cream of tartar until foamy. Gradually add sugar and continue beating until stiff peaks form.
- Fold one-third of the egg whites into the chocolate mixture to lighten it.
- Gently fold in the remaining egg whites and the vanilla extract.
- Fold in the whipped cream until just incorporated.
- Divide the mousse into serving cups and refrigerate for at least 2 hours.
- Garnish with chocolate shavings or fresh berries before serving.
4. Strawberry Shortcake Cups
Strawberry shortcake always reminds me of summer gatherings with my family. These individual cups capture all the traditional elements – buttery cake, fresh strawberries, and whipped cream – in a convenient, portable format.
What I love about these cups is how they showcase the natural beauty of fresh strawberries. When strawberries are in season and at their peak sweetness, this dessert is truly unbeatable. The sweetened macerated berries create their own sauce, which soaks slightly into the cake layer for an incredible flavor.
Ingredients:
- 2 cups cubed pound cake or angel food cake
- 1 lb fresh strawberries, hulled and sliced
- 3 Tbsp granulated sugar
- 1 Tbsp fresh lemon juice
- 1 cup heavy cream
- 2 Tbsp powdered sugar
- 1/2 tsp vanilla extract
- Fresh mint leaves for garnish
Method:
- In a bowl, combine sliced strawberries with granulated sugar and lemon juice. Let sit for at least 30 minutes until juicy.
- Whip the heavy cream with powdered sugar and vanilla until stiff peaks form.
- Place a layer of cake cubes at the bottom of each serving cup.
- Spoon a generous amount of macerated strawberries over the cake.
- Top with a dollop of whipped cream.
- Repeat layers if desired, ending with whipped cream.
- Garnish with a fresh strawberry slice and mint leaf.
- Serve immediately or refrigerate for up to 2 hours before serving.
Visit Amazon for any required items
5. Salted Caramel Pudding Cups
There’s something deeply satisfying about the combination of sweet and salty, and these salted caramel pudding cups deliver that perfect balance. The rich, buttery caramel paired with a touch of sea salt creates a sophisticated flavor profile that appeals to adults while still satisfying that childlike love for pudding.
I discovered this recipe during a caramel-making phase and have been perfecting it ever since. The homemade pudding is worlds apart from instant varieties, and the effort is absolutely worth it when you see people’s eyes close in bliss with the first spoonful.
Ingredients for Caramel:
- 1 cup granulated sugar
- 6 Tbsp unsalted butter, cut into pieces
- 1/2 cup heavy cream
- 1 tsp flaky sea salt
Ingredients for Pudding:
- 2 cups whole milk
- 1/2 cup heavy cream
- 1/4 cup cornstarch
- 1/4 tsp salt
- 3 large egg yolks
- 2 Tbsp unsalted butter
- 1 tsp vanilla extract
- Whipped cream for topping
- Additional sea salt for garnish
Method:
- For the caramel: In a heavy saucepan, heat sugar over medium heat, stirring occasionally until melted and amber colored. Add butter and whisk until melted. Remove from heat, slowly add cream (mixture will bubble), then add salt. Set aside to cool slightly.
- For the pudding: Whisk together 1/4 cup milk, cornstarch, salt, and egg yolks in a bowl.
- Heat remaining milk and cream in a saucepan until steaming.
- Slowly whisk hot milk mixture into the egg mixture, then return everything to the saucepan.
- Cook over medium heat, whisking constantly, until thickened.
- Remove from heat and whisk in butter and vanilla.
- Divide half the caramel among serving cups.
- Top with pudding mixture.
- Refrigerate until set, about 2 hours.
- Before serving, top with a dollop of whipped cream, a drizzle of remaining caramel, and a sprinkle of sea salt.
This dessert should be prepared the same day you plan to serve it, as the caramel can become too firm if refrigerated overnight.
6. Mini Trifle Cups
Trifles have always been a favorite at family gatherings – there’s something comforting about those layers of cake, custard, and fruit. By scaling them down to individual cups, everyone gets the perfect portion with all the layers in every bite.
I love how versatile trifles can be – you can use any flavor of cake, pudding, and fruit to create endless variations. During berry season, I use whatever’s freshest at the farmer’s market, but this recipe works beautifully with any seasonal fruit.
Ingredients:
- 2 cups cubed pound cake or sponge cake
- 1 package (3.4 oz) instant vanilla pudding, prepared according to package directions
- 2 cups mixed berries (strawberries, blueberries, raspberries)
- 2 Tbsp sugar (adjust based on sweetness of berries)
- 1 Tbsp lemon juice
- 1 cup heavy cream, whipped with 2 Tbsp sugar
- 2 Tbsp sliced almonds, toasted (optional)
Method:
- Toss berries with sugar and lemon juice, let sit for 15 minutes.
- Layer cake cubes at the bottom of each cup.
- Spoon a layer of pudding over the cake.
- Add a layer of the macerated berries with some of their juice.
- Repeat layers, ending with a dollop of whipped cream.
- Garnish with additional berries and toasted almonds if desired.
- Refrigerate for at least 1 hour before serving to allow flavors to meld.
7. Oreo Dirt Cups
Sometimes the most nostalgic desserts are the most satisfying. I remember making “dirt cups” as a child, and they still bring a smile to everyone’s face, regardless of age. There’s something delightfully playful about serving a dessert that looks like dirt but tastes like chocolate heaven.
The contrast between the creamy pudding and the crunchy cookie “dirt” creates a wonderful textural experience. While these are often thought of as kids’ desserts, I’ve served them at adult dinner parties to rave reviews – nostalgia is a powerful thing!
Ingredients:
- 2 cups cold milk
- 1 package (3.9 oz) instant chocolate pudding
- 8 oz whipped topping (like Cool Whip), thawed
- 20 Oreo cookies
- Gummy worms for garnish
Method:
- In a large bowl, whisk milk and instant pudding mix for 2 minutes. Let stand for 5 minutes until set.
- Fold in the whipped topping until well combined.
- Place Oreo cookies in a food processor and pulse until they resemble dirt (or place in a zip-top bag and crush with a rolling pin).
- In each serving cup, create alternating layers of the pudding mixture and crushed Oreos, starting and ending with the cookies.
- Refrigerate for at least 1 hour.
- Just before serving, add gummy worms, partially “buried” in the dirt for a fun effect.
Serving suggestion: For adult gatherings, consider adding a tablespoon of coffee liqueur to the pudding mixture for a more sophisticated flavor.
Visit Amazon for any required items
8. Key Lime Pie Cups
Growing up in Florida, key lime pie holds a special place in my heart. These key lime pie cups capture all the tangy, creamy goodness of the classic dessert in individual servings that are perfect for summer gatherings.
What makes these cups special is the balance between the tart lime filling and the sweet, buttery graham cracker crust. The contrast of flavors and textures creates a refreshing dessert that feels indulgent yet light at the same time.
Ingredients:
- 1 cup graham cracker crumbs
- 4 Tbsp melted butter
- 2 Tbsp sugar
- 1 can (14 oz) sweetened condensed milk
- 1/2 cup key lime juice (fresh is best, but bottled works)
- 2 tsp lime zest, plus more for garnish
- 3 egg yolks
- 1 cup heavy cream
- 2 Tbsp powdered sugar
- Thin lime slices for garnish
Method:
- Combine graham cracker crumbs, melted butter, and sugar. Press about 2 tablespoons into the bottom of each serving cup.
- In a bowl, whisk together condensed milk, lime juice, lime zest, and egg yolks until well combined.
- Pour the filling over the graham cracker bases.
- Bake at 350°F for 15 minutes, or until set but still slightly jiggly in the center.
- Cool completely, then refrigerate for at least 2 hours.
- Before serving, whip heavy cream with powdered sugar until stiff peaks form.
- Top each cup with whipped cream, a sprinkle of lime zest, and a small lime slice.
9. S’mores Cups
Who doesn’t love the campfire classic combination of graham crackers, chocolate, and toasted marshmallows? These s’mores cups bring the beloved outdoor treat indoors, and they’re a hit year-round.
I love serving these at winter gatherings as a reminder of summer campfires. The best part is watching people’s faces light up when they discover the melty chocolate layer hidden beneath the toasted marshmallow topping.
Ingredients:
- 1 cup graham cracker crumbs
- 4 Tbsp melted butter
- 2 Tbsp sugar
- 4 oz semi-sweet chocolate chips
- 1/4 cup heavy cream
- 1 bag mini marshmallows
- Chocolate bars, broken into small pieces for garnish
Method:
- Mix graham cracker crumbs with melted butter and sugar. Press into the bottom of each cup.
- Bake at 350°F for 5 minutes, then cool.
- Heat heavy cream until steaming. Pour over chocolate chips and let sit for 2 minutes, then stir until smooth to create a ganache.
- Pour ganache over graham cracker bases and refrigerate until set, about 30 minutes.
- Top each cup with mini marshmallows.
- Use a kitchen torch to toast the marshmallows until golden brown (or place under a broiler for 30 seconds, watching carefully).
- Garnish with a small piece of chocolate bar.
- Serve immediately while the marshmallows are still warm and gooey.
10. Banana Pudding Cups
Southern comfort food at its finest, banana pudding has a special place in American dessert history. These individual cups highlight the classic combination of creamy vanilla pudding, sliced bananas, and those nostalgic vanilla wafer cookies.
What makes my version special is the homemade vanilla pudding – it takes just a bit more effort than instant pudding but elevates the entire dessert to another level. The caramelization of the banana slices adds another dimension of flavor that makes these cups absolutely irresistible.
Ingredients:
- 2 cups whole milk
- 1/2 cup granulated sugar
- 1/4 cup cornstarch
- 1/4 tsp salt
- 4 large egg yolks
- 2 tsp vanilla extract
- 2 Tbsp butter
- 3-4 ripe bananas, sliced
- 1 Tbsp lemon juice
- 1 box vanilla wafer cookies
- 1 cup heavy cream
- 2 Tbsp powdered sugar
- Optional: 2 Tbsp brown sugar for caramelized bananas
Method:
- In a saucepan, whisk together sugar, cornstarch, and salt. Whisk in milk and egg yolks.
- Cook over medium heat, stirring constantly, until mixture thickens, about 8-10 minutes.
- Remove from heat and stir in vanilla and butter. Let cool slightly.
- Toss banana slices with lemon juice to prevent browning.
- For caramelized bananas (optional): Sprinkle some banana slices with brown sugar and use a kitchen torch to caramelize, or place under broiler for 1-2 minutes.
- Layer vanilla wafers, pudding, and banana slices in each cup, repeating layers.
- Refrigerate for at least 4 hours or overnight.
- Before serving, whip heavy cream with powdered sugar and top each cup with a dollop.
- Garnish with a vanilla wafer and caramelized banana slice.
Visit Amazon for any required items
| Dessert Cup | Prep Time | Chill Time | Difficulty | Best Season | Make-Ahead Friendly? |
|---|---|---|---|---|---|
| Tiramisu | 25 min | 4+ hours | Medium | Year-round | Yes (1 day) |
| Lemon Cheesecake | 20 min | 2+ hours | Easy | Spring/Summer | Yes (1 day) |
| Chocolate Mousse | 30 min | 2+ hours | Medium | Year-round | Yes (1 day) |
| Strawberry Shortcake | 15 min | 0-2 hours | Easy | Summer | Partially (components) |
| Salted Caramel Pudding | 40 min | 2+ hours | Medium-Hard | Fall/Winter | Same day only |
| Mini Trifle | 15 min | 1+ hour | Easy | Year-round | Yes (1 day) |
| Oreo Dirt Cups | 10 min | 1+ hour | Very Easy | Year-round | Yes (1 day) |
| Key Lime Pie | 25 min | 2+ hours | Medium | Spring/Summer | Yes (1 day) |
| S’mores Cups | 20 min | 30 min | Easy | Year-round | Partially (base only) |
| Banana Pudding | 30 min | 4+ hours | Medium | Year-round | Yes (1 day) |
11. Peanut Butter Chocolate Parfait Cups
The combination of chocolate and peanut butter is simply unbeatable. These parfait cups layer smooth chocolate pudding with creamy peanut butter mousse for a decadent dessert that satisfies the most intense sweet cravings.
I came up with this recipe during a late-night craving when I couldn’t decide between a peanut butter cup and pudding. The result was so good that it’s become one of my most requested desserts at gatherings. The crushed peanuts on top add a wonderful textural contrast to the creamy layers.
Ingredients:
- 1 package (3.9 oz) instant chocolate pudding
- 2 cups cold milk
- 1/2 cup creamy peanut butter
- 4 oz cream cheese, softened
- 1/3 cup powdered sugar
- 1 cup heavy cream, divided
- 1 tsp vanilla extract
- Chocolate shavings for garnish
- Crushed peanuts for garnish
Method:
- Prepare chocolate pudding according to package directions, using the milk. Refrigerate until set.
- Beat peanut butter and cream cheese until smooth.
- Add powdered sugar and beat until combined.
- Whip 1/2 cup heavy cream until stiff peaks form.
- Fold whipped cream into the peanut butter mixture.
- Whip remaining 1/2 cup cream with vanilla for topping.
- Layer chocolate pudding and peanut butter mixture in serving cups.
- Top with vanilla whipped cream, chocolate shavings, and crushed peanuts.
- Refrigerate for at least 1 hour before serving.
12. Chai Spiced Rice Pudding Cups
There’s something deeply comforting about warm spices and creamy rice pudding. These chai-infused cups bring together aromatic spices with the homey goodness of traditional rice pudding for a dessert that feels like a warm hug.
I discovered this combination during a cold winter evening when I wanted to use up leftover rice. The chai spices transformed a simple rice pudding into something special, and it’s now one of my favorite cold-weather desserts. The contrast between the warm spices and the cold pudding creates a delightful sensory experience.
Ingredients:
- 3 cups whole milk
- 1 cup cooked white rice (short grain works best)
- 1/3 cup granulated sugar
- 1/4 tsp salt
- 2 chai tea bags (or 1 Tbsp loose chai tea in a tea infuser)
- 1/2 tsp ground cinnamon
- 1/4 tsp ground cardamom
- Pinch of ground cloves
- Pinch of ground ginger
- 1 egg, beaten
- 1 tsp vanilla extract
- 1/4 cup golden raisins (optional)
- Chopped pistachios for garnish
- Ground cinnamon for garnish
Method:
- In a medium saucepan, combine milk, rice, sugar, and salt.
- Add chai tea bags and bring to a simmer over medium heat.
- Reduce heat to low and cook for 15-20 minutes, stirring occasionally, until rice is very tender and mixture has thickened.
- Remove tea bags and stir in cinnamon, cardamom, cloves, and ginger.
- Temper the beaten egg by slowly adding a small amount of the hot rice mixture while whisking constantly.
- Return the egg mixture to the saucepan and cook for 2 more minutes, stirring constantly.
- Remove from heat and stir in vanilla and raisins if using.
- Divide among serving cups and refrigerate until chilled.
- Garnish with chopped pistachios and a sprinkle of cinnamon before serving.
13. Mango Coconut Chia Pudding Cups
For a lighter, healthier option that doesn’t sacrifice flavor, these mango coconut chia pudding cups are my go-to. The tropical combination of mango and coconut creates a vacation-worthy dessert that also happens to be packed with nutrients.
I love making these when I need a dessert that accommodates different dietary preferences – they’re naturally dairy-free, gluten-free, and can easily be made vegan. The vibrant yellow color and fresh mango topping make them visually stunning on any dessert table.
Ingredients:
- 1 can (13.5 oz) coconut milk
- 3 Tbsp honey or maple syrup
- 1 tsp vanilla extract
- 1/4 cup chia seeds
- 2 ripe mangoes, diced (plus extra for topping)
- 1/4 tsp ground cardamom (optional)
- Toasted coconut flakes for garnish
- Fresh mint leaves for garnish
Method:
- In a blender, combine 1 diced mango, coconut milk, honey, and vanilla. Blend until smooth.
- Stir in chia seeds and cardamom if using.
- Divide mixture among serving cups and refrigerate for at least 4 hours or overnight.
- Before serving, top with remaining diced mango and toasted coconut flakes.
- Garnish with a small mint leaf.
Visit Amazon for any required items
14. Apple Crisp Cups
When fall arrives and apple season is in full swing, these apple crisp cups become a staple in my kitchen. There’s nothing like the aroma of baking apples and cinnamon filling the house, and these individual portions ensure that everyone gets the perfect ratio of tender apples to crispy topping.
What makes these cups special is the double layer of crumble – on the bottom and on top. This ensures you get that delicious buttery, oaty crunch in every bite, not just on top. I prefer using a mix of apple varieties for the best flavor and texture.
Ingredients for Crumble:
- 1 cup old-fashioned oats
- 1/2 cup all-purpose flour
- 1/2 cup brown sugar, packed
- 1/2 tsp cinnamon
- 1/4 tsp salt
- 1/2 cup cold unsalted butter, cubed
Ingredients for Apple Filling:
- 4 cups apples, peeled and diced (about 4-5 medium apples)
- 2 Tbsp lemon juice
- 1/4 cup granulated sugar
- 2 Tbsp brown sugar
- 1 Tbsp cornstarch
- 1 tsp cinnamon
- 1/4 tsp nutmeg
- Pinch of salt
- Vanilla ice cream for serving (optional)
Method:
- Preheat oven to 350°F. Place 8 ramekins or oven-safe cups on a baking sheet.
- For the crumble: Combine oats, flour, brown sugar, cinnamon, and salt in a bowl. Cut in butter using a pastry cutter or your fingers until mixture resembles coarse crumbs.
- Press about 1-2 tablespoons of the crumble mixture into the bottom of each cup.
- For the filling: Toss diced apples with lemon juice. Add both sugars, cornstarch, cinnamon, nutmeg, and salt, and toss until evenly coated.
- Divide apple mixture among the cups, on top of the first crumble layer.
- Top each cup with remaining crumble mixture.
- Bake for 25-30 minutes until topping is golden and filling is bubbly.
- Cool for 10 minutes before serving.
- Top with a small scoop of vanilla ice cream if desired.
Serving suggestion: These are best served warm with a scoop of vanilla ice cream on top, which melts slightly into the warm apples creating a beautiful sauce.
15. Crème Brûlée Cups
For special occasions when I want to impress, nothing beats the elegance of crème brûlée. The contrast between the crackly caramelized sugar top and the silky smooth custard underneath creates a dessert experience that’s truly memorable.
While crème brûlée has a reputation for being difficult, this cup version is surprisingly approachable. The shallow cups allow for more even cooking and a higher ratio of that coveted caramelized top to custard. The sound of cracking through the sugar with a spoon is one of life’s small pleasures!
Ingredients:
- 2 cups heavy cream
- 1 vanilla bean, split and scraped (or 1 Tbsp vanilla extract)
- 5 large egg yolks
- 1/2 cup granulated sugar, plus more for topping
- Pinch of salt
- Fresh berries for garnish (optional)
Method:
- Preheat oven to 325°F.
- Heat cream and vanilla bean (if using) in a saucepan until it just begins to simmer. Remove from heat and let steep for 10 minutes. Remove vanilla bean.
- In a bowl, whisk egg yolks, sugar, and salt until pale yellow.
- Slowly whisk the warm cream into the egg mixture. If using vanilla extract instead of vanilla bean, add it now.
- Strain the mixture through a fine-mesh sieve.
- Place ramekins or oven-safe cups in a baking dish. Divide custard among cups.
- Pour hot water into the baking dish, halfway up the sides of the cups (water bath).
- Bake for 25-30 minutes until centers are just set but still slightly jiggly.
- Cool completely, then refrigerate for at least 4 hours or overnight.
- Just before serving, sprinkle a thin layer of sugar on top of each custard.
- Use a kitchen torch to caramelize the sugar until golden and bubbly. (Alternatively, place under a broiler for 1-2 minutes, watching very carefully).
- Let stand for 1 minute to allow sugar to harden before serving.
- Garnish with fresh berries if desired.
| Cup Dessert | Calories (approx) | Prep Time | Cook/Chill Time | Special Equipment Needed | Make-Ahead Friendly? |
|---|---|---|---|---|---|
| Tiramisu | 320 | 25 min | 4+ hours chill | None | Yes (1 day) |
| Lemon Cheesecake | 290 | 20 min | 2+ hours chill | None | Yes (1 day) |
| Chocolate Mousse | 350 | 30 min | 2+ hours chill | None | Yes (1 day) |
| Strawberry Shortcake | 270 | 15 min | 0-2 hours chill | None | Partially |
| Salted Caramel Pudding | 380 | 40 min | 2+ hours chill | None | Same day only |
| Mini Trifle | 290 | 15 min | 1+ hour chill | None | Yes (1 day) |
| Oreo Dirt Cups | 310 | 10 min | 1+ hour chill | None | Yes (1 day) |
| Key Lime Pie | 340 | 25 min | 2+ hours chill | None | Yes (1 day) |
| S’mores Cups | 360 | 20 min | 30 min chill | Kitchen torch (optional) | Partially |
| Banana Pudding | 300 | 30 min | 4+ hours chill | None | Yes (1 day) |
| Peanut Butter Chocolate | 390 | 20 min | 1+ hour chill | None | Yes (1 day) |
| Chai Rice Pudding | 220 | 30 min | 2+ hours chill | None | Yes (2 days) |
| Mango Coconut Chia | 240 | 15 min | 4+ hours chill | None | Yes (2 days) |
| Apple Crisp | 310 | 25 min | 35 min bake | Oven-safe cups | Best fresh |
| Crème Brûlée | 370 | 20 min | 30 min bake + 4 hours chill | Kitchen torch, ramekins | Yes (2 days) |
Visit Amazon for any required items