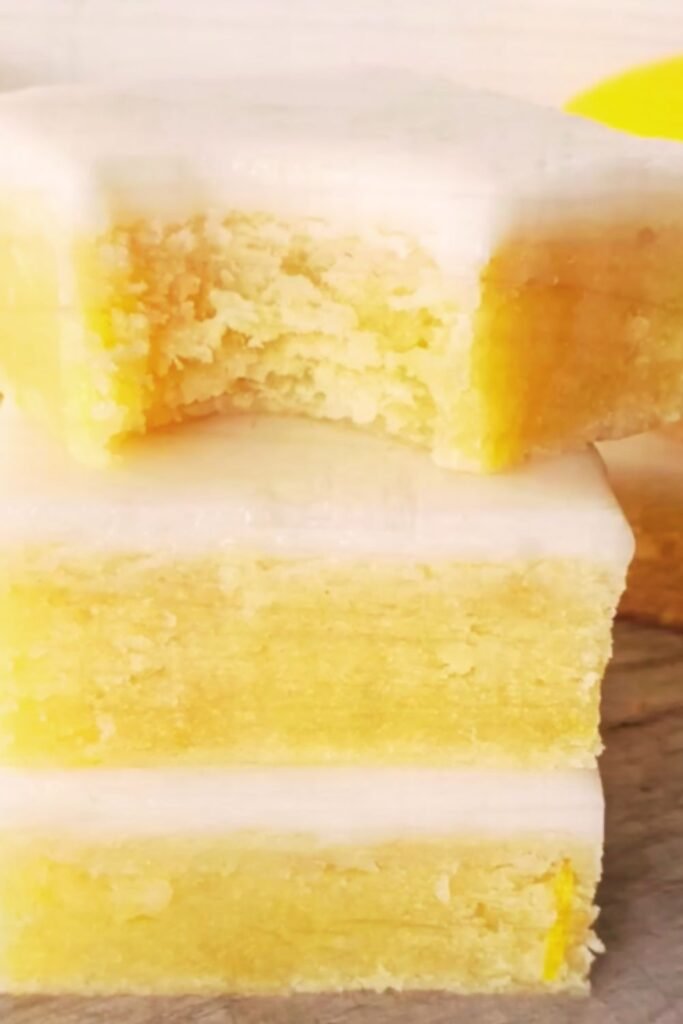
There’s something absolutely magical about a dessert that delivers maximum flavor with minimum effort, and my no-bake lemon and coconut slice does exactly that. I’ve been perfecting this recipe for years, and I can honestly say it’s become my go-to treat whenever I need something impressive but don’t want to turn on the oven. The combination of zesty lemon and tropical coconut creates a symphony of flavors that transports you straight to a beachside paradise.
What makes this slice truly special is its incredible versatility and foolproof nature. Whether you’re a complete beginner in the kitchen or an experienced baker looking for a quick win, this recipe delivers consistent results every single time. I’ve served this at summer barbecues, office potlucks, and family gatherings, and it never fails to disappear within minutes.
The beauty of no-bake desserts lies in their simplicity and the fact that they’re perfect for hot weather when the last thing you want to do is heat up your kitchen. This lemon and coconut slice embodies everything I love about no-bake treats: it’s refreshing, requires minimal preparation time, and the flavors actually improve after a few hours in the refrigerator.
Understanding the Magic Behind No-Bake Slices
Base Layer: The foundation of any great slice, typically made from crushed biscuits or cookies combined with butter and sometimes nuts or coconut.
Binding Agent: Usually butter or coconut oil that helps hold the base together and provides richness.
Flavor Profile: The combination of citrus and coconut that creates the signature taste experience.
Setting Process: The natural firming that occurs through refrigeration rather than baking.
Texture Balance: The contrast between the firm base and the creamy, tangy topping.
The science behind no-bake desserts is fascinating. When you combine crushed biscuits with melted butter, you’re creating a matrix that firms up when chilled. The proteins and fats in the butter solidify at refrigerator temperatures, creating that perfect slice-able texture we all love. Meanwhile, the lemon juice provides natural acidity that balances the sweetness and adds that bright, refreshing note that makes this dessert so addictive.
Essential Ingredients and Their Roles
I’ve experimented with countless variations of this recipe, and through trial and error, I’ve identified the key ingredients that make or break a lemon coconut slice. Each component plays a crucial role in the final product, and understanding these roles will help you customize the recipe to your preferences.
| Ingredient | Purpose | Substitution Options | Storage Tips |
|---|---|---|---|
| Digestive Biscuits (200g) | Forms the crunchy base | Graham crackers, vanilla wafers | Keep in airtight container |
| Desiccated Coconut (150g) | Adds texture and tropical flavor | Shredded coconut, coconut flakes | Store in cool, dry place |
| Butter (100g) | Binds base ingredients | Coconut oil, vegan butter | Refrigerate, soften before use |
| Condensed Milk (400g) | Creates creamy sweetness | Coconut condensed milk | Refrigerate after opening |
| Fresh Lemon Juice (80ml) | Provides tartness and flavor | Lime juice, bottled lemon juice | Use within 3 days of juicing |
| Lemon Zest (2 lemons) | Intensifies citrus flavor | Dried lemon zest (use less) | Freeze in ice cube trays |
| Cream Cheese (200g) | Adds richness and tang | Mascarpone, ricotta | Use at room temperature |
The quality of your ingredients directly impacts the final result. I always use fresh lemons because the difference in flavor is remarkable compared to bottled juice. The natural oils in fresh lemon zest provide an aromatic quality that you simply can’t replicate with artificial flavoring.
When selecting coconut, I prefer desiccated over shredded because it integrates better into the mixture and provides a more uniform texture. However, if you enjoy a bit more texture contrast, shredded coconut works beautifully too.
Step-by-Step Preparation Method
Creating the perfect no-bake lemon and coconut slice requires attention to detail and proper technique. I’ve refined this process over years of making this recipe, and these steps will ensure your success.
Preparing the Base
The foundation of any great slice starts with the base. I begin by crushing the digestive biscuits until they reach a fine crumb consistency. You can use a food processor for this, but I actually prefer the therapeutic process of placing them in a sealed plastic bag and crushing them with a rolling pin. This method gives you better control over the texture.
Once your biscuits are crushed, melt the butter gently. I prefer using a double boiler method or melting it in the microwave in 15-second intervals to prevent overheating. Overheated butter can separate and create an oily base that won’t set properly.
Combine the crushed biscuits with half of the desiccated coconut and the melted butter. Mix thoroughly until every crumb is coated and the mixture holds together when pressed. The consistency should be similar to wet sand that clumps when squeezed.
Press this mixture firmly into a lined 20cm x 30cm rectangular pan. I use the bottom of a measuring cup to ensure an even, compact base. The key here is applying consistent pressure across the entire surface. Any loose spots will create weak points in your finished slice.
Creating the Lemon Coconut Topping
The topping is where the magic really happens. Start by bringing your cream cheese to room temperature – this is crucial for achieving a smooth, lump-free mixture. Cold cream cheese will create chunks that are nearly impossible to eliminate later.
In a large mixing bowl, beat the cream cheese until it’s completely smooth and fluffy. This usually takes about 2-3 minutes with an electric mixer. Gradually add the condensed milk, beating continuously to maintain that smooth consistency.
Now comes the star ingredient – fresh lemon juice and zest. Add the lemon juice slowly while mixing to prevent the mixture from curdling. The acid in the lemon juice can cause the dairy to separate if added too quickly. Follow with the lemon zest, which provides intense flavor and beautiful color specks throughout the topping.
Finally, fold in the remaining desiccated coconut. I use a gentle folding motion rather than aggressive mixing to preserve the light, airy texture we’ve created.
Assembly and Setting Process
Pour the lemon coconut mixture over the prepared base, spreading it evenly with an offset spatula. Take your time with this step – a smooth, even top makes all the difference in the final presentation.
Cover the pan with plastic wrap, ensuring the wrap doesn’t touch the surface of the mixture. Refrigerate for at least 4 hours, though I prefer to leave it overnight. The longer setting time allows the flavors to meld and the texture to become perfectly firm.
Nutritional Information and Dietary Considerations
| Nutrient | Per Slice (12 servings) | Daily Value % |
|---|---|---|
| Calories | 285 | 14% |
| Total Fat | 18g | 28% |
| Saturated Fat | 12g | 60% |
| Cholesterol | 35mg | 12% |
| Sodium | 180mg | 8% |
| Total Carbohydrates | 28g | 9% |
| Dietary Fiber | 2g | 8% |
| Sugars | 24g | – |
| Protein | 5g | 10% |
| Vitamin C | 8mg | 13% |
| Calcium | 95mg | 10% |
This slice is naturally rich in healthy fats from coconut and provides a good dose of vitamin C from the fresh lemon juice. While it’s definitely a treat rather than health food, the coconut provides medium-chain triglycerides, which are easier for your body to process than other types of fats.
For those with dietary restrictions, this recipe is surprisingly adaptable. I’ve successfully made dairy-free versions using coconut condensed milk and vegan cream cheese alternatives. The texture is slightly different but equally delicious.
Flavor Variations and Creative Twists
One of the things I love most about this recipe is how easily it adapts to different flavor profiles. Over the years, I’ve developed several variations that have become family favorites.
Tropical Paradise Variation
Add crushed pineapple (drained) and toasted coconut flakes to the topping for an even more tropical experience. The pineapple adds natural sweetness and a lovely texture contrast.
Lime and Mint Twist
Substitute lime juice and zest for the lemon, and add finely chopped fresh mint leaves. This creates a mojito-inspired slice that’s incredibly refreshing.
Berry Lemon Coconut
Fold fresh raspberries or blueberries into the topping mixture. The berries add natural tartness and beautiful color while complementing the lemon perfectly.
Chocolate Coconut Base
Replace half the digestive biscuits with chocolate cookies for a richer base that pairs wonderfully with the bright lemon topping.
Storage and Serving Suggestions
Proper storage is essential for maintaining the quality of your no-bake slice. I always store mine covered in the refrigerator, where it will keep beautifully for up to one week. The flavors actually continue to develop over the first few days, making day-old slices even more delicious than fresh ones.
For serving, I recommend using a sharp, thin knife that’s been dipped in warm water and wiped clean between cuts. This prevents the filling from sticking to the blade and ensures clean, professional-looking slices.
The slice cuts best when it’s been refrigerated for at least 4 hours. If you’re in a hurry, you can place it in the freezer for 2 hours, but be careful not to let it freeze completely as this can affect the texture.
Perfect Accompaniments
This slice is delicious on its own, but I love serving it with a few complementary elements:
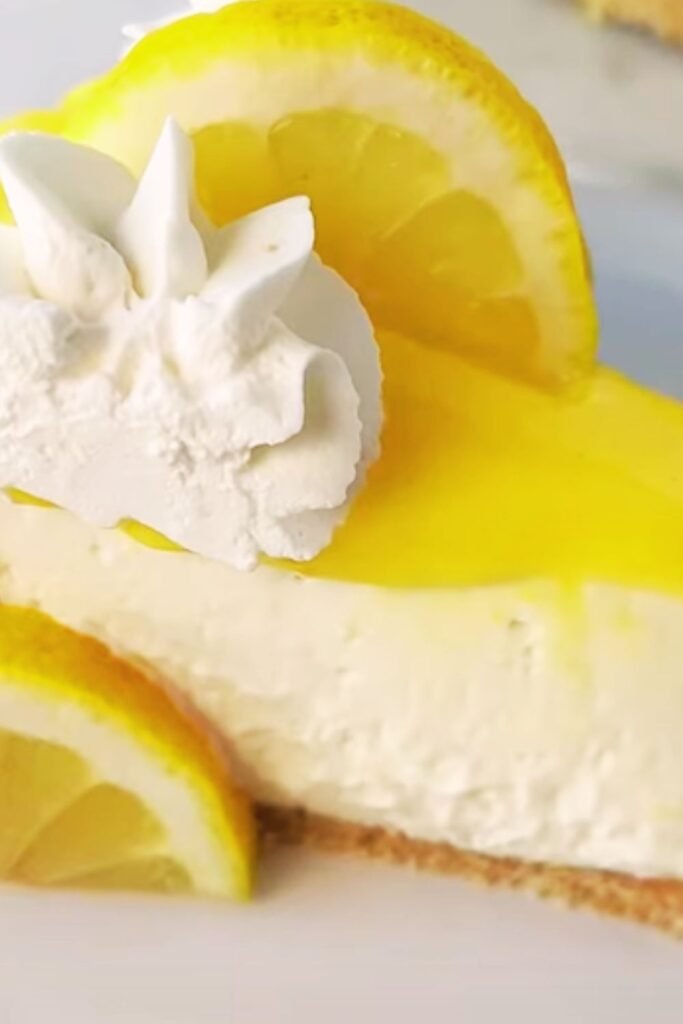
- Fresh berries provide a lovely color contrast and additional tartness
- A dollop of whipped cream adds richness for special occasions
- Mint leaves make an elegant garnish and add aromatic freshness
- A light dusting of powdered sugar creates a beautiful presentation
- Serve alongside herbal teas or fresh fruit juices for a complete dessert experience
Troubleshooting Common Issues
Even with the best intentions, sometimes things don’t go exactly as planned. I’ve encountered most of the common issues with this recipe and learned how to fix them.
Base Won’t Hold Together: This usually means insufficient butter or the butter was too hot when mixed. The solution is to add a bit more melted butter, one tablespoon at a time, until the mixture binds properly.
Topping Is Too Soft: This typically happens when the cream cheese wasn’t properly softened or when too much liquid was added. Let it set longer in the refrigerator, or place it in the freezer for 30 minutes to firm up.
Lemon Flavor Too Mild: Don’t be afraid to add more lemon zest – it’s the key to intense citrus flavor. You can also add a few drops of natural lemon extract if needed.
Coconut Clumping: This occurs when the coconut is added to mixture that’s too warm. Always let your mixture cool to room temperature before folding in the coconut.
The Science of No-Bake Success
Understanding the science behind no-bake desserts has made me a much better baker. The success of this slice relies on several key principles that I’ve learned through experience and research.
Temperature control is crucial. When fats cool, they solidify and create structure. This is why proper chilling time is non-negotiable. The condensed milk provides sweetness and helps bind the ingredients, while the acid in the lemon juice helps the mixture set more firmly.
The ratio of wet to dry ingredients is carefully balanced in this recipe. Too much liquid and your slice won’t set properly; too little and it becomes crumbly and difficult to cut cleanly.
Making It Special for Occasions
I’ve served this slice at countless special occasions, and I’ve learned a few tricks for making it extra special. For birthdays, I sometimes add food coloring to create pastel layers. For holidays, I incorporate seasonal elements like cranberries at Christmas or fresh strawberries for summer gatherings.
The presentation can be elevated simply by cutting the slices into different shapes using cookie cutters, or by serving them on elegant plates with complementary garnishes.
Questions and Answers
Q: Can I make this slice ahead of time for a party? A: Absolutely! This slice actually improves with time and can be made up to 3 days in advance. Just keep it covered in the refrigerator and cut it just before serving for the best presentation.
Q: What’s the best way to get clean, professional-looking cuts? A: Use a sharp, thin knife dipped in warm water between each cut. Wipe the blade clean with a damp cloth to prevent the filling from building up on the knife.
Q: Can I freeze this slice for longer storage? A: Yes, it freezes beautifully for up to 3 months. Wrap individual slices in plastic wrap and store in an airtight container. Thaw in the refrigerator for several hours before serving.
Q: My base layer is too crumbly. What went wrong? A: This usually means there wasn’t enough butter to bind the crumbs properly. Next time, add the melted butter gradually until the mixture holds together when pressed.
Q: Can I use bottled lemon juice instead of fresh? A: While fresh lemon juice provides the best flavor, bottled can work in a pinch. However, you’ll definitely notice a difference in taste intensity and freshness.
Q: What size pan should I use for this recipe? A: A 20cm x 30cm rectangular pan is ideal, but you can also use a 23cm square pan. Just adjust the thickness expectations accordingly.
Q: How do I know when the slice has set properly? A: The surface should feel firm to the touch and not leave an indentation when lightly pressed. The edges should also pull away slightly from the pan sides.
Q: Can I make this recipe dairy-free? A: Yes! Use coconut condensed milk, vegan cream cheese, and coconut oil instead of butter. The texture will be slightly different but equally delicious.
Q: Why does my topping have a grainy texture? A: This usually happens when the cream cheese wasn’t fully softened before mixing, or when ingredients were added too quickly. Always bring cream cheese to room temperature and mix gradually.
Q: Can I add other fruits to this recipe? A: Certainly! Passion fruit pulp, crushed pineapple (well-drained), or berry purees work wonderfully. Just be mindful not to add too much liquid as it can prevent proper setting.
This no-bake lemon and coconut slice has become one of my signature desserts, and I hope it becomes one of yours too. The combination of simplicity, incredible flavor, and reliable results makes it perfect for both everyday treats and special occasions. The bright, refreshing taste never fails to bring smiles to faces and spark conversations about tropical getaways and sunny days.