When I first discovered the magic of combining Biscoff’s caramelized cookie goodness with the silky smoothness of cheesecake, my dessert world changed forever. This no-bake Biscoff cheesecake has become my go-to showstopper dessert, and I’m thrilled to share why it should be yours too.
The beauty of this recipe lies not just in its incredible flavor profile, but in its simplicity. No oven required, no water baths to worry about, and no cracking disasters – just pure, unadulterated dessert bliss that comes together with minimal fuss and maximum impact.
Understanding the Biscoff Phenomenon
Before diving into the recipe, let me explain what makes Biscoff so special. Originally created in Belgium, these caramelized biscuits bring a unique flavor that’s part cookie, part caramel, and completely addictive. The spread version has revolutionized home baking, offering that distinctive taste in a creamy, workable form.
Key Biscoff Characteristics:
- Caramelized flavor: Deep, rich sweetness with subtle spice notes
- Smooth texture: When using Biscoff spread, it blends seamlessly
- Versatility: Works in bases, fillings, and toppings
- Stability: Maintains flavor integrity when chilled
Essential Ingredients Breakdown
Creating the perfect no-bake Biscoff cheesecake requires understanding each component’s role. I’ve experimented with various combinations, and this selection delivers consistent, restaurant-quality results every time.
Base Components
| Ingredient | Quantity | Purpose | Substitution Options |
|---|---|---|---|
| Biscoff cookies | 300g | Crust foundation | Digestive biscuits + 2 tbsp Biscoff spread |
| Unsalted butter | 100g | Binding agent | Salted butter (reduce salt elsewhere) |
| Ground cinnamon | 1 tsp | Flavor enhancement | Mixed spice or nutmeg |
Filling Essentials
| Ingredient | Quantity | Purpose | Quality Tips |
|---|---|---|---|
| Full-fat cream cheese | 600g | Primary structure | Must be room temperature |
| Biscoff spread | 400g | Star flavor | Smooth variety works best |
| Double cream | 300ml | Texture and richness | 35% fat minimum |
| Icing sugar | 150g | Sweetness balance | Sift to prevent lumps |
| Vanilla extract | 2 tsp | Flavor depth | Pure extract only |
| Gelatin powder | 2 sachets (14g) | Setting agent | Vegetarian alternative available |
Decoration Elements
| Component | Quantity | Application | Storage Notes |
|---|---|---|---|
| Extra Biscoff spread | 100g | Swirl decoration | Warm slightly for easier spreading |
| Biscoff cookies | 6-8 pieces | Garnish | Crush some, keep others whole |
| Whipped cream | 200ml | Final touch | Stabilize with sugar |
My Foolproof Method
After making this cheesecake countless times, I’ve refined the technique to eliminate common pitfalls. Here’s my step-by-step approach that guarantees success.
Preparing the Perfect Base
I start by creating a base that’s both sturdy and flavorful. The key is achieving the right moisture balance – too dry and it crumbles, too wet and it becomes soggy.
- Cookie preparation: I pulse the Biscoff cookies in a food processor until they resemble fine breadcrumbs. Some larger pieces are acceptable as they add texture.
- Butter integration: Melting the butter completely ensures even distribution. I let it cool slightly before mixing to prevent the cookies from becoming paste-like.
- Pressing technique: Using the back of a spoon, I press the mixture firmly into my lined springform pan. The edges should come up about 2cm high.
- Chilling phase: I refrigerate the base for at least 30 minutes. This step is crucial for structural integrity.
Mastering the Filling
The filling is where this cheesecake truly shines. My technique ensures a smooth, lump-free texture that sets perfectly every time.
Preparation sequence:
- Gelatin activation: I sprinkle the gelatin over 4 tablespoons of cold water, allowing it to bloom for 5 minutes before dissolving in hot water.
- Cream cheese preparation: Room temperature cream cheese is non-negotiable. I beat it until completely smooth, scraping down the bowl frequently.
- Biscoff integration: I warm the Biscoff spread slightly to make it more pliable, then beat it into the cream cheese until fully combined.
- Cream incorporation: I whip the double cream to soft peaks separately, then fold it gently into the cheese mixture.
- Final assembly: The cooled gelatin mixture gets folded in last, ensuring even distribution without deflating the cream.
Assembly and Setting
My assembly technique ensures professional-looking results:
- I pour half the filling over the chilled base
- Add dollops of warmed Biscoff spread
- Pour the remaining filling
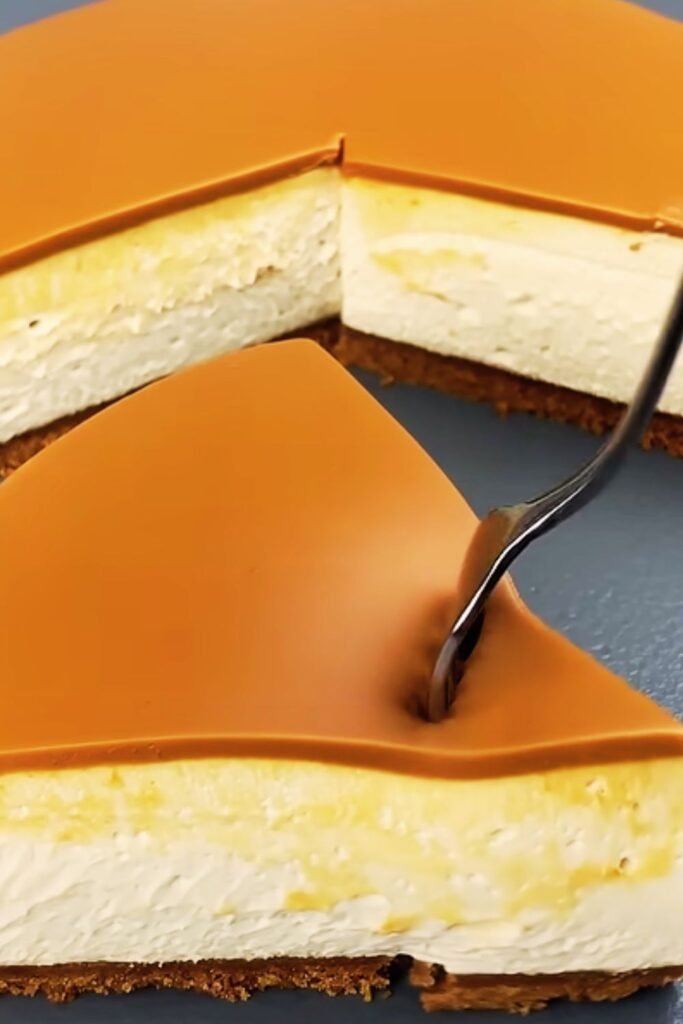
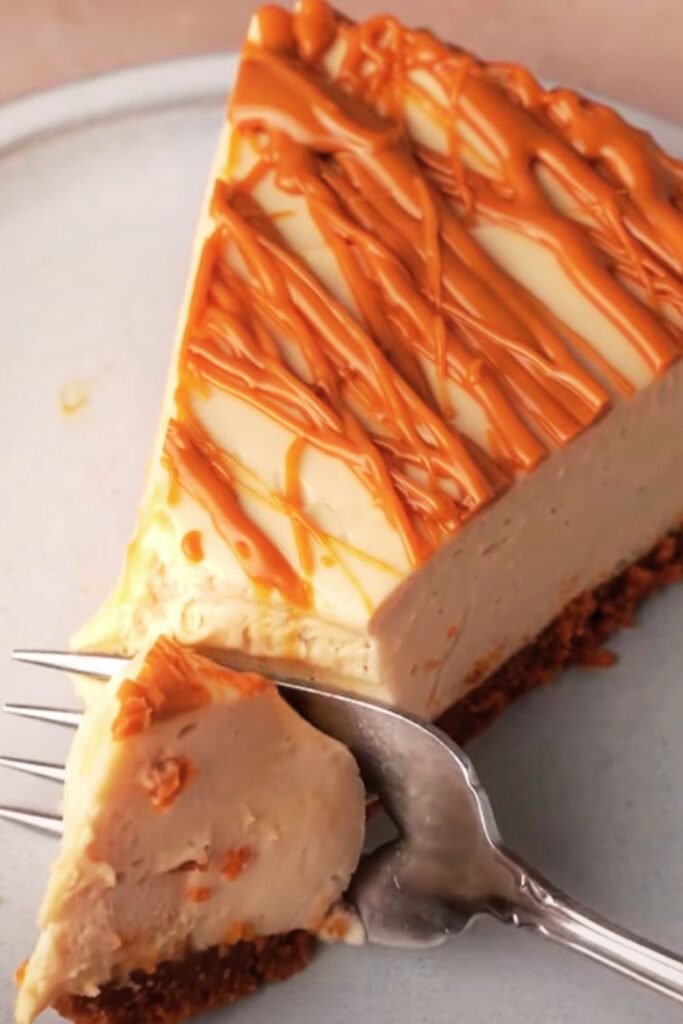
- Use a skewer to create marble patterns
- Tap the pan gently to release air bubbles
- Chill for minimum 4 hours, preferably overnight
Troubleshooting Common Issues
Through my experience, I’ve identified the most frequent problems and their solutions:
Cracked or grainy texture:
- Cause: Over-beating or using cold ingredients
- Solution: Ensure all ingredients are at room temperature and beat just until combined
Loose or runny consistency:
- Cause: Insufficient chilling time or incorrect gelatin ratio
- Solution: Extended chilling time and proper gelatin blooming
Base separation:
- Cause: Inadequate pressing or wrong butter ratio
- Solution: Firm pressing and precise measurements
Uneven setting:
- Cause: Uneven mixing or temperature variations
- Solution: Thorough folding technique and consistent refrigeration
Flavor Variations I Love
While the classic version is perfection, I’ve developed several variations that showcase the versatility of this base recipe:
Salted Caramel Biscoff:
- Add 2 tablespoons of sea salt flakes to the filling
- Drizzle with homemade salted caramel sauce
- Garnish with caramelized nuts
Chocolate Biscoff Fusion:
- Incorporate 100g melted dark chocolate into the filling
- Use chocolate digestive biscuits in the base
- Top with chocolate shavings
Espresso Biscoff:
- Add 2 tablespoons of instant espresso powder
- Include coffee-soaked ladyfingers in layers
- Dust with cocoa powder
Storage and Serving Guidelines
Proper storage ensures your cheesecake maintains its perfect texture and flavor:
Storage Parameters
| Duration | Storage Method | Quality Notes |
|---|---|---|
| 1-2 days | Covered in refrigerator | Peak texture and flavor |
| 3-5 days | Wrapped in plastic film | Slight texture softening |
| Up to 3 months | Frozen (without toppings) | Thaw overnight before serving |
Serving Recommendations
I’ve found that serving temperature significantly impacts the eating experience. Remove the cheesecake from the refrigerator 15-20 minutes before serving for optimal texture.
Portion sizing:
- Standard slice: 12 servings from 23cm pan
- Generous slice: 8-10 servings
- Petite portions: 16 servings for dinner parties
Accompaniment suggestions:
- Fresh berries for acid balance
- Crushed Biscoff cookies for texture contrast
- Light dusting of cinnamon
- Vanilla bean ice cream for special occasions
Nutritional Considerations
Understanding the nutritional profile helps with portion planning and dietary accommodations:
Nutritional Breakdown (per standard slice)
| Component | Amount | Percentage of Daily Value |
|---|---|---|
| Calories | 485 | 24% |
| Total Fat | 32g | 41% |
| Saturated Fat | 19g | 95% |
| Carbohydrates | 45g | 15% |
| Sugars | 38g | – |
| Protein | 8g | 16% |
| Sodium | 285mg | 12% |
Dietary Modifications
For those with specific dietary needs, I’ve successfully adapted this recipe:
Reduced sugar version:
- Replace icing sugar with powdered erythritol
- Use sugar-free Biscoff alternative
- Expect slightly different texture
Gluten-free adaptation:
- Substitute with gluten-free gingersnap cookies
- Verify all ingredients are certified gluten-free
- Maintain same proportions
Professional Presentation Tips
Having served this cheesecake at numerous gatherings, I’ve learned presentation techniques that elevate the final product:
Cutting technique:
- Use a large, sharp knife warmed in hot water
- Wipe clean between each cut
- Make confident, smooth motions
Plating suggestions:
- Offset placement on the plate
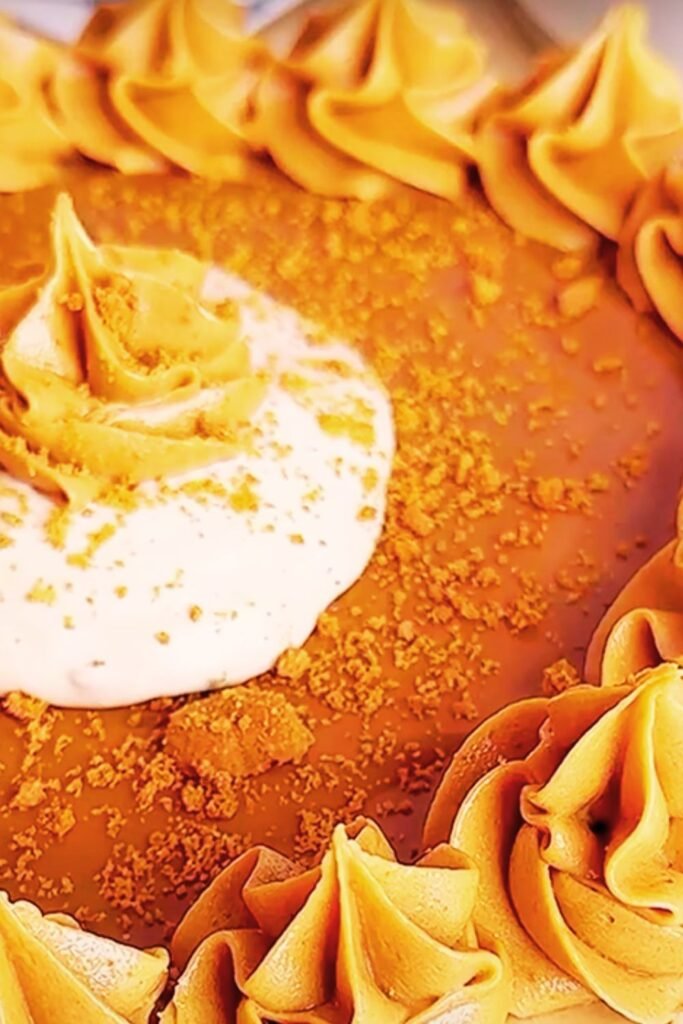
- Add a small dollop of whipped cream
- Garnish with a whole Biscoff cookie
- Light dusting of icing sugar for elegance
Photography tips for social media:
- Natural lighting works best
- Show the creamy texture in cross-section
- Include some ingredients in the background
- Capture the marbled effect in the filling
Seasonal Adaptations
I’ve discovered that this cheesecake adapts beautifully to seasonal themes:
Summer version:
- Incorporate fresh stone fruit
- Lighter garnishes
- Serve with iced coffee
Autumn adaptation:
- Add pumpkin spice to the filling
- Include candied pecans
- Warm spice garnishes
Winter celebration:
- Rich chocolate drizzles
- Festive cookie decorations
- Warming spice elements
Spring variation:
- Fresh berry compotes
- Lighter presentation
- Floral garnishes
Questions and Answers
Q: Can I make this cheesecake without gelatin? My experience shows that while possible, the texture will be softer and less stable. I recommend adding an extra 100g of cream cheese and ensuring extended chilling time for best results without gelatin.
Q: How far in advance can I prepare this dessert? I regularly make this cheesecake 2-3 days ahead of serving. The flavors actually improve with time, and the texture remains perfect when properly stored in the refrigerator.
Q: What’s the best way to remove it from the springform pan? I run a thin knife around the edges while the cheesecake is still slightly chilled, then release the spring. Using parchment paper makes removal foolproof.
Q: Can I substitute the Biscoff spread with homemade cookie butter? Absolutely! I’ve used homemade versions successfully. Ensure the consistency matches commercial Biscoff spread, and adjust sweetness accordingly.
Q: Why does my cheesecake sometimes have a grainy texture? This usually occurs when the cream cheese isn’t properly softened or when ingredients are added too quickly. I always ensure room temperature ingredients and gradual incorporation.
Q: Can I freeze individual slices? Yes, I wrap individual slices in plastic wrap and freeze for up to 3 months. Thaw overnight in the refrigerator for best texture.
Q: What causes the cheesecake to crack on top? Unlike baked cheesecakes, no-bake versions rarely crack. If you notice surface issues, it’s usually from over-mixing or temperature shock. Gentle folding and gradual temperature changes prevent this.
Q: How do I achieve the perfect marble effect? I warm the Biscoff spread slightly, add it in dollops, then use a skewer in figure-eight motions. The key is restraint – too much swirling creates muddy colors rather than distinct marbling.
Q: Can I make mini individual cheesecakes using this recipe? I’ve successfully adapted this for individual portions using muffin tins or small ramekins. Adjust chilling time to 2-3 hours for smaller portions, and reduce base quantity proportionally.
Q: What’s the secret to getting clean, professional-looking slices? My technique involves using a large, sharp knife dipped in warm water and wiped clean between each cut. I also chill the cheesecake thoroughly before cutting and make confident, smooth motions without sawing.
This no-bake Biscoff cheesecake represents everything I love about dessert making – it’s approachable yet impressive, requires no special equipment, and delivers consistent results every time. The combination of that distinctive Biscoff flavor with the creamy richness of cheesecake creates something truly special that never fails to impress guests and satisfy my own dessert cravings.
The beauty of this recipe lies in its flexibility and forgiveness. Whether you’re a beginner baker or an experienced dessert maker, this cheesecake adapts to your skill level while always delivering exceptional results. I encourage you to make it your own through the variations I’ve suggested, and don’t be afraid to experiment with your own creative touches.