Let me tell you about my absolute favorite way to transform ordinary chicken into something extraordinary. This Hot Honey Bangin’ Crunchy Cornflake Baked Chicken has become my go-to recipe when I want to impress guests or simply treat my family to something special. The combination of sweet honey heat and that irresistible cornflake crunch creates a symphony of flavors and textures that never fails to get everyone talking.
I discovered this recipe during one of my kitchen experiments when I was looking for a healthier alternative to traditional fried chicken. The cornflakes provide that perfect crunch we all crave, while the hot honey glaze adds a sophisticated sweet-and-spicy element that elevates the entire dish. What makes this recipe truly special is how it manages to be both comforting and exciting at the same time.
What Makes This Recipe Special
The beauty of this hot honey cornflake chicken lies in its perfect balance of flavors and textures. I’ve spent years perfecting this recipe, and I can confidently say it hits every note you want in a memorable meal. The cornflakes create an incredibly crispy exterior that stays crunchy even after baking, while the chicken remains juicy and tender inside.
The hot honey component is where the magic really happens. I use a carefully balanced mixture of honey, hot sauce, and aromatic spices that creates a glaze so addictive, you’ll find yourself making extra just to drizzle on everything. The sweetness from the honey doesn’t overpower the heat – instead, they work together to create a complex flavor profile that keeps you coming back for more.
Essential Ingredients Breakdown
For the Chicken Base:
- 8 pieces chicken thighs and drumsticks (bone-in, skin-on preferred)
- 2 cups buttermilk (for the initial marinade)
- 1 tablespoon kosher salt
- 1 teaspoon black pepper
- 1 teaspoon garlic powder
- 1 teaspoon onion powder
For the Cornflake Coating:
- 4 cups cornflakes (plain, not frosted)
- 1 cup all-purpose flour
- 2 large eggs
- 1/4 cup whole milk
- 1 teaspoon paprika
- 1/2 teaspoon cayenne pepper
- 1 teaspoon dried thyme
- 1 teaspoon dried oregano
For the Hot Honey Glaze:
- 1/2 cup honey (preferably local or raw)
- 3 tablespoons hot sauce (I recommend Frank’s RedHot or Sriracha)
- 2 tablespoons butter
- 1 tablespoon apple cider vinegar
- 1 teaspoon garlic powder
- 1/2 teaspoon smoked paprika
- 1/4 teaspoon red pepper flakes
Nutritional Information Table
| Nutrient | Per Serving (2 pieces) | % Daily Value |
|---|---|---|
| Calories | 485 | 24% |
| Total Fat | 18g | 28% |
| Saturated Fat | 5g | 25% |
| Cholesterol | 165mg | 55% |
| Sodium | 920mg | 40% |
| Total Carbohydrates | 35g | 13% |
| Dietary Fiber | 2g | 7% |
| Sugars | 22g | – |
| Protein | 42g | 84% |
| Vitamin A | 15% | 15% |
| Vitamin C | 8% | 8% |
| Calcium | 8% | 8% |
| Iron | 12% | 12% |
Step-by-Step Preparation Guide
Phase 1: Marinating the Chicken (2-4 hours ahead)
I always start by marinating my chicken because this step is crucial for achieving that perfect flavor penetration. In a large bowl, I combine the buttermilk with salt, pepper, garlic powder, and onion powder. The buttermilk not only adds flavor but also helps tenderize the chicken, making it incredibly juicy.
Submerge each piece of chicken completely in the buttermilk mixture. I cover the bowl with plastic wrap and refrigerate for at least 2 hours, though overnight is even better. The longer you marinate, the more flavor you’ll develop, and the more tender your chicken will become.
Phase 2: Preparing the Cornflake Coating
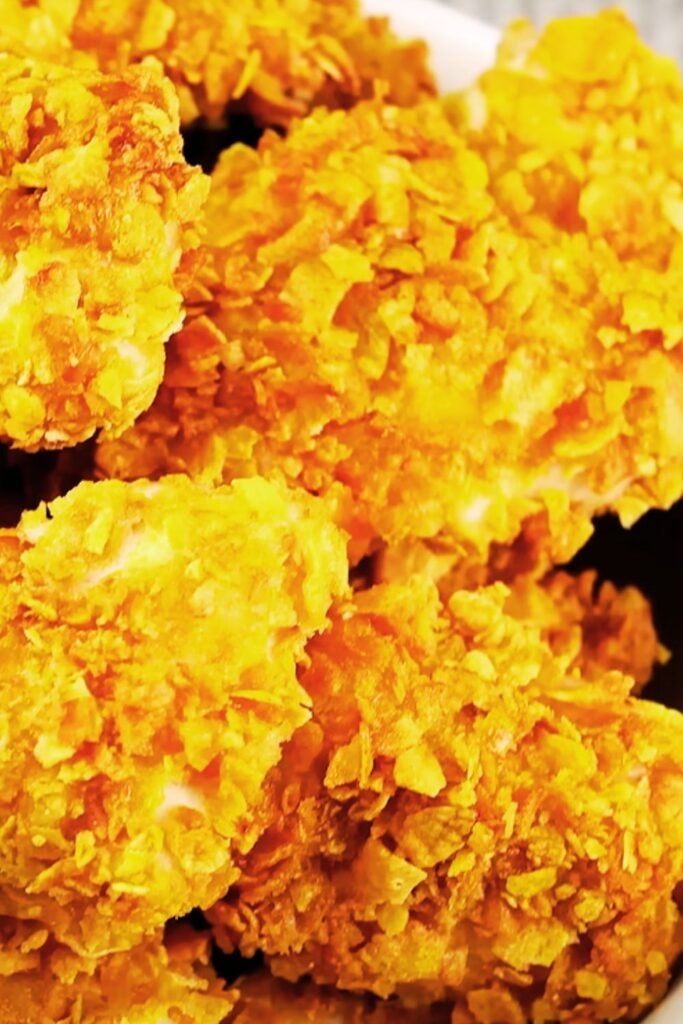
While the chicken marinates, I prepare my coating station. First, I crush the cornflakes – but here’s my secret: I don’t pulverize them completely. I want a mix of fine crumbs and slightly larger pieces for varied texture. I use a food processor and pulse about 10-12 times until I achieve the perfect consistency.
In one shallow dish, I combine the flour with paprika, cayenne, thyme, and oregano. In another dish, I whisk together the eggs and milk until smooth. In a third dish, I spread out my seasoned cornflake crumbs. This three-station setup ensures even, thorough coating.
Phase 3: The Coating Process
Remove the chicken from the buttermilk marinade, letting excess drip off. I work with one piece at a time, first dredging it in the seasoned flour mixture, making sure to coat all surfaces. Then I dip it in the egg mixture, allowing excess to drip off. Finally, I press the chicken into the cornflake mixture, ensuring complete coverage.
The key here is to really press the cornflakes into the chicken. I use my hands to gently but firmly press the coating onto each piece, making sure no spots are left uncovered. This pressing technique is what creates that incredibly crispy exterior we’re after.
Phase 4: Baking to Perfection
I preheat my oven to 425°F (220°C) and line a large baking sheet with parchment paper. I arrange the coated chicken pieces on the sheet, making sure they don’t touch each other. Proper spacing allows for even cooking and maximum crispiness.
I bake for 35-40 minutes, depending on the size of the pieces. I know they’re done when the internal temperature reaches 165°F (74°C) and the coating is golden brown and crispy. I resist the urge to flip the chicken during baking – this helps maintain that perfect crispy coating.
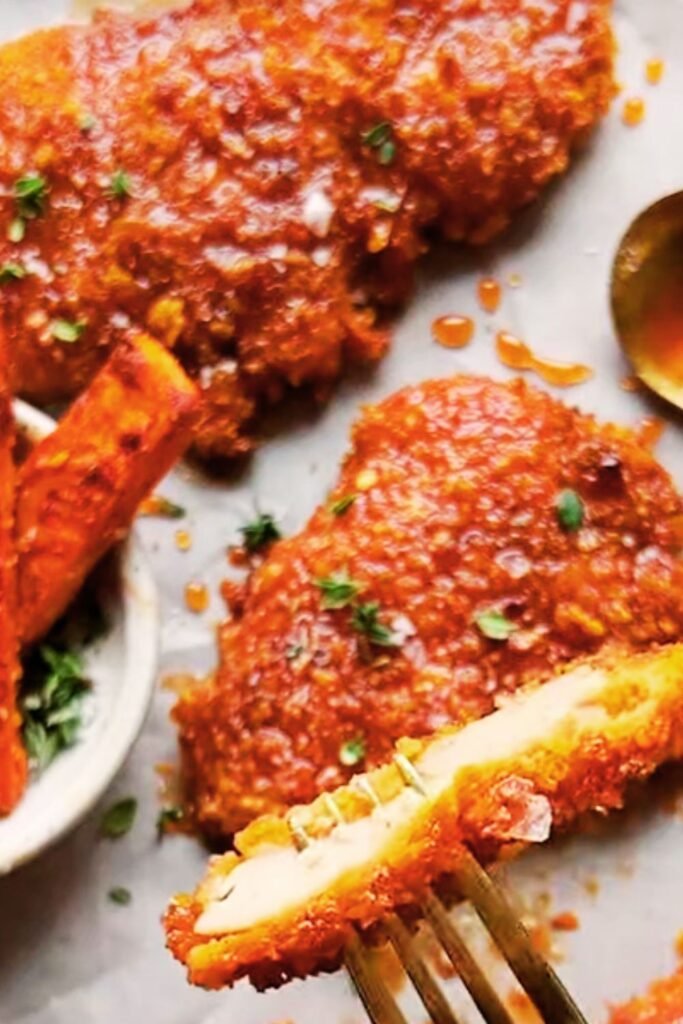
Phase 5: Creating the Hot Honey Glaze
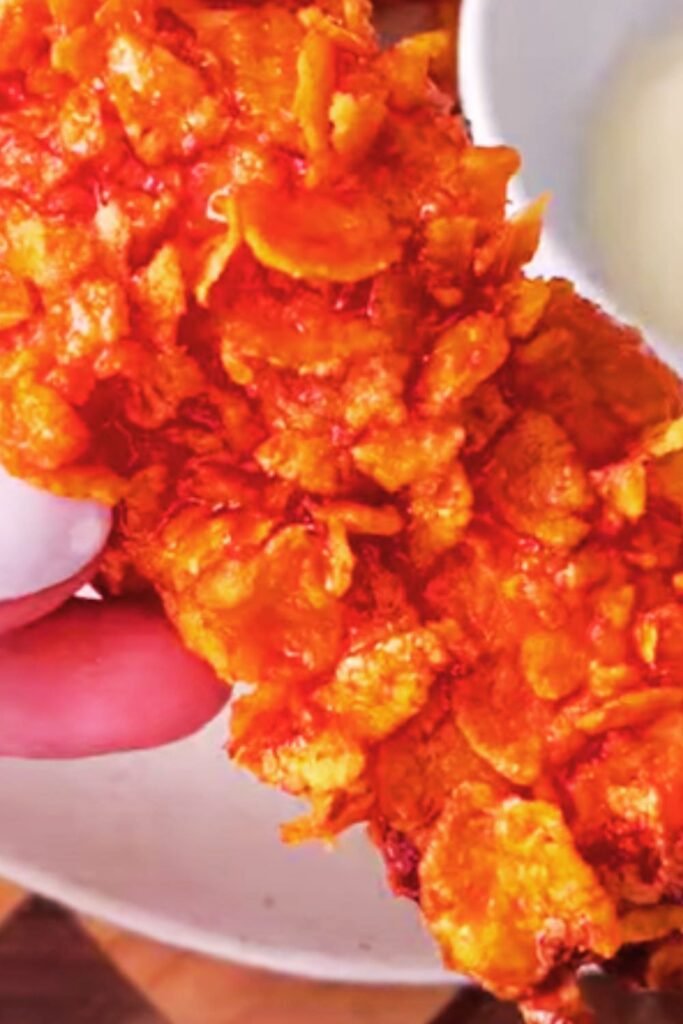
While the chicken bakes, I prepare the star of the show – the hot honey glaze. In a small saucepan, I combine honey, hot sauce, butter, apple cider vinegar, garlic powder, smoked paprika, and red pepper flakes. I bring this mixture to a gentle simmer over medium heat, stirring constantly.
The glaze is ready when it coats the back of a spoon and has a glossy, syrupy consistency. This usually takes about 5-7 minutes. I taste and adjust the heat level as needed – sometimes I add a bit more hot sauce if I’m feeling adventurous.
Cooking Time and Temperature Guide
| Cooking Phase | Temperature | Time | Internal Temp |
|---|---|---|---|
| Marinating | Refrigerator (35-40°F) | 2-24 hours | N/A |
| Oven Preheating | 425°F (220°C) | 15 minutes | N/A |
| Baking | 425°F (220°C) | 35-40 minutes | 165°F (74°C) |
| Glaze Preparation | Medium heat | 5-7 minutes | N/A |
| Rest Time | Room temperature | 5 minutes | N/A |
Variations and Customizations
Heat Level Adjustments
If you prefer a milder version, I recommend reducing the hot sauce to 2 tablespoons and omitting the cayenne pepper from the coating. For those who love extra heat, I sometimes add a teaspoon of ghost pepper powder to the cornflake mixture – but use this sparingly!
Coating Alternatives
While cornflakes are my favorite, I’ve experimented with other cereals. Crushed Rice Krispies create a lighter, airier coating, while crushed Ritz crackers add a buttery richness. Panko breadcrumbs mixed with crushed cornflakes also create an interesting texture variation.
Glaze Variations
My hot honey glaze is endlessly customizable. I’ve made versions with maple syrup instead of honey for a deeper sweetness, or added fresh herbs like rosemary or thyme. Sometimes I incorporate Asian flavors with soy sauce and sesame oil for a fusion twist.
Serving Suggestions and Pairings
This hot honey cornflake chicken pairs beautifully with a variety of sides. My personal favorite combination includes creamy coleslaw, which provides a cool, refreshing contrast to the heat, and roasted sweet potatoes that complement the honey flavors perfectly.
For a complete Southern-inspired meal, I serve it with buttermilk biscuits and honey butter. The biscuits soak up that delicious hot honey glaze, and the honey butter adds an extra layer of indulgence. Mac and cheese is another crowd-pleaser that works wonderfully with this dish.
Recommended Side Dishes:
- Creamy coleslaw with apple cider vinegar dressing
- Roasted sweet potatoes with cinnamon and brown sugar
- Buttermilk biscuits with honey butter
- Classic mac and cheese with sharp cheddar
- Grilled corn on the cob with lime and chili powder
- Mixed green salad with buttermilk ranch dressing
Storage and Reheating Guidelines
| Storage Method | Container | Duration | Quality Notes |
|---|---|---|---|
| Refrigerator | Airtight container | 3-4 days | Best texture within 2 days |
| Freezer | Freezer-safe bag | 2-3 months | Coating may lose some crispiness |
| Room Temperature | Covered dish | 2 hours max | Food safety concern after 2 hours |
To reheat, I place the chicken on a baking sheet and warm it in a 350°F oven for 10-15 minutes. This method helps restore some of the coating’s crispiness. I avoid microwaving because it makes the coating soggy.
Troubleshooting Common Issues
Problem: Coating Falls Off During Baking
Solution: Make sure your chicken is properly dried before coating, and really press the cornflakes into the surface. The egg wash should be sticky enough to hold everything together.
Problem: Chicken Is Dry
Solution: Don’t skip the buttermilk marinade, and be careful not to overbake. Use a meat thermometer to ensure you’re not cooking past 165°F.
Problem: Glaze Is Too Thick
Solution: Add a tablespoon of hot water or apple cider vinegar to thin it out. If it’s too thin, simmer it a bit longer to reduce.
Problem: Not Crispy Enough
Solution: Make sure your oven is fully preheated, don’t overcrowd the baking sheet, and resist opening the oven door frequently during baking.
Nutritional Benefits and Dietary Considerations
This recipe offers several nutritional advantages over traditional fried chicken. Baking instead of frying significantly reduces the oil content while maintaining that satisfying crunch. The cornflakes provide some added vitamins and minerals, particularly B vitamins and iron.
The chicken itself is an excellent source of high-quality protein, essential for muscle maintenance and growth. The buttermilk marinade adds probiotics and calcium, though in smaller amounts than you’d get from drinking buttermilk directly.
For those watching their sugar intake, the honey in the glaze does add natural sugars, but it’s distributed across multiple servings. You can reduce the honey by about 25% if you prefer a less sweet version.
Advanced Tips for Perfect Results
After making this recipe countless times, I’ve discovered several techniques that consistently produce restaurant-quality results. First, I always let my chicken come to room temperature for about 30 minutes before coating. This ensures even cooking and better coating adhesion.
I’ve also learned that double-coating creates an even crunchier exterior. After the initial coating, I let the chicken rest for 10 minutes, then repeat the egg and cornflake coating process. This extra step takes more time but delivers incredible results.
The glaze timing is crucial – I apply it immediately after the chicken comes out of the oven while it’s still hot. This helps the glaze penetrate slightly and creates a beautiful glossy finish.
Questions and Answers
Q: Can I use boneless chicken pieces instead of bone-in? A: Absolutely! Boneless chicken thighs or breasts work wonderfully with this recipe. Just reduce the cooking time to about 25-30 minutes and check for doneness at 165°F. I personally prefer thighs for their tenderness and flavor.
Q: How far in advance can I prepare this dish? A: I recommend coating the chicken up to 4 hours ahead and keeping it refrigerated. The glaze can be made up to 3 days in advance and reheated gently before serving. However, for the best texture, I prefer to bake the chicken fresh.
Q: Can I make this recipe gluten-free? A: Yes! Simply substitute the all-purpose flour with your favorite gluten-free flour blend. Make sure to check that your cornflakes are certified gluten-free, as some brands may contain gluten-containing ingredients.
Q: What’s the best way to crush the cornflakes? A: I use a food processor with quick pulses, but you can also place them in a sealed plastic bag and crush them with a rolling pin. The goal is to have a mix of fine crumbs and slightly larger pieces for varied texture.
Q: Can I use a different type of honey? A: Definitely! I love experimenting with different honey varieties. Wildflower honey adds complexity, while clover honey provides a milder flavor. Raw honey works beautifully too, though it may crystallize slightly in the glaze.
Q: How do I know when the chicken is perfectly cooked? A: The most reliable method is using a meat thermometer. The internal temperature should reach 165°F in the thickest part of the meat. Visually, the juices should run clear, and the coating should be golden brown and crispy.
Q: Can I freeze the coated raw chicken? A: Yes, you can freeze the coated chicken for up to 3 months. Freeze them on a baking sheet first, then transfer to freezer bags. Add about 10-15 minutes to the cooking time when baking from frozen.
Q: What if I don’t have buttermilk? A: You can make a substitute by adding 1 tablespoon of lemon juice or white vinegar to 1 cup of regular milk. Let it sit for 5 minutes before using. It won’t be exactly the same, but it works well in a pinch.
This Hot Honey Bangin’ Crunchy Cornflake Baked Chicken has become more than just a recipe in my kitchen – it’s a celebration of flavors and textures that brings people together. The combination of that incredible crunch, the juicy chicken, and the addictive hot honey glaze creates a dish that’s both comforting and exciting. Whether you’re cooking for a weeknight dinner or entertaining guests, this recipe never fails to impress and satisfy.