Nothing beats the satisfaction of creating restaurant-quality crispy shrimp right in my own kitchen. After years of experimenting with different techniques and countless batches that didn’t quite hit the mark, I finally cracked the code to achieving that perfect golden crunch without the hassle of deep frying.
This Magic Crispy Baked Shrimp recipe transformed my weeknight dinners and became my secret weapon for impressing guests. The beauty lies in how simple ingredients come together to create something truly extraordinary. Every bite delivers that satisfying crunch followed by tender, juicy shrimp that practically melts in your mouth.
What makes this recipe truly magical isn’t just the incredible texture, but how achievable it is for home cooks of any skill level. I’ve watched friends who claim they “can’t cook” master this technique and serve up shrimp that rivals their favorite seafood restaurants. The secret lies in understanding a few key principles that I’m excited to share with you.
Understanding the Magic Behind Perfect Crispy Shrimp
The journey to perfect crispy baked shrimp starts with understanding why traditional methods often fall short. Most home cooks struggle with either soggy coatings or overcooked, rubbery shrimp. I discovered that the magic happens when you nail three crucial elements: moisture control, coating adhesion, and precise temperature management.
Moisture Control : The enemy of crispy coatings everywhere. Even the tiniest amount of surface moisture will prevent proper browning and create steam instead of that coveted crunch.
Coating Adhesion : The science of making sure your beautiful coating doesn’t slide off during baking. This requires proper layering and the right binding agents.
Temperature Management : Finding that sweet spot where the coating crisps up beautifully while the shrimp cooks through without becoming tough.
My technique addresses each of these challenges systematically, resulting in shrimp that’s crispy on the outside and perfectly tender inside, every single time.
Essential Ingredients That Make the Difference
The Shrimp Selection
I always reach for large shrimp, specifically the 21-25 count variety. These provide the perfect canvas for our crispy coating while offering enough substance to remain juicy during baking. Fresh shrimp works best, but I’ve had excellent results with properly thawed frozen shrimp too.
The Coating Trinity
My coating system relies on three distinct layers, each serving a specific purpose:
Base Layer – Seasoned Flour : All-purpose flour mixed with salt and white pepper creates the foundation. This layer absorbs any remaining moisture and provides the first grip point for subsequent coatings.
Binding Layer – Enhanced Egg Wash : Beaten eggs enriched with a splash of heavy cream and a pinch of garlic powder. This creates superior adhesion while adding richness to the final flavor profile.
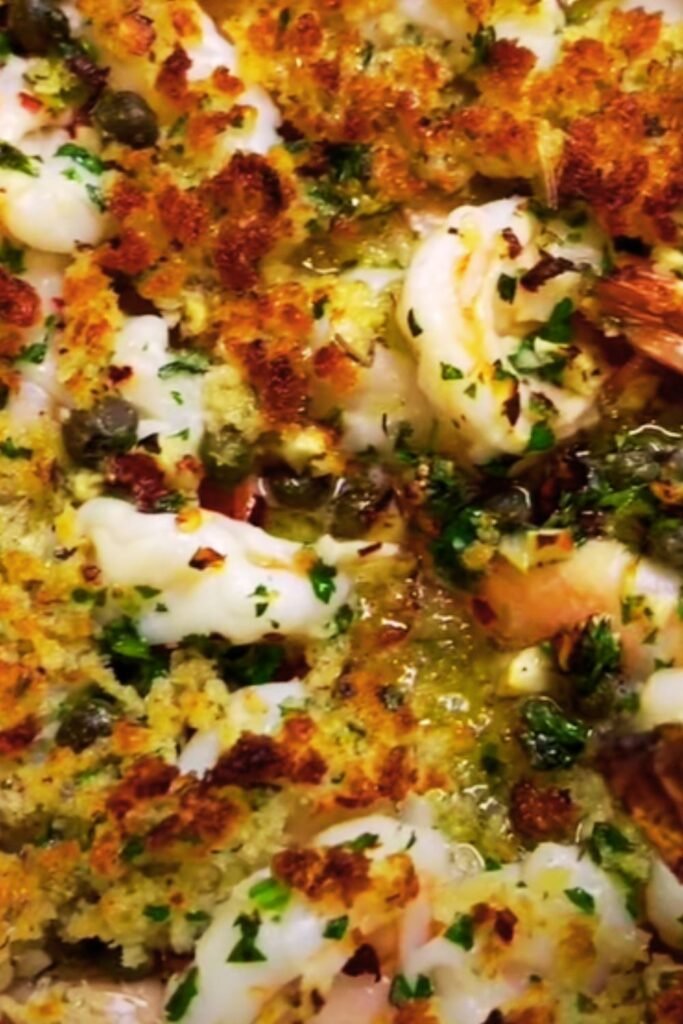
Crispy Layer – Panko Paradise : Japanese panko breadcrumbs mixed with finely grated Parmesan cheese, smoked paprika, and my secret blend of seasonings. This combination creates unmatched texture and flavor depth.
My Secret Seasoning Blend
After countless experiments, I’ve perfected a seasoning mixture that enhances the shrimp’s natural sweetness without overpowering it:
- Garlic powder – 2 teaspoons
- Onion powder – 1 teaspoon
- Smoked paprika – 1 teaspoon
- Dried oregano – 1/2 teaspoon
- Cayenne pepper – 1/4 teaspoon
- Fine sea salt – 1 teaspoon
- Fresh ground black pepper – 1/2 teaspoon
This blend provides warmth, depth, and just enough heat to keep things interesting without overwhelming delicate palates.
Step-by-Step Preparation Process
Preparing Your Workspace
Organization is key to success with this recipe. I set up my coating station before touching a single shrimp. Three shallow dishes work perfectly: one for seasoned flour, one for the enhanced egg wash, and one for the seasoned panko mixture.
The Shrimp Preparation Ritual
Each shrimp gets individual attention during prep. I remove the shells while leaving the tails on for presentation, then carefully devein each one. The critical step that many home cooks skip is the thorough drying process. I pat each shrimp completely dry with paper towels, then let them rest on a clean kitchen towel for 10 minutes. This extra step eliminates surface moisture that would otherwise prevent proper coating adhesion.
The Double-Dredging Technique
Here’s where the magic truly happens. Instead of the typical single coating, I use a double-dredging method that creates an incredibly robust crispy shell:
- First Pass: Flour, then egg wash, then panko mixture
- Second Pass: Back to egg wash, then a final generous coating of panko mixture
This technique might seem excessive, but it’s the difference between good crispy shrimp and absolutely spectacular ones.
Mastering the Baking Process
Oven Setup and Temperature Control
I preheat my oven to 425°F (220°C) – this higher temperature is crucial for achieving proper browning. I line my baking sheet with parchment paper and give it a light spray of cooking oil to prevent sticking.
The Arrangement Strategy
Proper spacing is non-negotiable. Each shrimp needs its own space to allow hot air circulation. Overcrowding creates steam, which is the enemy of crispiness. I’d rather use two baking sheets than compromise on spacing.
The Flip Technique
Halfway through baking, I carefully flip each shrimp using tongs. This ensures even browning and prevents the bottom from becoming soggy. The total baking time ranges from 12-15 minutes depending on shrimp size.
Nutritional Profile and Health Benefits
| Nutrient | Amount per 6-piece serving | % Daily Value |
|---|---|---|
| Calories | 295 | 15% |
| Protein | 32g | 64% |
| Total Fat | 14g | 21% |
| Saturated Fat | 4g | 20% |
| Cholesterol | 210mg | 70% |
| Sodium | 580mg | 25% |
| Carbohydrates | 16g | 5% |
| Dietary Fiber | 1g | 4% |
| Sugars | 1g | 2% |
| Calcium | 145mg | 14% |
| Iron | 3mg | 17% |
| Potassium | 220mg | 6% |
| Vitamin B12 | 1.2mcg | 50% |
Cooking Time Reference Guide
| Shrimp Size | Count per Pound | Prep Time | Baking Time | Total Time |
|---|---|---|---|---|
| Jumbo | 16-20 | 25 min | 15-18 min | 40-43 min |
| Extra Large | 21-25 | 20 min | 12-15 min | 32-35 min |
| Large | 26-30 | 18 min | 10-12 min | 28-30 min |
| Medium Large | 31-35 | 15 min | 8-10 min | 23-25 min |
Serving Suggestions and Presentation Ideas
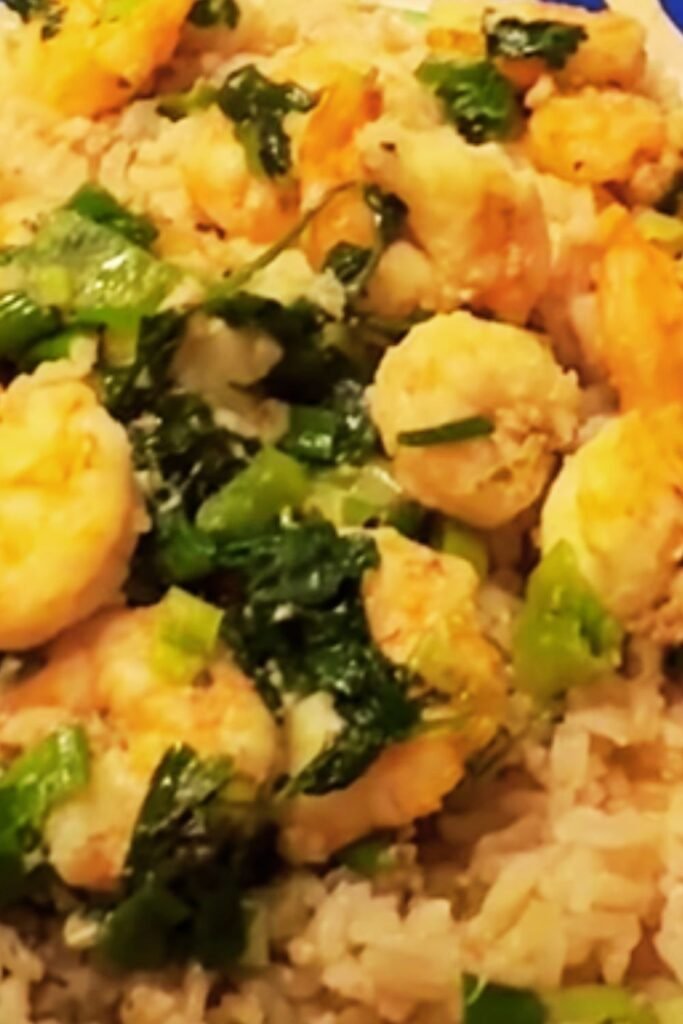
The versatility of these crispy baked shrimp amazes me every time I serve them. For casual family dinners, I love pairing them with coconut rice and steamed broccoli. The contrast of textures and flavors creates a satisfying meal that feels both comforting and sophisticated.
When entertaining, I arrange them on a large platter with small bowls of various dipping sauces. My favorites include homemade cocktail sauce spiked with fresh horseradish, creamy garlic aioli, and a tangy remoulade that perfectly complements the shrimp’s crispy coating.
These shrimp also shine in composed salads. I often layer them over mixed greens with cherry tomatoes, cucumber, and avocado, then drizzle with a light citrus vinaigrette. The warm, crispy shrimp creates a beautiful temperature contrast with the cool, fresh vegetables.
For more formal occasions, I serve them as an elegant appetizer with lemon wedges and a selection of artisanal sauces. The presentation is restaurant-worthy, but the preparation remains surprisingly straightforward.
Storage and Meal Prep Strategies
Proper Storage Techniques
Leftover crispy shrimp store beautifully when handled correctly. I allow them to cool completely before transferring to an airtight container lined with paper towels. The paper towels absorb any residual moisture, helping maintain the coating’s integrity. Properly stored, they stay fresh in the refrigerator for up to three days.
Reheating for Best Results
The key to reheating crispy shrimp lies in restoring the coating’s texture. I never use the microwave, which creates steam and ruins the crispiness. Instead, I preheat my oven to 350°F (175°C), arrange the shrimp on a baking sheet, and reheat for 5-7 minutes. This method revives much of the original crunch.
Make-Ahead Options
For busy weeknights, I sometimes prepare the coated shrimp in advance. After the double-dredging process, I arrange them on a baking sheet and freeze until solid, then transfer to freezer bags. They can be baked directly from frozen, adding just 3-5 minutes to the cooking time.
Troubleshooting Common Issues
Soggy Coating Problems
When my coating turns out soggy, it’s usually due to one of three issues: insufficient drying of the shrimp, overcrowding the baking sheet, or inadequate oven temperature. I’ve learned that patience during the drying phase pays dividends in the final result.
Coating Adhesion Issues
If the coating slides off during baking, the problem typically lies in the dredging process. Either the shrimp wasn’t dry enough, or I rushed through the coating steps. The double-dredging technique I use helps, but it requires methodical execution.
Overcooking Prevention
Shrimp cook quickly, and the line between perfectly done and rubbery is thin. I watch for visual cues: the shrimp should curl slightly and turn opaque throughout. An instant-read thermometer should register 145°F (63°C) at the thickest part.
Flavor Variations and Customizations
Mediterranean Twist
I sometimes incorporate Mediterranean flavors by adding dried oregano, lemon zest, and a touch of sumac to the panko mixture. This creates a bright, herbaceous coating that pairs beautifully with tzatziki sauce.
Asian-Inspired Version
For an Asian flair, I substitute regular panko with panko mixed with sesame seeds and add ground ginger and Chinese five-spice to the seasoning blend. Served with sweet chili sauce, this version offers an exciting departure from traditional preparations.
Spicy Cajun Style
When I want more heat, I increase the cayenne pepper and add smoked paprika, dried thyme, and a pinch of oregano. This Cajun-inspired version pairs wonderfully with a cooling ranch dip or avocado crema.
Expert Tips for Consistent Success
Through years of making this recipe, I’ve discovered several tricks that ensure consistent results:
• Temperature matters: Always verify your oven temperature with a separate thermometer. Even small variations can affect the final result.
• Timing is everything: Don’t rush the drying process. Those extra 10 minutes of air-drying make a significant difference in coating adhesion.
• Quality ingredients: Using fresh, high-quality shrimp and real Parmesan cheese elevates the entire dish. Corners cut on ingredients show in the final product.
• Prep ahead: Having all components ready before starting the coating process prevents rushing and ensures each shrimp gets proper attention.
Frequently Asked Questions
Q: Can I use this technique with other seafood? Absolutely! This coating method works wonderfully with fish fillets, scallops, and even calamari rings. Just adjust the cooking time based on the thickness and type of seafood you’re using.
Q: What’s the best way to know when the shrimp are perfectly cooked? I look for visual cues: the shrimp should be golden brown and curled into a C-shape. They should feel firm but not hard when gently pressed. The internal temperature should reach 145°F (63°C).
Q: Can I make this recipe dairy-free? Yes! Simply omit the Parmesan cheese from the coating mixture and use a plant-based milk in the egg wash instead of cream. The texture will be slightly different but still delicious.
Q: Why do you recommend leaving the tails on? The tails provide a convenient handle for eating and create an elegant presentation. However, you can certainly remove them if you prefer. Just be extra gentle during the coating process.
Q: How do I prevent the coating from being too thick? The key is gently shaking off excess coating at each step. After dredging in flour, give each shrimp a light tap. Do the same after the egg wash and panko coating. You want coverage, not a thick shell.
Q: Can I prepare these for a crowd? Definitely! I often double or triple the recipe for parties. Just make sure to use multiple baking sheets to maintain proper spacing. You might need to rotate the pans halfway through baking for even cooking.
Q: What’s the secret to getting the coating to stick so well? The double-dredging technique combined with properly dried shrimp is the key. The first coating creates a base, while the second adds extra crunch and insurance against any coating that might fall off.
Q: Are these suitable for meal prep? Yes, though they’re best enjoyed fresh. If meal prepping, I recommend storing the components separately and assembling just before reheating. The coating stays crispier this way.
Q: Can I use regular breadcrumbs instead of panko? While you can substitute regular breadcrumbs, panko creates a significantly lighter, crispier texture. The larger flakes trap more air, resulting in better crunch. I strongly recommend sticking with panko for best results.
Q: What dipping sauces pair best with these shrimp? My top recommendations include classic cocktail sauce, garlic aioli, honey mustard, and spicy remoulade. The neutral seasoning of the coating pairs well with both creamy and tangy sauces.
This Magic Crispy Baked Shrimp recipe has become my signature dish, one that never fails to impress and always delivers on flavor and texture. The technique might seem detailed, but once you master it, you’ll find yourself returning to this recipe again and again for its reliability and delicious results.