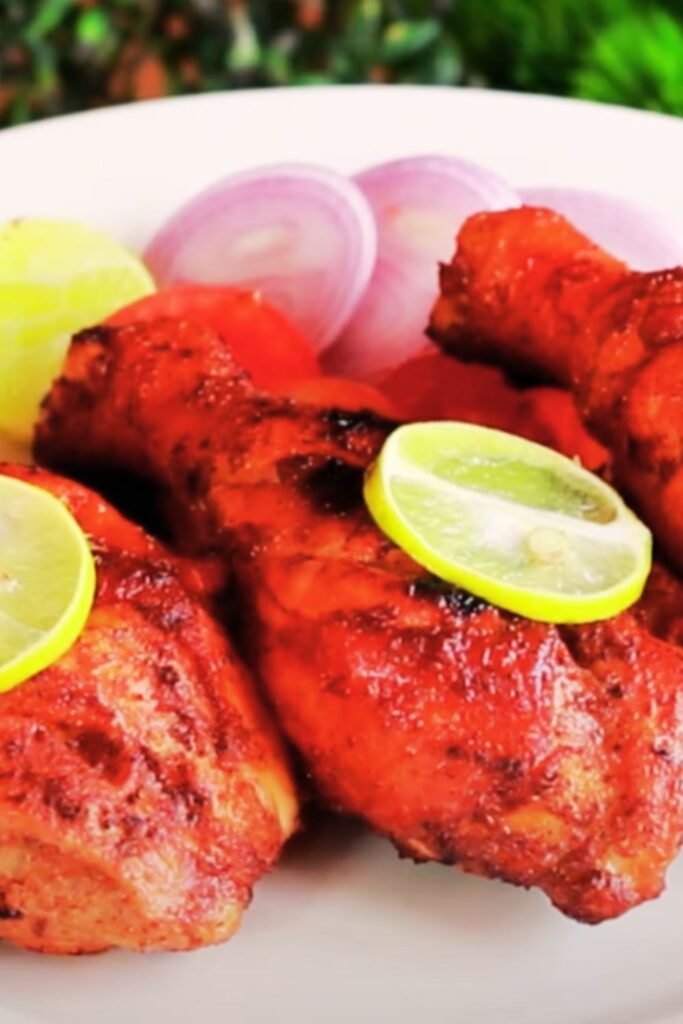
There’s something magical about the perfect chicken drumstick. You know the one I’m talking about – golden-brown skin that crackles when you bite into it, revealing tender, juicy meat that’s been infused with bold seasonings. I’ve spent years perfecting my technique for creating these crispy masterpieces, and today I’m sharing every secret I’ve learned along the way.
Growing up, my grandmother always said that the key to great chicken wasn’t just in the cooking – it was in the preparation, the seasoning, and most importantly, the patience. She was absolutely right. These seasoned crispy chicken drumsticks have become my signature dish, and they never fail to impress whether I’m cooking for family dinner or entertaining guests.
Why Drumsticks Are the Perfect Choice
Before diving into my recipe, let me explain why I believe drumsticks are the superior chicken piece for achieving that perfect crispy exterior. Unlike chicken breasts, which can easily dry out, drumsticks have enough fat content to stay moist during the cooking process. The bone acts as a natural conductor of heat, ensuring even cooking, while the skin-to-meat ratio is ideal for achieving maximum crispiness.
Key Benefits of Cooking Drumsticks:
- Higher fat content prevents drying out
- Natural bone-in cooking ensures even heat distribution
- More affordable than premium cuts
- Kid-friendly finger food presentation
- Excellent for meal prep and leftovers
Essential Ingredients for Maximum Flavor
The foundation of exceptional crispy drumsticks lies in the seasoning blend. I’ve experimented with countless combinations over the years, and this particular mix delivers layers of flavor that complement rather than overpower the natural chicken taste.
Primary Seasoning Blend
Dry Seasonings:
- Paprika (2 tablespoons) – adds color and mild sweetness
- Garlic powder (1 tablespoon) – provides savory depth
- Onion powder (1 tablespoon) – enhances overall flavor complexity
- Black pepper (1 teaspoon) – adds gentle heat
- Salt (2 teaspoons) – essential for flavor enhancement and moisture retention
- Dried thyme (1 teaspoon) – contributes earthy, herbal notes
- Cayenne pepper (½ teaspoon) – adjustable heat element
Wet Ingredients:
- Olive oil (3 tablespoons) – helps seasonings adhere and promotes browning
- Fresh lemon juice (2 tablespoons) – tenderizes meat and adds brightness
- Worcestershire sauce (1 tablespoon) – deepens umami flavors
Optional Enhancement Ingredients
For Extra Crispiness:
- Cornstarch (2 tablespoons) – creates additional texture
- Baking powder (1 teaspoon) – helps skin puff and crisp
For Flavor Variations:
- Smoked paprika – for smoky undertones
- Brown sugar (1 teaspoon) – balances spice with sweetness
- Fresh herbs like rosemary or sage – for aromatic complexity
The Science Behind Crispy Skin
Understanding what makes chicken skin crispy has revolutionized my cooking. The key lies in removing moisture and creating the right surface texture. When chicken skin contains too much moisture, it steams rather than crisps in the oven. My method addresses this through several crucial steps.
Moisture Removal Techniques:
- Pat drumsticks completely dry before seasoning
- Allow seasoned chicken to rest uncovered in refrigerator
- Use cornstarch or baking powder to absorb surface moisture
- Cook at high initial temperature to quickly evaporate remaining moisture
Step-by-Step Preparation Method
Phase 1: Preparation and Seasoning
Step 1: Initial Preparation Start with 8-10 chicken drumsticks at room temperature. I always remove them from the refrigerator 30 minutes before cooking to ensure even heating. Using paper towels, thoroughly pat each drumstick dry, paying special attention to the skin surface and any crevices where moisture might hide.
Step 2: Creating the Seasoning Paste In a large bowl, combine all dry seasonings and whisk together until evenly distributed. Add olive oil, lemon juice, and Worcestershire sauce, creating a paste-like consistency. This wet-dry combination ensures the seasonings adhere properly while providing moisture for penetration into the meat.
Step 3: Seasoning Application Using clean hands, massage the seasoning paste into each drumstick, ensuring complete coverage including under the skin where possible. I gently loosen the skin without tearing it, allowing some seasoning to reach the meat directly. Place seasoned drumsticks on a wire rack set over a baking sheet.
Step 4: Resting Period This is where patience pays off. Allow the seasoned drumsticks to rest uncovered in the refrigerator for at least 2 hours, though overnight is even better. This resting period allows the seasonings to penetrate while the surface moisture evaporates, setting up perfect conditions for crispiness.
Phase 2: Cooking Process
Step 5: Oven Preparation Preheat your oven to 425°F (220°C). Position the rack in the upper third of the oven, which promotes better browning. If using a convection setting, reduce temperature to 400°F (200°C) and expect slightly faster cooking times.
Step 6: Cooking Setup Line a large baking sheet with parchment paper and place a wire cooling rack on top. This elevation allows hot air to circulate completely around each drumstick, promoting even crisping on all surfaces. Arrange drumsticks on the rack with space between each piece.
Step 7: Initial High-Heat Cooking Place the baking sheet in the preheated oven and cook for 25 minutes without opening the door. This initial high heat is crucial for setting the skin and beginning the crisping process.
Step 8: Temperature Adjustment and Finishing Reduce oven temperature to 375°F (190°C) and continue cooking for an additional 20-25 minutes. The total cooking time depends on drumstick size, but internal temperature should reach 165°F (74°C) when measured with an instant-read thermometer inserted into the thickest part without touching bone.
Timing and Temperature Guide
Proper timing and temperature control are essential for achieving consistently perfect results. I’ve developed this comprehensive guide through extensive testing with different sized drumsticks and various oven types.
| Drumstick Size | Initial Cook Time (425°F) | Final Cook Time (375°F) | Total Time | Internal Temp |
|---|---|---|---|---|
| Small (2-3 oz) | 20 minutes | 15-20 minutes | 35-40 min | 165°F |
| Medium (3-4 oz) | 25 minutes | 20-25 minutes | 45-50 min | 165°F |
| Large (4-5 oz) | 30 minutes | 25-30 minutes | 55-60 min | 165°F |
| Extra Large (5+ oz) | 35 minutes | 30-35 minutes | 65-70 min | 165°F |
Visual Doneness Indicators
Beyond temperature, I rely on these visual cues to determine perfect doneness:
Skin Appearance:
- Deep golden-brown color with darker crispy edges
- Skin appears tight and slightly puffed
- No wet or translucent areas visible
- Light char marks on highest points
Juice Characteristics:
- Juices run clear when drumstick is pierced
- No pink or red coloration near the bone
- Minimal juice pooling around drumsticks on pan
Troubleshooting Common Issues
Over the years, I’ve encountered every possible drumstick disaster and learned how to prevent them. Here are the most common problems and my proven solutions.
Problem: Soggy Skin
Causes and Solutions:
Excess Moisture: The most frequent culprit is insufficient drying before seasoning. Always pat drumsticks completely dry and allow them to air-dry in the refrigerator.
Overcrowding: When drumsticks are too close together, they steam rather than roast. Maintain at least 2 inches of space between pieces.
Low Temperature: Cooking at temperatures below 400°F doesn’t generate enough heat to crisp the skin effectively. Stick to high-heat methods.
Problem: Dry Meat
Causes and Solutions:
Overcooking: Even drumsticks can dry out if cooked too long. Always use a thermometer and remove from oven immediately when internal temperature reaches 165°F.
Insufficient Fat: Lean drumsticks benefit from additional oil in the seasoning mixture. Don’t skimp on the olive oil.
Lack of Brining: For extra insurance against dryness, consider brining drumsticks for 2-4 hours before seasoning.
Problem: Uneven Cooking
Causes and Solutions:
Size Variation: When drumsticks vary significantly in size, smaller pieces finish before larger ones. Sort by size and adjust cooking times accordingly.
Poor Air Circulation: Using a flat baking sheet without elevation prevents proper heat circulation. Always use a wire rack when possible.
Oven Hot Spots: Some ovens have uneven heat distribution. Rotate the pan halfway through cooking for uniform results.
Nutritional Information and Health Benefits
Understanding the nutritional profile of these drumsticks helps me make informed decisions about portion sizes and meal planning. Here’s a comprehensive breakdown based on a typical 4-ounce cooked drumstick.
| Nutrient | Per Drumstick | Daily Value % |
|---|---|---|
| Calories | 185 | 9% |
| Protein | 24g | 48% |
| Total Fat | 9g | 12% |
| Saturated Fat | 2.5g | 13% |
| Cholesterol | 85mg | 28% |
| Sodium | 420mg | 18% |
| Potassium | 285mg | 8% |
| Iron | 1.2mg | 7% |
| Vitamin B6 | 0.3mg | 18% |
| Niacin | 6.2mg | 39% |
Health Benefits
High-Quality Protein: Drumsticks provide complete protein containing all essential amino acids necessary for muscle maintenance and growth.
B Vitamins: Rich in niacin and B6, which support energy metabolism and nervous system function.
Mineral Content: Good source of phosphorus for bone health and selenium for antioxidant protection.
Iron Content: Contributes to healthy red blood cell formation and oxygen transport.
Serving Suggestions and Pairings
The versatility of these crispy drumsticks makes them suitable for numerous meal occasions and pairing options. I’ve developed these combinations through years of experimenting with different flavors and textures.
Classic Comfort Pairings
Traditional Sides:
- Creamy mashed potatoes with roasted garlic
- Buttery corn on the cob with fresh herbs
- Coleslaw with tangy vinegar dressing
- Mac and cheese with crispy breadcrumb topping
- Biscuits with honey butter
Vegetable Accompaniments:
- Roasted Brussels sprouts with bacon bits
- Honey-glazed carrots with thyme
- Green bean casserole with crispy onions
- Roasted sweet potatoes with cinnamon
- Steamed broccoli with lemon butter
International Flavor Combinations
Mediterranean Style:
- Greek-style roasted vegetables with oregano and feta
- Cucumber yogurt sauce (tzatziki) for dipping
- Warm pita bread with olive tapenade
- Lemon rice pilaf with fresh herbs
Asian-Inspired Pairings:
- Coconut rice with cilantro and lime
- Asian-style coleslaw with sesame dressing
- Steamed jasmine rice with soy-ginger vegetables
- Pickled cucumber salad for contrast
Seasonal Menu Ideas
Summer Gatherings:
- Fresh corn salad with basil and tomatoes
- Watermelon feta salad for cooling contrast
- Grilled zucchini and yellow squash
- Fresh fruit salad with mint
Winter Comfort Meals:
- Roasted root vegetables with rosemary
- Warm quinoa salad with dried cranberries
- Butternut squash soup as starter
- Apple crisp for dessert
Storage and Meal Prep Tips
One of the greatest advantages of these drumsticks is their excellent storage and reheating properties. I frequently prepare large batches for meal prep, and they maintain their quality remarkably well.
Proper Storage Methods
Refrigerator Storage: Cooked drumsticks will maintain quality for up to 4 days when stored in airtight containers in the refrigerator. I recommend separating them with parchment paper to prevent sticking and storing them in glass containers to prevent flavor absorption.
Freezer Storage: For longer storage, these drumsticks freeze beautifully for up to 3 months. Wrap individually in plastic wrap before placing in freezer bags to prevent freezer burn. Label with date and seasoning type for easy identification.
Reheating Techniques: To restore crispiness when reheating, I use a 350°F oven for 10-15 minutes rather than microwaving. Place drumsticks on a wire rack to allow air circulation and prevent sogginess.
Meal Prep Strategies
Batch Cooking: I often double or triple this recipe for weekly meal prep. The drumsticks reheat so well that I can prepare Sunday’s dinner and have lunch portions ready for the entire week.
Seasoning Variations: To prevent meal prep monotony, I prepare different seasoning blends for variety. One batch might be Italian-herb focused while another features cajun spices.
Portioning Tips: For individual meal prep containers, I include 2 drumsticks with complementary sides. This provides approximately 350-400 calories and makes portion control effortless.
Frequently Asked Questions
Q: Can I use frozen drumsticks for this recipe? Yes, but proper thawing is essential. I recommend thawing completely in the refrigerator overnight before beginning the preparation process. Never attempt to season frozen drumsticks as the seasonings won’t adhere properly and moisture content will be too high for achieving crispiness.
Q: How do I know when the drumsticks are perfectly crispy? The skin should be deep golden-brown and feel firm to the touch. When you tap the surface with a utensil, it should sound crisp rather than soft. Visual cues include skin that appears tight and slightly puffed with no wet or translucent areas.
Q: Can I prepare these drumsticks in advance? Absolutely! In fact, seasoning them 4-24 hours ahead improves flavor penetration. Keep them covered in the refrigerator after the initial uncovered drying period. They can be cooked directly from the cold refrigerated state.
Q: What’s the best way to remove excess fat while maintaining crispiness? I trim visible excess skin and fat before seasoning, but leave enough skin to ensure proper coverage. During cooking, fat will render naturally. Using a wire rack allows rendered fat to drip away while maintaining crispy texture.
Q: Can I adapt this recipe for different dietary restrictions? The base recipe is naturally gluten-free and keto-friendly. For lower sodium versions, reduce salt and increase herb quantities. For dairy-free diets, ensure Worcestershire sauce is dairy-free (some brands contain milk products).
Q: Why do you recommend letting the seasoned chicken rest overnight? This resting period serves two crucial purposes: flavor penetration and moisture evaporation. The salt in the seasoning mixture begins breaking down proteins for enhanced flavor absorption, while surface moisture evaporates for superior crispiness.
Q: Can I use an air fryer instead of the oven? Yes, but adjust the method accordingly. Cook at 380°F for 25-30 minutes, flipping halfway through. The cooking time may be slightly shorter, so check internal temperature starting at 20 minutes.
Q: What should I do if my drumsticks are browning too quickly? If the skin is browning faster than the meat is cooking, tent the drumsticks loosely with aluminum foil to prevent burning while allowing the interior to finish cooking. You can also reduce the oven temperature by 25°F.
Q: How can I make these drumsticks spicier without compromising the crispy texture? Increase the cayenne pepper gradually, or add hot sauce to the wet seasoning mixture. Dry spices maintain crispiness better than wet additions, so consider adding chipotle powder, hot paprika, or crushed red pepper flakes to the dry seasoning blend.
Q: Is it necessary to use a wire rack, or can I cook them directly on the baking sheet? While a wire rack produces superior results by allowing air circulation and fat drainage, you can cook directly on parchment-lined baking sheets. Just expect slightly less crispiness on the bottom surface and flip the drumsticks halfway through cooking for more even browning.
These seasoned crispy chicken drumsticks represent everything I love about home cooking: simple techniques that produce extraordinary results, ingredients that work together harmoniously, and a recipe that brings people together around the dinner table. The combination of proper preparation, bold seasonings, and careful temperature control creates drumsticks that rival any restaurant version while being completely achievable in your home kitchen.
Whether you’re cooking for a busy weeknight dinner, meal prepping for the week ahead, or entertaining guests for a special occasion, these drumsticks deliver consistent, impressive results. The crispy skin gives way to incredibly juicy, flavorful meat that satisfies on every level. Most importantly, this recipe has become a foundation that you can build upon, adjusting seasonings and accompaniments to suit your family’s preferences and dietary needs.
I encourage you to make this recipe your own through experimentation and adaptation. Try different spice combinations, explore various serving suggestions, and discover which techniques work best in your kitchen with your equipment. The joy of cooking comes not just from following recipes, but from understanding the principles behind them and making them uniquely yours.