I’ve been absolutely obsessed with Nando’s spicy rice ever since my first visit to their restaurant three years ago. That perfect balance of heat, flavor, and aromatic spices had me coming back for more, but let’s be honest – dining out frequently isn’t always budget-friendly! That’s when I decided to embark on my mission to recreate this beloved dish at home.
After countless experiments in my kitchen, testing different spice combinations and cooking techniques, I’m thrilled to share my perfected homemade Nando’s spicy rice recipe with you. This isn’t just any ordinary rice dish – it’s a flavor-packed, restaurant-quality meal that’ll have your family asking for seconds (and thirds!).
What Makes Nando’s Spicy Rice Special?
Peri-Peri Influence: The signature heat comes from peri-peri peppers and spices Aromatic Base: Onions, garlic, and bell peppers create the flavor foundation
Perfect Texture: Long-grain rice cooked to fluffy perfection Color Appeal: Beautiful reddish-orange hue from paprika and tomatoes Balanced Heat: Spicy enough to excite, mild enough for most palates
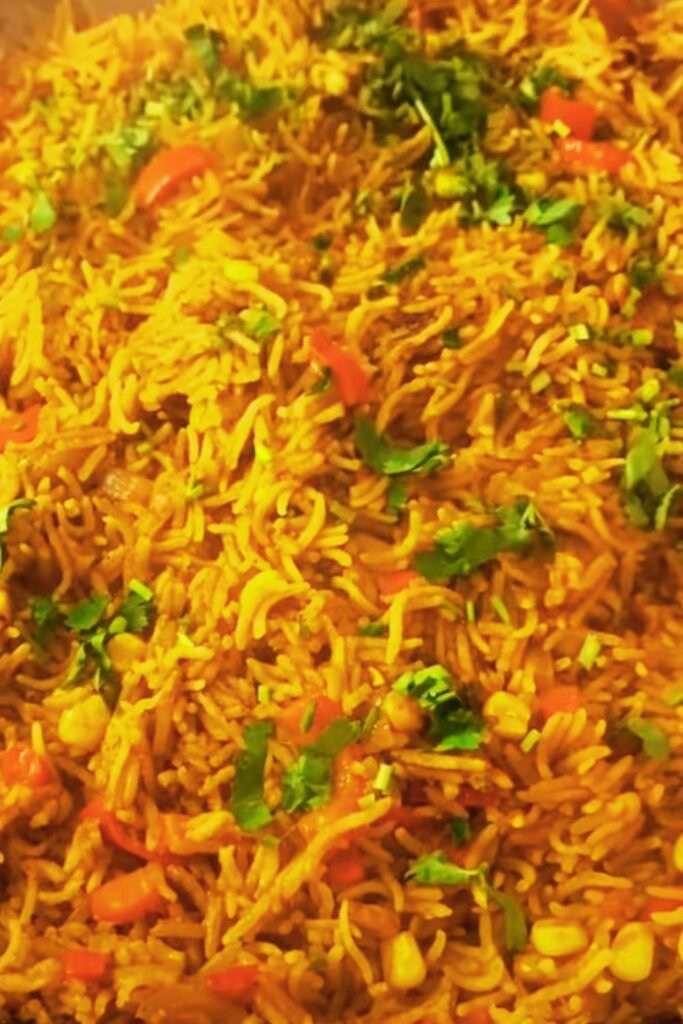
The magic of Nando’s spicy rice lies in its simplicity combined with bold flavors. Unlike many spicy rice dishes that rely heavily on one type of heat, this recipe creates layers of flavor that build upon each other. The result is a dish that’s both satisfying as a side and substantial enough to serve as a main course.
Essential Ingredients Breakdown
Core Rice Components
| Ingredient | Quantity | Purpose | Substitution Options |
|---|---|---|---|
| Long-grain white rice | 2 cups | Base texture | Basmati, Jasmine rice |
| Chicken/Vegetable stock | 3 cups | Flavor foundation | Water + bouillon cubes |
| Olive oil | 3 tablespoons | Cooking medium | Vegetable oil, sunflower oil |
Aromatic Vegetables
| Ingredient | Quantity | Role | Preparation Notes |
|---|---|---|---|
| Large onion | 1 medium | Flavor base | Finely diced |
| Red bell pepper | 1 large | Sweetness, color | Strip-cut |
| Yellow bell pepper | 1 medium | Additional sweetness | Strip-cut |
| Garlic cloves | 4-5 cloves | Aromatic depth | Minced |
| Fresh tomatoes | 2 medium | Acidity, moisture | Diced, seeds removed |
Spice Blend Magic
| Spice | Quantity | Heat Level | Flavor Profile |
|---|---|---|---|
| Paprika | 2 tablespoons | Mild | Smoky, sweet |
| Peri-peri seasoning | 1.5 tablespoons | Medium-Hot | Citrusy, fiery |
| Cumin powder | 1 teaspoon | None | Earthy, warm |
| Oregano | 1 teaspoon | None | Herbal, Mediterranean |
| Cayenne pepper | ½ teaspoon | Hot | Sharp heat |
| Black pepper | ½ teaspoon | Mild | Pungent spice |
| Salt | To taste | None | Flavor enhancer |
Grab the Saving up to 50% from Target Deal Days (Mar 25 to 27, 2026)

My Step-by-Step Cooking Method
Preparation Phase (15 minutes)
I always start by getting all my ingredients ready – this makes the cooking process so much smoother! Here’s what I do:
- Rice Preparation: Rinse 2 cups of long-grain rice under cold water until the water runs clear. This removes excess starch and prevents the rice from becoming sticky.
- Vegetable Prep: Dice the onion finely, cut bell peppers into strips, mince garlic, and dice tomatoes. I remove the seeds from tomatoes to prevent excess moisture.
- Spice Blend: In a small bowl, I combine all the dry spices. This ensures even distribution when added to the dish.
Cooking Process (35 minutes)
Stage 1: Building the Flavor Base (8-10 minutes)
Heat 3 tablespoons of olive oil in a large, heavy-bottomed pan or Dutch oven over medium heat. I prefer using a pan with a thick base as it distributes heat evenly and prevents burning.
Add the diced onion first and sauté until it becomes translucent – this usually takes about 4-5 minutes. The key here is patience; properly cooked onions create the sweet foundation that balances the spices.
Next, add the minced garlic and cook for another minute until fragrant. Be careful not to burn the garlic as it can turn bitter.
Stage 2: Vegetable Integration (5-7 minutes)
Add the bell pepper strips to the pan. I cook these for about 5 minutes until they start to soften but still retain some crunch. This adds wonderful texture to the final dish.
Stir in the diced tomatoes and cook for 2-3 minutes until they start to break down and release their juices.
Stage 3: Spice Activation (2-3 minutes)
This is where the magic happens! Add your spice blend to the vegetables and stir continuously for 2-3 minutes. The spices need to bloom in the oil to release their full flavor potential. You’ll know it’s ready when the mixture becomes very aromatic.
Stage 4: Rice Addition and Liquid (20-25 minutes)
Add the rinsed rice to the pan and stir gently to coat each grain with the spiced vegetable mixture. This step is crucial as it ensures every grain of rice is infused with flavor.
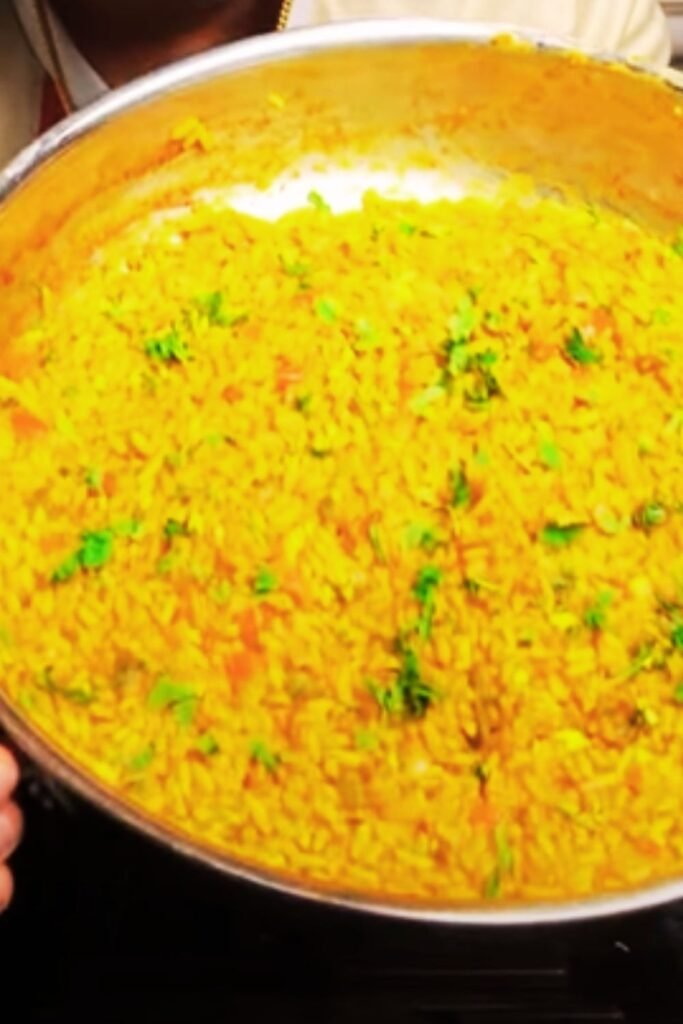
Pour in the stock gradually while stirring. I use chicken stock for richer flavor, but vegetable stock works perfectly for vegetarian versions. Bring the mixture to a boil, then reduce heat to low, cover, and simmer for 18-20 minutes.
Important tip: Resist the urge to lift the lid during cooking! This releases steam and can result in unevenly cooked rice.
Stage 5: Resting and Finishing (5 minutes)
Once the cooking time is complete, remove the pan from heat but keep it covered. Let it rest for 5 minutes – this allows the rice to finish steaming and absorb any remaining liquid.
After resting, fluff the rice gently with a fork, starting from the edges and working toward the center.
Grab the Saving up to 50% from Target Deal Days (Mar 25 to 27, 2026)
Nutritional Information Per Serving
| Nutrient | Amount | Daily Value % |
|---|---|---|
| Calories | 285 | 14% |
| Carbohydrates | 52g | 17% |
| Protein | 6g | 12% |
| Fat | 7g | 11% |
| Fiber | 3g | 12% |
| Sodium | 680mg | 30% |
| Vitamin C | 95mg | 106% |
| Vitamin A | 2100 IU | 42% |
Based on 6 servings per recipe
Serving Suggestions That I Love
Main Course Pairings
I’ve discovered that this spicy rice pairs beautifully with various proteins:
- Grilled chicken thighs marinated in peri-peri sauce
- Pan-seared fish fillets with a squeeze of lemon
- Roasted vegetables like zucchini, eggplant, and cherry tomatoes
- Black beans for a complete vegetarian protein
- Grilled halloumi cheese for a Mediterranean twist
Side Dish Combinations
When serving as a side, I love pairing it with:
- Fresh cucumber and tomato salad with mint
- Creamy coleslaw to balance the heat
- Grilled corn on the cob with lime and chili
- Simple green salad with lemon vinaigrette
- Roasted sweet potato wedges
Storage and Reheating Tips
Refrigerator Storage
- Store in airtight containers for up to 4 days
- Allow to cool completely before refrigerating
- Separate into individual portions for easy reheating
Freezer Storage
- Freeze for up to 3 months in freezer-safe containers
- Label with date and contents
- Thaw overnight in refrigerator before reheating
Reheating Methods
Microwave Method: Add 2-3 tablespoons of water or stock, cover, and heat in 30-second intervals, stirring between each interval.
Stovetop Method: Add a splash of stock to a pan, add the rice, cover, and heat on low for 5-7 minutes, stirring occasionally.
Oven Method: Preheat to 350°F, add rice to covered baking dish with a little liquid, and heat for 15-20 minutes.
Grab the Saving up to 50% from Target Deal Days (Mar 25 to 27, 2026)
Recipe Variations I’ve Tried
Protein-Added Versions
Chicken Spicy Rice: Add 1 pound of diced cooked chicken during the last 5 minutes of cooking.
Shrimp Variation: Stir in 1 pound of cooked shrimp just before serving to prevent overcooking.
Vegetarian Protein: Add a can of black beans or chickpeas for extra protein and fiber.
Heat Level Adjustments
Mild Version: Reduce peri-peri seasoning to 1 tablespoon and omit cayenne pepper.
Extra Spicy: Add 1 finely chopped fresh chili pepper and increase cayenne to 1 teaspoon.
Sweet and Spicy: Add 1 tablespoon of honey or brown sugar to balance the heat.
Troubleshooting Common Issues
Rice Problems and Solutions
| Problem | Cause | Solution |
|---|---|---|
| Mushy rice | Too much liquid or overcooking | Use correct liquid ratio, don’t lift lid |
| Dry, hard rice | Insufficient liquid | Add warm stock gradually |
| Burnt bottom | Heat too high | Use lower heat, heavier pan |
| Bland flavor | Under-seasoned | Taste and adjust spices before adding liquid |
| Uneven cooking | Poor heat distribution | Stir once after adding liquid, use heavy-bottomed pan |
My Personal Tips for Success
After making this recipe dozens of times, I’ve learned some valuable lessons that I want to share with you:
Toast the Rice: For even more flavor, lightly toast the rice in the spiced oil mixture for 2-3 minutes before adding liquid. This creates a nuttier flavor and helps prevent sticking.
Quality Matters: Invest in good-quality peri-peri seasoning or make your own. The spice blend is the heart of this dish, so don’t skimp on quality.
Stock Selection: I always use homemade or high-quality store-bought stock. It makes a significant difference in the final flavor.
Resting Time: Never skip the resting period after cooking. This step is crucial for perfect texture.
Fresh Ingredients: Use fresh garlic, onions, and bell peppers when possible. Frozen or pre-cut vegetables won’t give you the same depth of flavor.
Grab the Saving up to 50% from Target Deal Days (Mar 25 to 27, 2026)
Frequently Asked Questions
Q: Can I use brown rice instead of white rice? Yes, but you’ll need to adjust the cooking time and liquid. Brown rice typically needs 45-50 minutes and an extra ½ cup of liquid. The texture will be chewier and nuttier.
Q: How spicy is this recipe compared to restaurant Nando’s rice? My recipe aims for medium heat level, similar to Nando’s regular spicy rice. You can easily adjust the heat by modifying the amount of peri-peri seasoning and cayenne pepper.
Q: Can I make this recipe vegan? Absolutely! Simply use vegetable stock instead of chicken stock, and ensure your peri-peri seasoning doesn’t contain any animal products.
Q: What if I can’t find peri-peri seasoning? You can make your own by combining 2 tablespoons paprika, 1 teaspoon each of garlic powder, onion powder, and oregano, ½ teaspoon each of cayenne and black pepper, and ¼ teaspoon of ground ginger.
Q: Can I prepare this dish ahead of time? Yes, this dish actually tastes better the next day as the flavors have time to meld. Store it properly and reheat using one of the methods I mentioned above.
Q: Why does my rice turn out sticky? Sticky rice usually results from not rinsing the rice properly before cooking or using too much liquid. Make sure to rinse until the water runs clear and measure your liquid accurately.
Q: Can I use a rice cooker for this recipe? While possible, I don’t recommend it because the sautéing step is crucial for flavor development. The stovetop method allows you to build layers of flavor that a rice cooker can’t replicate.
Q: How do I know when the rice is perfectly cooked? The rice is done when all liquid is absorbed, the grains are tender, and you can easily fluff it with a fork. If there’s still liquid after the recommended cooking time, continue cooking uncovered for a few more minutes.
Q: Can I double this recipe? Yes, but use a larger pan to ensure even cooking. You might need to extend the cooking time by 5-10 minutes and use a bit more liquid.
Q: What’s the best way to serve this for a dinner party? I like to serve it family-style in a large, colorful serving bowl garnished with fresh herbs like cilantro or parsley. It pairs wonderfully with grilled meats and a simple salad.
This homemade Nando’s spicy rice has become a regular feature at my dinner table, and I’m confident it will become a favorite in your home too. The combination of aromatic spices, perfectly cooked rice, and that signature heat creates a dish that’s both comforting and exciting. Whether you’re serving it as a side dish for your weekend barbecue or as a main course with some added protein, this recipe delivers restaurant-quality results every single time.
The best part? Once you master this basic technique, you can experiment with your own variations and make it uniquely yours. I encourage you to play with different vegetables, adjust the spice levels to your preference, and discover your own perfect version of this beloved dish.