If you’re craving something crispy, spicy, and utterly satisfying, look no further than this Spicy Korean Chicken Katsu recipe. I’ve spent years perfecting this fusion dish that combines the crispy, golden perfection of Japanese katsu with the bold, fiery flavors of Korean cuisine. The result? An irresistible meal that’ll have your family and friends begging for seconds.
What Makes This Recipe Special
Korean Chicken Katsu takes the traditional Japanese dish to exciting new heights by incorporating gochujang (Korean chili paste) and other Korean ingredients. The chicken remains juicy on the inside while maintaining that signature crispy exterior we all love. When sliced and drizzled with the sweet and spicy sauce, it creates a perfect harmony of textures and flavors that’s simply impossible to resist.
I first discovered this fusion dish during my travels through Seoul’s vibrant food scene, where innovative chefs were blending culinary traditions with delicious results. After several attempts in my own kitchen, I’m thrilled to share my perfected version with you!
Ingredients Breakdown
For the Chicken:
- 4 boneless, skinless chicken breasts (about 1.5 pounds total)
- 1 teaspoon salt
- 1/2 teaspoon black pepper
- 1/2 teaspoon garlic powder
- 2 large eggs, beaten
- 1 cup all-purpose flour
- 2 cups panko breadcrumbs
- 1 tablespoon Korean gochugaru (red pepper flakes) – mixed into the panko
- Vegetable oil for frying
For the Spicy Korean Sauce:
- 3 tablespoons gochujang (Korean chili paste)
- 2 tablespoons soy sauce
- 2 tablespoons rice vinegar
- 2 tablespoons honey or maple syrup
- 1 tablespoon sesame oil
- 2 cloves garlic, minced
- 1 teaspoon grated fresh ginger
- 1 tablespoon toasted sesame seeds
- 2 green onions, finely chopped
For Serving:
- Steamed short-grain rice
- Kimchi
- Thinly sliced cucumbers
- Sesame seeds
- Green onions, sliced diagonally
Essential Kitchen Tools
Having the right tools ready will make this recipe much easier to execute:
- Meat mallet or rolling pin (for pounding chicken)
- 3 shallow bowls (for breading station)
- Large, deep skillet or Dutch oven (for frying)
- Cooking thermometer
- Paper towels
- Wire cooling rack
- Small saucepan (for the sauce)
- Sharp knife
- Cutting board
Preparation Method
Step 1: Prepare the Chicken
- Place each chicken breast between two sheets of plastic wrap.
- Using a meat mallet or rolling pin, gently pound the chicken until it’s about 1/2 inch thick throughout. This ensures even cooking.
- Season both sides of each chicken breast with salt, pepper, and garlic powder.
Step 2: Set Up Your Breading Station
- Create a breading station with three shallow dishes:
- First dish: All-purpose flour
- Second dish: Beaten eggs
- Third dish: Panko breadcrumbs mixed with Korean red pepper flakes
Step 3: Bread the Chicken
- Take one seasoned chicken breast and dredge it in the flour, coating completely and shaking off any excess.
- Dip the floured chicken into the beaten eggs, ensuring it’s fully coated.
- Finally, press the chicken into the panko mixture, making sure both sides and edges are well covered with breadcrumbs.
- Place the breaded chicken on a plate and repeat with the remaining chicken breasts.
- Allow the breaded chicken to rest for 5 minutes to help the coating adhere better.
Step 4: Fry the Chicken
- In a large, deep skillet or Dutch oven, heat about 1/2 inch of vegetable oil to 340°F (170°C).
- Carefully place one or two pieces of breaded chicken into the hot oil (don’t overcrowd the pan).
- Fry for about 3-4 minutes per side until golden brown and crispy. The internal temperature should reach 165°F (74°C).
- Transfer the fried chicken to a wire rack lined with paper towels to drain excess oil.
- Repeat with remaining chicken pieces.
Step 5: Make the Spicy Korean Sauce
- In a small saucepan, combine gochujang, soy sauce, rice vinegar, honey, sesame oil, minced garlic, and grated ginger.
- Heat the mixture over medium-low heat, stirring frequently, until it begins to simmer.
- Remove from heat and stir in the toasted sesame seeds and green onions.
- Let the sauce cool slightly – it will thicken a bit as it cools.
Step 6: Serve
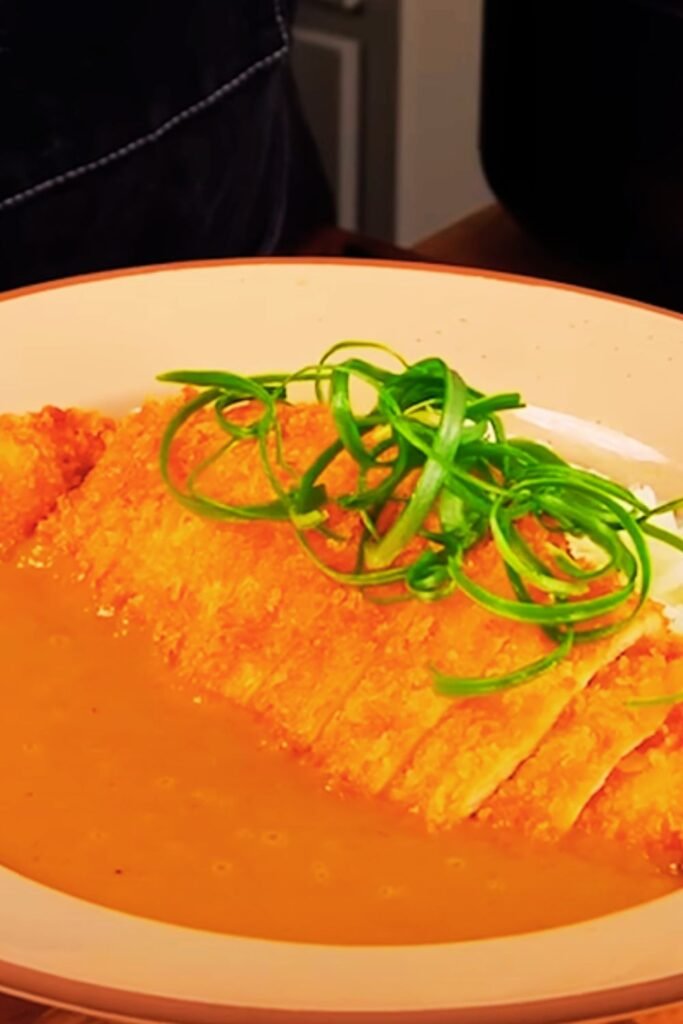
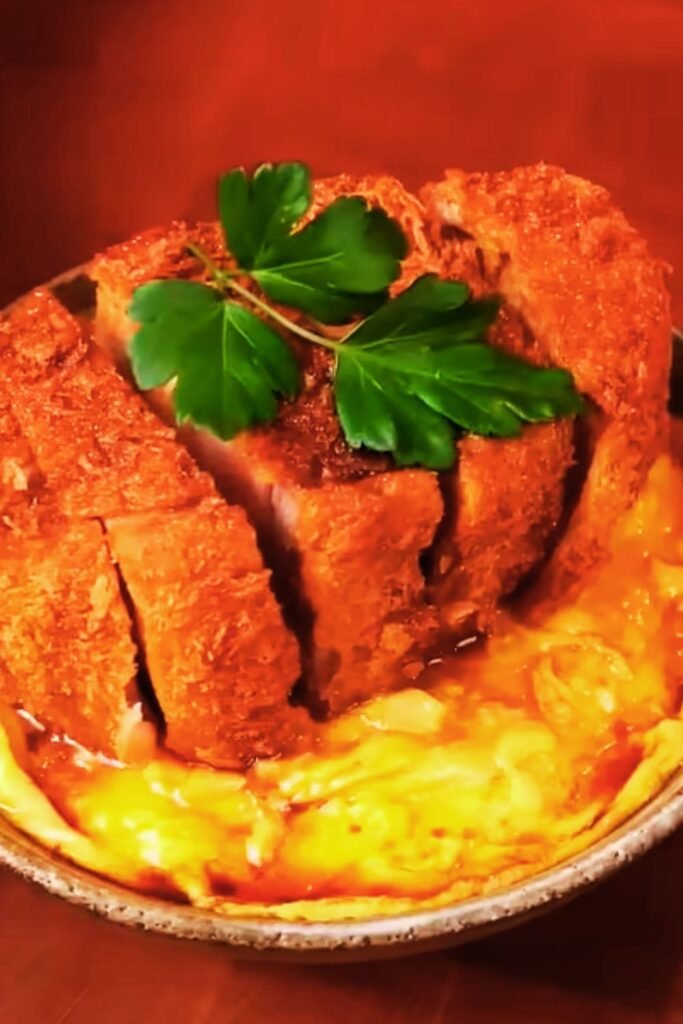
- Slice the fried chicken katsu into strips, cutting against the grain.
- Drizzle generously with the spicy Korean sauce.
- Serve with steamed rice, kimchi, sliced cucumbers, and garnish with additional sesame seeds and green onions.
Recipe Variations
One of the joys of fusion cuisine is its versatility. Here are some exciting ways to customize this dish:
Protein Alternatives
- Pork Cutlets: Substitute pork loin for a traditional tonkatsu-style variation.
- Tofu Katsu: For a vegetarian option, use extra-firm tofu, pressed and sliced into 1/2-inch thick slabs.
- Chicken Thighs: For juicier meat with more flavor, use boneless, skinless chicken thighs (pounded thin).
Heat Level Adjustments
- Mild Version: Reduce the amount of gochujang and gochugaru by half.
- Extra Spicy: Double the gochujang and add 1 teaspoon of Korean red pepper powder to the sauce.
- Sweet Heat: Add an extra tablespoon of honey to balance increased spice levels.
Coating Options
- Gluten-Free: Use gluten-free flour and gluten-free panko breadcrumbs.
- Extra Crunchy: Double-dip the chicken (flour-egg-panko-egg-panko) for an ultra-crispy exterior.
- Flavor-Infused Panko: Mix dried herbs or garlic powder into the panko for added flavor.
Nutritional Information
Per serving (1 chicken breast with sauce, without sides)
| Nutrient | Amount |
|---|---|
| Calories | 425 kcal |
| Protein | 38g |
| Carbohydrates | 32g |
| Dietary Fiber | 2g |
| Sugars | 8g |
| Fat | 18g |
| Saturated Fat | 3g |
| Cholesterol | 145mg |
| Sodium | 980mg |
| Potassium | 520mg |
| Iron | 2.5mg |
| Calcium | 45mg |
Time Management Chart
| Stage | Time Required | Make-Ahead Potential |
|---|---|---|
| Chicken Preparation | 15 minutes | Can be seasoned up to 8 hours ahead and refrigerated |
| Breading Process | 10 minutes | Not recommended in advance (coating becomes soggy) |
| Frying | 15-20 minutes | Can be done 30 minutes ahead and kept warm in oven |
| Sauce Preparation | 10 minutes | Can be made up to 3 days ahead and refrigerated |
| Assembly and Serving | 5 minutes | Serve immediately for best texture |
| Total Time | 55-60 minutes | Some components can be prepared in advance |
Common Mistakes to Avoid
- Oil Temperature Issues: If your oil isn’t hot enough (at least 340°F), the breading will absorb too much oil and become soggy rather than crispy. Too hot (above 360°F), and the exterior will burn before the chicken cooks through.
- Uneven Chicken Thickness: Failing to pound the chicken to an even thickness results in undercooked thick parts and overcooked thin sections. Take your time with this important step!
- Crowding the Pan: Adding too many pieces to the pan at once lowers the oil temperature drastically, resulting in greasy, soggy katsu. Fry in batches, even if it takes longer.
- Not Resting the Breaded Chicken: Letting the breaded chicken rest for 5 minutes before frying helps the coating adhere better and prevents it from falling off during cooking.
- Over-Handling the Breading: Pressing too hard when applying the panko can compact the breadcrumbs and result in a dense rather than light, crispy coating.
- Skipping the Wire Rack: Placing fried katsu directly on paper towels can trap steam and soften the underside. Using a wire rack allows air circulation for maximum crispiness.
Chef’s Tips for Perfect Korean Chicken Katsu
- Double-Fry Technique: For the absolute crispiest result, try the double-fry method. Fry the chicken at 320°F until cooked through, let rest for 2 minutes, then briefly fry again at 350°F for ultimate crispiness.
- Panko Quality Matters: Invest in high-quality Japanese panko breadcrumbs for the best texture. They’re lighter and crispier than regular breadcrumbs.
- Sauce Temperature: The spicy Korean sauce is delicious both warm and at room temperature, but I find the flavors bloom best when served slightly warm rather than piping hot.
- Meat Temperature: Let the chicken come to room temperature for about 15 minutes before breading. Cold chicken straight from the refrigerator can drop the oil temperature too dramatically when frying.
- Oil Management: After frying each batch, remove any loose breadcrumbs from the oil using a fine-mesh strainer to prevent burning and bitter flavors.
- Cutting Technique: Use a very sharp knife and clean cuts when slicing the katsu to preserve the crispy coating. Cut at a slight angle for the most attractive presentation.
Serving Suggestions
This Spicy Korean Chicken Katsu works beautifully as part of a larger Korean-inspired feast. Here are some perfect pairings:
Side Dishes
- Kimchi: The fermented tanginess cuts through the richness of the fried chicken
- Korean Cucumber Salad (Oi Muchim): A refreshing, lightly spiced cucumber side
- Pickled Daikon Radish: The sweet-tangy flavor and crunchy texture complement the katsu perfectly
- Korean Bean Sprout Salad (Kongnamul Muchim): Light and nutritious balance to the meal
- Steamed Broccoli with Sesame Oil: For a simple green vegetable component
Serving Styles
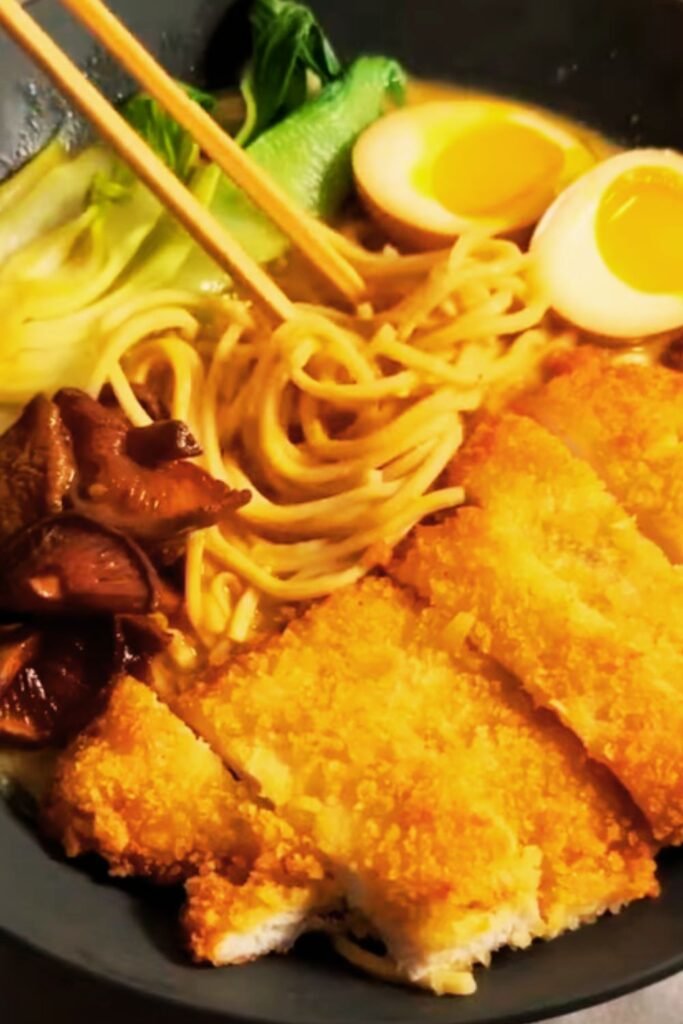
- Katsu Rice Bowl: Serve over rice with sauce drizzled on top for a simple donburi-style meal
- Katsu Sandwich: Place between soft milk bread with shredded cabbage and sauce for a Korean-inspired katsu sando
- Family Style: Serve whole katsu pieces on a platter with sauce on the side for dipping
- Bento Box: Create individual boxes with katsu, rice, and small portions of several side dishes
Drink Pairings
- Barley Tea (Boricha): A traditional Korean roasted barley tea that cleanses the palate
- Sparkling Water with Yuzu: The citrus notes and bubbles cut through the richness
- Korean Milky Soda: A refreshing sweet-and-creamy accompaniment popular in Korea
- Iced Green Tea: A refreshing, slightly bitter contrast to the spicy-sweet flavors
Storage and Reheating Instructions
While Spicy Korean Chicken Katsu is best enjoyed fresh from the fryer, here’s how to handle any leftovers:
Storage
- Refrigeration: Store cooled katsu in an airtight container, separating layers with parchment paper. Keep sauce in a separate container. Refrigerate for up to 2 days.
- Freezing: Fried katsu can be frozen for up to 1 month. Wrap individual pieces tightly in plastic wrap, then foil, and place in a freezer bag.
Reheating Methods
| Method | Instructions | Results |
|---|---|---|
| Oven | Preheat to 350°F (175°C). Place katsu on a wire rack over a baking sheet. Bake for 10-15 minutes until heated through and crispy. | Best for maintaining crispiness |
| Air Fryer | Heat at 350°F (175°C) for 3-4 minutes until crispy and heated through. | Excellent crispiness, quick method |
| Toaster Oven | Heat at medium setting for 5-7 minutes, watching carefully to prevent burning. | Good for small portions |
| Microwave | Not recommended – results in soggy breading | Poor texture |
| Stovetop | Heat a small amount of oil in a skillet over medium heat. Fry gently for 1-2 minutes per side until crispy and heated through. | Good crispiness but uses additional oil |
Sauce Refreshing
If the sauce thickens too much in storage, gently warm it with a splash of water or chicken broth while stirring until it reaches the desired consistency.
Health and Dietary Considerations
This dish can be adapted for various dietary needs:
Allergy Modifications
- Gluten-Free: Use gluten-free flour, gluten-free panko, and tamari instead of soy sauce
- Egg-Free: Replace egg wash with buttermilk or a mixture of dijon mustard and water
- Soy-Free: Use coconut aminos instead of soy sauce in the sauce
Healthier Adaptations
- Baked Version: After breading, spray with cooking oil and bake at 425°F (220°C) for 20-25 minutes, flipping halfway
- Air Fryer Method: Cook at 375°F (190°C) for 12-15 minutes, flipping halfway and spraying with oil
- Reduced Sodium: Use low-sodium soy sauce and decrease the amount by half
Calorie Reduction Techniques
- Lighter Breading: Use a thinner layer of panko and spray with oil instead of deep frying
- Leaner Protein: Use chicken breast tenderloins which are naturally portion-controlled
- Sauce Adjustment: Replace some or all of the honey with a zero-calorie sweetener
The Cultural Backstory
This Korean Chicken Katsu represents the beautiful evolution of cross-cultural cuisine. Japanese katsu (breaded, fried cutlets) emerged in the late 19th century when Japan opened to Western influences. The dish was inspired by European schnitzel but adapted with local ingredients and techniques.
Korean cuisine, with its bold flavors and liberal use of chili peppers, brings a new dimension to the traditionally milder Japanese dish. This fusion reflects the complex historical relationship between Korea and Japan while celebrating how food transcends political boundaries.
In modern South Korea, particularly in trendy districts of Seoul like Hongdae and Gangnam, fusion restaurants have popularized Korean-style katsu, adding gochujang and other distinctly Korean flavors to create something entirely new yet respectful of both culinary traditions.
The addition of gochujang—a fermented chili paste central to Korean cooking for centuries—brings not just heat but depth, umami, and that distinctive Korean tang that makes this fusion dish so irresistible.
Q&A Section
Q: Can I prepare any components of this dish in advance for a dinner party? A: Absolutely! The spicy Korean sauce can be made up to 3 days ahead and stored in the refrigerator. You can also pound and season the chicken a day before. For the freshest result, bread and fry the chicken just before serving, though you can bread the chicken up to 2 hours ahead and keep it refrigerated until frying time.
Q: My sauce turned out too spicy. How can I tone it down? A: If your sauce is too spicy, there are several easy fixes. Add more honey or a tablespoon of brown sugar to balance the heat with sweetness. You can also add a tablespoon of butter to mellow the spice or stir in some plain yogurt or a splash of cream. Another option is simply diluting with a bit more soy sauce and a splash of water.
Q: Is there a way to make this dish with less oil? A: Yes! This recipe works wonderfully in an air fryer. Spray the breaded chicken with cooking oil and air fry at 375°F (190°C) for about 12-15 minutes, flipping halfway through. You can also bake it in the oven at 425°F (220°C) for 20-25 minutes on a wire rack over a baking sheet, again flipping halfway.
Q: My breading keeps falling off during frying. What am I doing wrong? A: This common issue usually happens for a few reasons: 1) The chicken might be too wet before breading—pat it dry first, 2) You may be skipping the “resting” period after breading—let it sit for 5 minutes before frying, 3) Your oil might not be hot enough—use a thermometer to confirm it’s at 340°F, or 4) You might be flipping the chicken too often—try to flip just once during frying.
Q: How can I tell when the chicken is cooked through without cutting into it? A: The most reliable method is using an instant-read thermometer inserted into the thickest part of the chicken—it should read 165°F (74°C). If you don’t have a thermometer, cook the pounded chicken for about 3-4 minutes per side in 340°F oil. The breading should be deep golden brown, and the chicken should feel firm but slightly springy when pressed with tongs.
Q: Can I use chicken thighs instead of breasts? A: Definitely! Boneless, skinless chicken thighs work wonderfully and often provide more flavor and moisture. Pound them to an even thickness (about 1/2 inch) and follow the same cooking instructions. They may need an extra minute of cooking time compared to breasts.
Q: Where can I find ingredients like gochujang and gochugaru if I don’t have an Asian market nearby? A: Many mainstream grocery stores now carry these ingredients in their international food sections. You can also easily find them online through retailers like Amazon, Weee!, or specialty Korean food websites. In a pinch, you could substitute gochujang with a mixture of miso paste and sriracha, though the flavor won’t be exactly the same.
Final Thoughts
Creating this Spicy Korean Chicken Katsu has been one of my favorite culinary adventures. The harmonious balance between the crispy Japanese-style cutlet and the bold, spicy Korean sauce represents everything I love about fusion cuisine—respecting traditions while creating something excitingly new.
Don’t be intimidated by the multiple steps; each one is straightforward, and the result is absolutely worth the effort. This dish has become a regular request from friends and family at my dinner parties, and I’m confident it will earn a special place in your recipe collection too.
Whether you’re an experienced cook or a kitchen novice, this recipe offers room for personalization while providing a roadmap to delicious results. The vibrant colors, varied textures, and complex flavors make it as impressive to serve as it is satisfying to eat.
I hope you enjoy making (and devouring) this Spicy Korean Chicken Katsu as much as I do. Happy cooking!