There’s something magical about the combination of garlic, butter, and succulent shrimp that makes my taste buds dance with joy. I’ve been perfecting this recipe for years, and I’m thrilled to share my ultimate garlic butter shrimp with you today. This dish has rescued countless last-minute dinner dilemmas in my household, impressing both family and unexpected guests with its restaurant-quality flavor despite taking just 15 minutes to prepare.
What makes this recipe so special? It’s the perfect balance of rich, aromatic garlic butter sauce coating each perfectly cooked shrimp. The recipe is deceptively simple but delivers complex flavors that will have everyone thinking you spent hours in the kitchen. Whether you’re a seafood enthusiast or just looking for a quick, impressive meal, this garlic butter shrimp recipe deserves a permanent spot in your cooking repertoire.
The Secret to Perfect Garlic Butter Shrimp
The magic of this dish comes down to three critical factors: using the freshest shrimp possible, perfecting the cooking time, and creating a garlic butter sauce that strikes the perfect balance between richness and zesty flavor. I’ve found that taking the time to properly prepare your shrimp and using high-quality ingredients makes all the difference between a good dish and an unforgettable one.
When I first started making this recipe, I’d often overcook the shrimp, resulting in a rubbery texture. Through trial and error, I’ve learned that shrimp cook incredibly quickly—just 2-3 minutes per side depending on their size. That beautiful pink color with a slight opacity is your visual cue for perfectly cooked shrimp.
Ingredients You’ll Need
For this sumptuous garlic butter shrimp, I’ve carefully selected ingredients that complement each other perfectly:
- 1½ pounds large shrimp (21-25 count), peeled and deveined
- 6 tablespoons unsalted butter, divided
- 8 cloves garlic, minced (about 3 tablespoons)
- ¼ teaspoon red pepper flakes (adjust to taste)
- ¼ cup dry white wine (or chicken broth)
- 2 tablespoons fresh lemon juice
- ¼ cup fresh parsley, finely chopped
- Salt and freshly ground black pepper, to taste
- 1 lemon, cut into wedges for serving
Essential Equipment
While this recipe doesn’t require any fancy kitchen gadgets, having the right tools will make the cooking process smoother:
- Large skillet or sauté pan (12-inch recommended)
- Sharp knife for mincing garlic
- Cutting board
- Wooden spoon or silicone spatula
- Paper towels for patting shrimp dry
- Measuring spoons and cups
- Garlic press (optional but helpful)
Preparation: Setting the Stage for Success
Before diving into the cooking process, I always recommend following these preparation steps to ensure the best results:
Preparing Your Shrimp
Proper shrimp preparation is fundamental to this recipe’s success:
- If using frozen shrimp, thaw them completely by placing in the refrigerator overnight or under cold running water for 5-7 minutes.
- Once thawed, peel the shrimp, leaving the tails on if desired for presentation.
- Remove the dark vein running along the back of each shrimp using a small knife or toothpick.
- Rinse the shrimp under cold water and pat thoroughly dry with paper towels.
- Season with a light sprinkle of salt and pepper.
Pro tip: Don’t skip patting the shrimp dry! Excess moisture prevents proper browning and can make your sauce watery.
Preparing Your Aromatics
The foundation of flavor comes from properly prepared aromatics:
- Peel and mince the garlic cloves finely (or use a garlic press).
- Chop the fresh parsley, separating some for garnish.
- Cut lemon in half—one half for juicing and the other half for cutting into wedges for serving.
- Measure out your wine or broth and have all ingredients within arm’s reach of your cooking area.
Cooking Method: The Step-by-Step Process
Now that everything is prepped and ready, let’s dive into the cooking process:
Step 1: Sear the Shrimp
- Heat a large skillet over medium-high heat.
- Add 2 tablespoons of butter and let it melt completely.
- When the butter is hot but not smoking, add the shrimp in a single layer (work in batches if necessary to avoid overcrowding).
- Cook for approximately 2 minutes per side until they turn pink and start to curl.
- Remove the shrimp to a plate and set aside.
Step 2: Create the Garlic Butter Sauce
- Reduce heat to medium and add the remaining 4 tablespoons of butter to the same pan.
- Once melted, add the minced garlic and red pepper flakes.
- Sauté for 30-60 seconds, until fragrant but not browned (burnt garlic tastes bitter).
- Pour in the white wine or broth, using a wooden spoon to scrape up any browned bits from the bottom of the pan.
- Allow the liquid to simmer for 1-2 minutes until slightly reduced.
- Stir in the lemon juice and half of the chopped parsley.
Step 3: Bring It All Together
- Return the shrimp to the pan, along with any accumulated juices.
- Toss to coat in the sauce and cook for an additional 1-2 minutes until the shrimp are heated through and completely cooked.
- Taste and adjust seasoning with salt and pepper if needed.
- Remove from heat and sprinkle with remaining parsley.
Presentation and Serving Suggestions
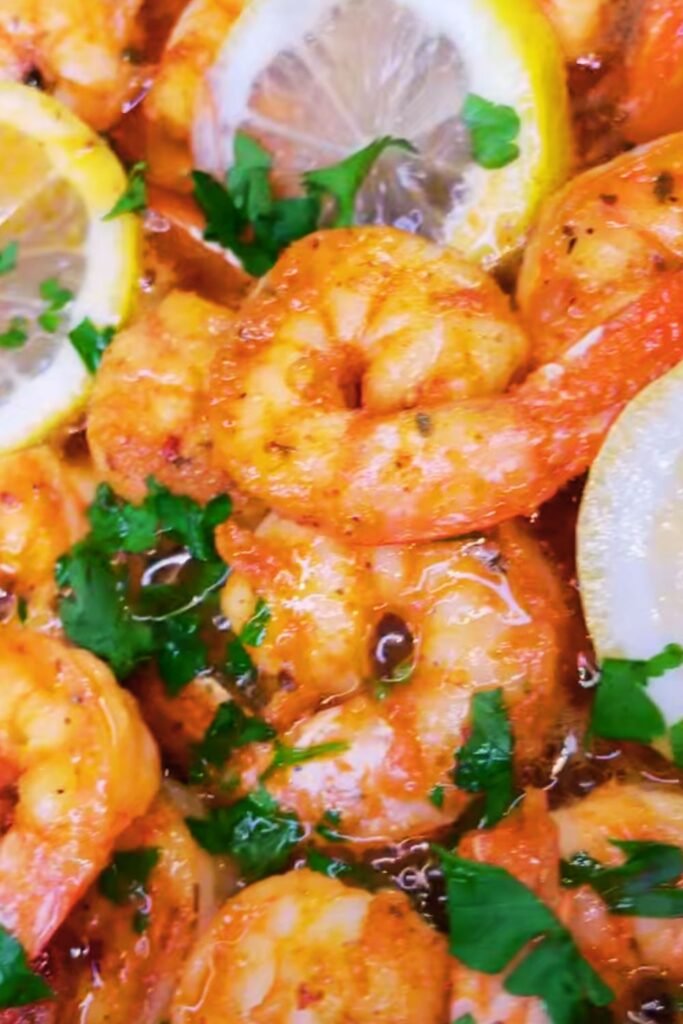
The visual appeal of this dish is nearly as important as its taste. I like to serve my garlic butter shrimp in a shallow bowl or plate with a slight rim to contain the delicious sauce. Arrange the shrimp in a circular pattern, drizzle the sauce over the top, and finish with a sprinkle of fresh parsley and a few lemon wedges on the side.
This versatile dish can be served in multiple ways:
As an Appetizer
- Serve with toothpicks and a small bowl of the sauce for dipping
- Arrange on a platter with lemon wedges for a stunning party starter
- Provide crusty bread on the side for sopping up the delicious sauce
As a Main Course
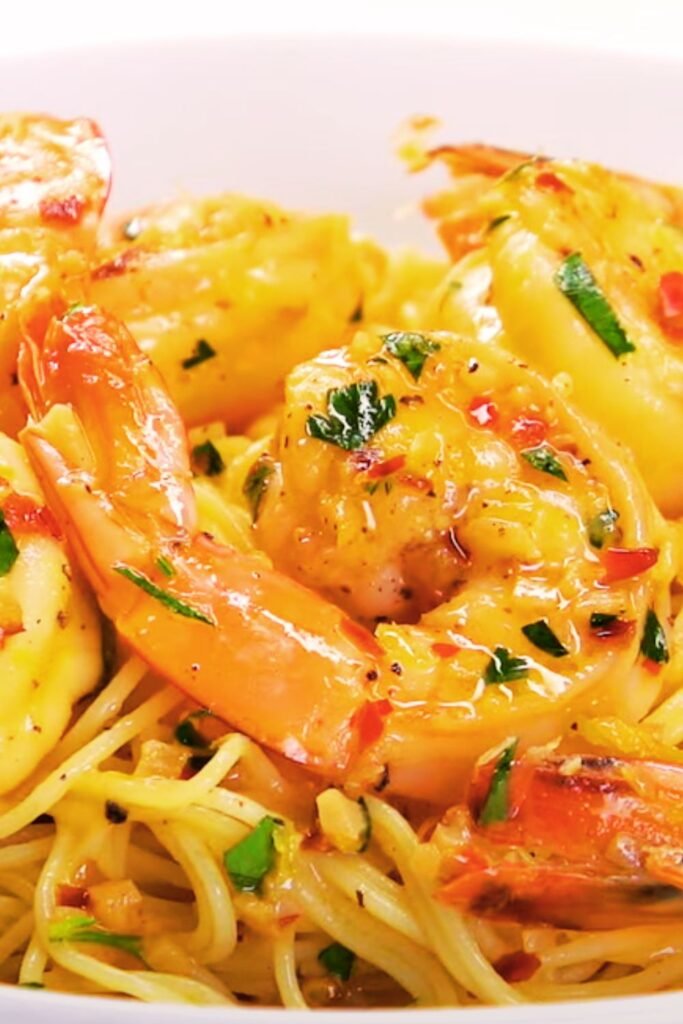
- Serve over pasta (linguine works beautifully)
- Pair with fluffy white rice or cauliflower rice for a low-carb option
- Accompany with roasted vegetables like asparagus or broccoli
- Serve alongside a crisp green salad with a light vinaigrette
Complementary Side Dishes
- Crusty French bread or garlic bread
- Steamed jasmine rice
- Lemon herb quinoa
- Roasted asparagus with lemon
- Sautéed spinach with garlic
- Fresh green salad with balsamic vinaigrette
Nutritional Information
Understanding the nutritional content of what we eat is important. Here’s a breakdown of what you can expect from a serving of this garlic butter shrimp:
| Nutrient | Amount per Serving (¼ of recipe) |
|---|---|
| Calories | 295 |
| Protein | 28g |
| Fat | 18g |
| Saturated Fat | 11g |
| Carbohydrates | 4g |
| Fiber | 0.5g |
| Sugar | 0.5g |
| Sodium | 890mg |
| Cholesterol | 245mg |
| Vitamin A | 15% DV |
| Vitamin C | 12% DV |
| Calcium | 8% DV |
| Iron | 15% DV |
Common Variations and Substitutions
While the classic recipe is perfect as is, I’ve experimented with numerous variations over the years to suit different dietary needs and flavor preferences:
Alternative Ingredients
| Original Ingredient | Possible Substitutions | Notes |
|---|---|---|
| Butter | Olive oil | Lighter flavor, dairy-free option |
| Butter | Ghee | Richer flavor, suitable for some dairy sensitivities |
| White wine | Chicken broth | Alcohol-free option |
| White wine | Vegetable broth | Vegetarian option |
| Fresh garlic | Garlic powder | Use 1 tsp in place of 3 tbsp fresh |
| Fresh parsley | Dried parsley | Use 1 tbsp instead of ¼ cup fresh |
| Red pepper flakes | Cajun seasoning | Adds complexity and heat |
| Lemon juice | Lime juice | Creates a different but complementary citrus note |
Popular Flavor Variations
Here are some delicious variations I’ve developed over the years:
- Mediterranean Style: Add 1 cup halved cherry tomatoes and ½ cup crumbled feta cheese at the end of cooking
- Coconut Curry: Substitute half the butter with coconut milk and add 1 tablespoon curry powder
- Herb Garden: Add 1 tablespoon each of fresh chopped basil, thyme, and oregano along with the parsley
- Cajun Kick: Add 1 tablespoon Cajun seasoning and a diced bell pepper
- Lemon Pepper: Double the lemon juice and add 2 teaspoons freshly ground black pepper
Troubleshooting Common Issues
Even experienced cooks encounter challenges. Here are solutions to common issues that might arise:
Problem: Rubbery Shrimp
Solution: Shrimp cook extremely quickly. Remove them from heat as soon as they turn pink and opaque. Remember that they will continue cooking slightly from residual heat.
Problem: Watery Sauce
Solution: Make sure to thoroughly pat the shrimp dry before cooking. If your sauce is still too thin, you can add a small amount of cornstarch slurry (½ teaspoon cornstarch mixed with 1 tablespoon cold water) to the simmering sauce.
Problem: Bitter Garlic Taste
Solution: Garlic burns easily and develops a bitter flavor when overcooked. Always sauté garlic just until fragrant, usually 30-60 seconds, before adding liquid ingredients.
Problem: Bland Flavor
Solution: Season adequately with salt throughout the cooking process, not just at the end. Also, make sure your pan is hot enough when searing the shrimp to develop those flavorful browned bits on the bottom of the pan.
Storing and Reheating Leftovers

While this dish is best enjoyed fresh, leftovers can still be delicious if handled properly:
Storage Tips
- Allow the shrimp to cool completely before refrigerating
- Store in an airtight container for up to 2 days
- Keep sauce and shrimp together to prevent drying out
Reheating Methods
| Method | Instructions | Notes |
|---|---|---|
| Stovetop | Heat in a skillet over medium-low heat for 2-3 minutes | Best for preserving texture |
| Microwave | Heat in 30-second intervals at 50% power, stirring between | Quickest method but can toughen shrimp |
| Oven | Warm at 300°F for 5-7 minutes in an oven-safe dish | Good for larger portions |
Important: Be extremely careful not to overcook when reheating, as shrimp can quickly become tough and rubbery.
Selecting the Best Shrimp
The quality of your shrimp significantly impacts the final dish. Here’s what I look for when selecting shrimp:
Fresh vs. Frozen
Most “fresh” shrimp at supermarkets was actually frozen and thawed. Unless you live coastal with access to truly fresh shrimp, high-quality frozen shrimp is often the better choice. It’s typically frozen right after catching, preserving its freshness.
Size Matters
Shrimp sizes are indicated by count per pound:
- Jumbo: 16-20 per pound
- Large: 21-30 per pound
- Medium: 31-35 per pound
- Small: 36-45 per pound
For this recipe, I recommend large shrimp (21-25 count) as they cook evenly while remaining substantial enough to stand up to the sauce.
Sustainable Choices
When possible, look for shrimp certified by the Marine Stewardship Council or labeled with Best Aquaculture Practices to ensure sustainable sourcing.
Health Benefits of Shrimp
Many people don’t realize that shrimp isn’t just delicious—it’s also nutritious when prepared properly:
- High-Quality Protein: Shrimp provides about 24 grams of protein per 4-ounce serving
- Low in Calories: A 4-ounce serving contains approximately 120 calories (before adding butter sauce)
- Rich in Nutrients: Good source of selenium, vitamin B12, phosphorus, and iodine
- Contains Antioxidants: Astaxanthin, a carotenoid antioxidant that gives shrimp its pink color, has anti-inflammatory properties
Of course, the butter sauce adds richness and calories, but for those monitoring intake, you can reduce the butter amount and still enjoy delicious results.
Questions & Answers
Q: Can I make this recipe with frozen shrimp? Absolutely! Just make sure to thaw them completely first. The best method is overnight in the refrigerator, but you can also place them in a colander under cold running water for 5-7 minutes if you’re short on time. Ensuring they’re fully thawed and patted dry is crucial for proper cooking.
Q: How can I tell when the shrimp are perfectly cooked? Perfectly cooked shrimp turn from gray and translucent to pink and opaque. They also curl into a loose “C” shape. If they curl into a tight “O” shape, they’re overcooked. The total cooking time is usually just 4-5 minutes total (2-3 minutes per side), depending on size.
Q: Is there a way to make this dish dairy-free? Yes! You can substitute the butter with olive oil or a good quality dairy-free butter alternative. The flavor profile will change slightly, but it will still be delicious. If using olive oil, consider adding a pinch more salt to compensate for the salt typically found in butter.
Q: What’s the best way to devein shrimp? The easiest way is to use sharp kitchen scissors or a small paring knife to cut a shallow line along the back of the shrimp, then use the tip of the knife or a toothpick to lift out the dark vein. Many grocery stores sell shrimp that are already deveined to save you this step.
Q: Can I make this dish spicier? Definitely! Simply increase the amount of red pepper flakes, or add a finely diced fresh chili pepper like jalapeño or serrano when you sauté the garlic. You could also add a dash of hot sauce to the finished dish.
Q: What’s the best pan to use for this recipe? I recommend using a large (12-inch) heavy-bottomed skillet or sauté pan. Cast iron, stainless steel, or hard-anodized aluminum all work well. Non-stick pans don’t allow for as much fond (those flavorful browned bits) to develop, which adds depth to the sauce.
Q: How can I make the sauce creamier? For a creamier sauce, add 2-3 tablespoons of heavy cream or cream cheese after the wine has reduced but before adding the shrimp back to the pan. Let it simmer for a minute to thicken slightly.
Q: Can I use pre-minced garlic from a jar? While fresh garlic provides the best flavor, jarred minced garlic can work in a pinch. Use about 1½ tablespoons to replace the 8 cloves of fresh garlic called for in the recipe.
Making Ahead and Meal Prep Tips
This dish is best made fresh, but you can prepare components ahead of time to streamline the cooking process:
- Clean and devein shrimp up to 24 hours before cooking, storing them in the refrigerator
- Mince garlic and chop parsley up to 8 hours ahead, storing in separate airtight containers
- Measure out all other ingredients and have them ready beside your cooking station
For meal prep purposes, consider preparing the components separately:
- Cook the shrimp with just a bit of seasonings
- Prepare the garlic butter sauce separately
- Store both components in separate containers
- When ready to eat, gently reheat the sauce first, then add the shrimp just long enough to warm through
This method prevents overcooking the shrimp during reheating while still allowing you to enjoy the dish throughout the week.
Final Thoughts
Garlic butter shrimp has been my go-to recipe for years, whether I’m cooking for my family on a busy weeknight or entertaining guests who deserve something special. The beauty of this dish lies in its simplicity combined with its impressive flavor profile. The rich, garlicky butter sauce perfectly complements the natural sweetness of the shrimp, creating a harmonious balance that keeps everyone coming back for more.
What I love most about this recipe is its versatility. You can serve it as an elegant appetizer, a quick protein-packed lunch, or a satisfying dinner. The ingredients are straightforward and likely already in your kitchen, making it accessible even on short notice.
Remember, the key to truly exceptional garlic butter shrimp lies in not overcooking the shrimp and allowing the flavors of garlic, butter, and lemon to shine through without overpowering one another. With practice, you’ll develop an intuition for the perfect timing, but even your first attempt is bound to impress.
I hope this recipe brings as much joy to your table as it has to mine over the years. There’s something magical about sharing a delicious meal with loved ones, and this garlic butter shrimp has been the centerpiece of many meaningful moments in my home. I’d love to hear about your experience with this recipe and any personal touches you add to make it your own!