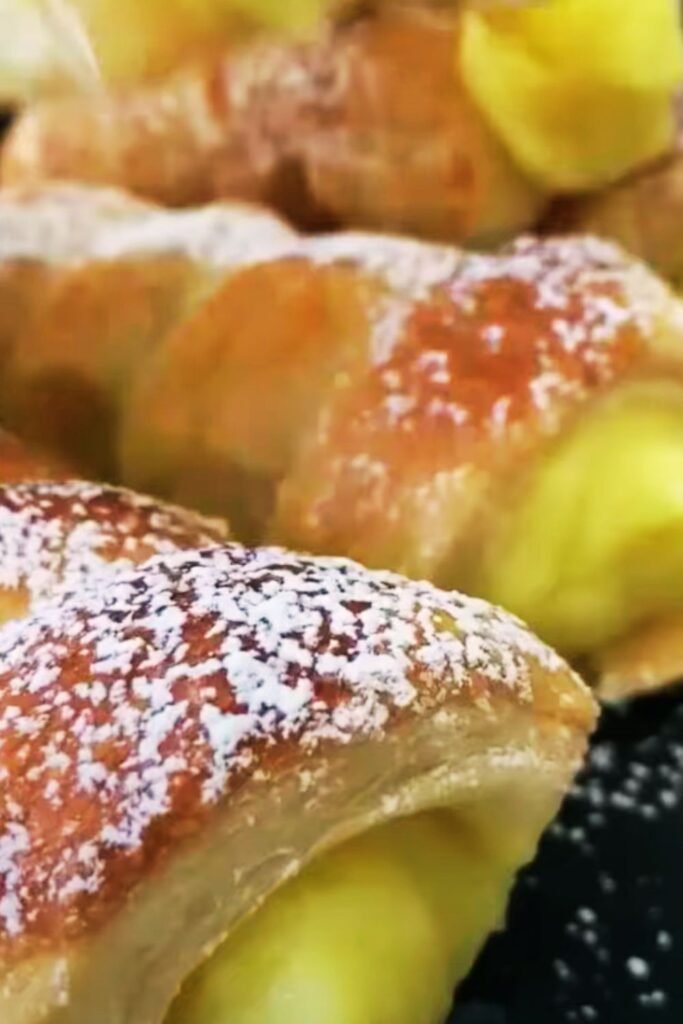
When I first laid eyes on Big Blue Monster Stuffed Cookies at a local bakery, I knew I had to recreate them in my own kitchen. These aren’t your ordinary cookies – they’re oversized, vibrant blue beauties packed with surprises that make every bite an adventure. After countless hours of testing and perfecting, I’m thrilled to share my foolproof recipe and all the secrets I’ve learned along the way.
The magic of these cookies lies not just in their striking appearance, but in their incredible texture and flavor combination. Picture this: a soft, chewy cookie base with a gorgeous blue hue, studded with chocolate chips, marshmallows, and other delightful mix-ins, then stuffed with a gooey center that oozes out with each bite. These cookies have become my signature treat, and I guarantee they’ll become yours too.
Understanding the Big Blue Monster Cookie Phenomenon
Big Blue Monster Cookies are oversized, colorfully tinted cookies that typically measure 4-6 inches in diameter. The “monster” designation comes from their impressive size and the generous amount of mix-ins they contain.
Stuffed Cookies refer to cookies that have a filling inserted into the center before baking, creating a surprise element when bitten into.
Cookie Dough Base serves as the foundation, usually made with butter, sugars, eggs, and flour, tinted with food coloring to achieve the signature blue color.
Mix-ins are the various add-ins like chocolate chips, marshmallows, sprinkles, or candies that give these cookies their “monster” personality.
Essential Ingredients for Perfect Big Blue Monster Cookies
Creating these show-stopping cookies requires specific ingredients that work together to achieve the perfect texture, flavor, and appearance. Here’s what I’ve learned makes all the difference:
Base Cookie Ingredients
| Ingredient | Amount | Purpose | Quality Tips |
|---|---|---|---|
| All-purpose flour | 2¼ cups | Structure and texture | Use fresh flour, sift for best results |
| Butter (unsalted) | 1 cup | Flavor and richness | Room temperature, high-quality preferred |
| Brown sugar | ¾ cup | Moisture and chewiness | Light brown sugar works best |
| Granulated sugar | ½ cup | Sweetness and spread | Fine granulated for smooth mixing |
| Large eggs | 2 whole | Binding and richness | Room temperature for better incorporation |
| Vanilla extract | 2 teaspoons | Flavor enhancement | Pure vanilla, not imitation |
| Baking soda | 1 teaspoon | Leavening agent | Fresh, not expired |
| Salt | ½ teaspoon | Flavor balance | Fine sea salt or table salt |
| Blue food coloring | 1-2 teaspoons | Signature color | Gel coloring gives better results |
Mix-in Components
| Mix-in Type | Amount | Flavor Profile | Texture Contribution |
|---|---|---|---|
| Mini chocolate chips | 1 cup | Sweet, rich chocolate | Firm bursts of flavor |
| Mini marshmallows | ½ cup | Sweet, vanilla notes | Soft, chewy pockets |
| Colorful sprinkles | ¼ cup | Vanilla sweetness | Crunchy texture contrast |
| Crushed cookies | ½ cup | Varies by cookie type | Added crunch and flavor |
| White chocolate chips | ½ cup | Creamy, sweet | Smooth melting texture |
Stuffing Options
The stuffing is what transforms these from regular cookies into something extraordinary. I’ve experimented with numerous combinations, and here are my favorites:
Nutella Stuffing: 2 tablespoons per cookie, creates a rich chocolate-hazelnut center Peanut Butter Stuffing: 1½ tablespoons per cookie, adds protein and nutty flavor Cookie Butter Stuffing: 2 tablespoons per cookie, intensifies the cookie flavor Caramel Stuffing: 1 tablespoon per cookie, provides gooey sweetness Cream Cheese Frosting: 1½ tablespoons per cookie, adds tangy richness
My Step-by-Step Big Blue Monster Cookie Method
Preparation Phase
I always start by getting my workspace organized. This recipe moves quickly once you begin, so having everything measured and ready makes the difference between success and scrambled chaos.
First, I preheat my oven to 350°F (175°C). Then I line my baking sheets with parchment paper – this prevents sticking and makes cleanup effortless. I prefer using light-colored baking sheets because they promote even browning.
Creating the Perfect Cookie Base
In my stand mixer fitted with the paddle attachment, I cream the butter with both sugars for about 3-4 minutes until the mixture becomes light and fluffy. This step is crucial – undercreaming results in dense cookies, while overcreaming can make them tough.
Next, I add the eggs one at a time, mixing well after each addition. The vanilla extract goes in with the second egg. Now comes the fun part – adding the blue food coloring. I start with one teaspoon and gradually add more until I achieve that vibrant monster blue color. Gel food coloring works much better than liquid because it doesn’t thin the dough.
In a separate bowl, I whisk together the flour, baking soda, and salt. I add this dry mixture to the wet ingredients in three additions, mixing just until combined. Overmixing develops too much gluten, resulting in tough cookies.
Incorporating the Mix-ins
This is where these cookies truly become “monsters.” I fold in the chocolate chips, marshmallows, sprinkles, and any other mix-ins I’m using. The key is gentle folding – I want to distribute everything evenly without overworking the dough.
The Stuffing Assembly Process
Here’s where my technique differs from many recipes I’ve seen. I portion the dough into 3-ounce portions using a large cookie scoop. For each cookie, I flatten one portion into a disk, place my chosen stuffing in the center, then top with another portion of dough. I seal the edges completely – any gaps will cause the stuffing to leak out during baking.
Baking to Perfection
I space these giants about 3 inches apart on my prepared baking sheets. They spread significantly during baking, so adequate spacing prevents them from merging into one massive cookie sheet.
The baking time is critical – I bake for 11-13 minutes, just until the edges are set but the centers still look slightly underdone. They continue cooking on the hot pan after removal from the oven.
Troubleshooting Common Big Blue Monster Cookie Issues
Through my extensive testing, I’ve encountered and solved numerous problems that home bakers face with these cookies:
Color Problems
Pale Blue Color: Usually caused by using liquid food coloring instead of gel, or not using enough. I recommend gel coloring for vibrant results.
Uneven Color Distribution: This happens when the food coloring isn’t fully incorporated. Mix thoroughly after adding coloring.
Color Bleeding: Overmixing after adding coloring can cause this. Mix just until evenly distributed.
Texture Issues
Cookies Too Flat: Often caused by warm dough or old baking soda. Chill the dough for 30 minutes before baking.
Cookies Too Thick: Usually from too much flour or not enough butter. Measure ingredients accurately.
Dry Texture: Overbaking is the main culprit. Remove cookies when centers still look slightly underdone.
Stuffing Problems
Leaking Stuffing: Inadequate sealing of dough edges. Press edges firmly together and ensure no gaps exist.
Stuffing Disappearing: Some fillings absorb into the dough during baking. Thicker fillings work better than thin ones.
Advanced Techniques for Professional Results

Dough Temperature Management
I’ve learned that dough temperature dramatically affects the final result. Slightly chilled dough (about 65°F) holds its shape better during baking, preventing excessive spreading while maintaining the tender texture we want.
Strategic Mix-in Placement
Instead of randomly folding mix-ins throughout the dough, I’ve developed a method where I reserve some mix-ins to press into the tops of shaped cookies. This ensures visible mix-ins on the surface, making the cookies more visually appealing.
Stuffing Consistency Optimization
The consistency of your stuffing matters enormously. I’ve found that slightly warming spreadable fillings like Nutella makes them easier to work with, while chilling softer fillings like caramel helps prevent leakage.
Baking Sheet Rotation
For even browning, I rotate my baking sheets halfway through the baking time. This compensates for any hot spots in the oven and ensures uniform color development.
Nutritional Information and Dietary Considerations
| Nutrient | Per Cookie (1 large) | Daily Value % |
|---|---|---|
| Calories | 485 | 24% |
| Total Fat | 22g | 34% |
| Saturated Fat | 13g | 65% |
| Cholesterol | 65mg | 22% |
| Sodium | 320mg | 14% |
| Total Carbohydrates | 68g | 25% |
| Dietary Fiber | 2g | 7% |
| Sugars | 45g | – |
| Protein | 6g | 12% |
Dietary Modifications I’ve Successfully Tested
Gluten-Free Version: Substitute the all-purpose flour with a 1:1 gluten-free flour blend. The texture is slightly different but still delicious.
Dairy-Free Adaptation: Use vegan butter and dairy-free chocolate chips. The cookies maintain their structure and flavor.
Reduced Sugar Option: I can reduce the sugar by up to 25% without significantly affecting texture, though the cookies will be less sweet.
Egg-Free Alternative: Substitute each egg with ¼ cup applesauce or commercial egg replacer.
Storage and Serving Suggestions
Optimal Storage Methods
These cookies maintain their quality for up to one week when stored properly. I place them in an airtight container with parchment paper between layers to prevent sticking. For longer storage, they freeze beautifully for up to three months.
Serving Presentations
Casual Serving: Simply arrange on a platter with napkins – these cookies are meant to be handheld treats.
Special Occasion Display: Stack them on a tiered stand for dramatic presentation at parties or gatherings.
Individual Packaging: Wrap each cookie in cellophane for party favors or bake sale items.
Warm Serving: Briefly warm in a 300°F oven for 2-3 minutes to soften the centers and enhance the stuffing experience.
Seasonal and Holiday Variations

Holiday Adaptations
Halloween Version: Use orange food coloring and add candy corn and mini chocolate chips for a festive autumn treat.
Christmas Variation: Tint the dough green or red, and incorporate crushed candy canes and white chocolate chips.
Valentine’s Day Style: Create pink cookies with heart-shaped sprinkles and strawberry-flavored stuffing.
Easter Theme: Pastel colors with mini chocolate eggs and spring-themed sprinkles create perfect Easter treats.
Questions and Answers About Big Blue Monster Stuffed Cookies
Q: Can I make the dough ahead of time? Absolutely! I often prepare the dough up to 3 days in advance and store it in the refrigerator. The flavors actually develop and improve during this time. Just let it come to room temperature before shaping and baking.
Q: Why do my cookies spread too much during baking? Excessive spreading usually indicates that your dough is too warm or your butter was too soft when mixing. Try chilling the shaped cookies for 15-20 minutes before baking, and ensure your butter is at proper room temperature (about 65°F).
Q: What’s the best way to get vibrant blue color? Gel food coloring is absolutely essential for achieving that bright monster blue. Liquid coloring will thin your dough and produce pale results. Start with 1 teaspoon of gel coloring and add more until you reach your desired intensity.
Q: Can I use different stuffing combinations? Definitely! I encourage experimentation. Some of my favorite combinations include Nutella with crushed hazelnuts, peanut butter with mini chocolate chips, or caramel with sea salt. Just ensure your stuffing is thick enough to stay contained during baking.
Q: How do I prevent the stuffing from leaking out? The key is proper sealing technique. Flatten your bottom dough portion, add stuffing leaving a border around the edges, then top with another dough portion. Pinch and seal the edges completely, ensuring no gaps exist where stuffing could escape.
Q: What size should I make these cookies? I typically make them about 3 ounces each, which results in cookies that are 4-5 inches in diameter after baking. This size provides the perfect balance of impressive presentation and manageable eating experience.
Q: Can I freeze the baked cookies? Yes! These cookies freeze exceptionally well. Wrap them individually in plastic wrap, then place in a freezer bag. They maintain their quality for up to 3 months. Thaw at room temperature for about 30 minutes before serving.
Q: How do I know when they’re perfectly baked? The edges should be set and just beginning to turn golden, while the centers still look slightly underdone. They’ll continue cooking on the hot pan after removal from the oven. Overbaking results in dry, tough cookies.
Q: What’s the secret to getting the perfect chewy texture? The combination of brown sugar (which adds moisture) and not overbaking is crucial. Also, using room temperature ingredients helps create a better emulsion, which contributes to the desired texture.
Q: Can I make mini versions of these cookies? Certainly! Reduce the portion size to about 1 ounce each and decrease the baking time to 8-10 minutes. The stuffing amount should be reduced proportionally – about 1 teaspoon per mini cookie.
These Big Blue Monster Stuffed Cookies have become my signature treat, and I’m confident they’ll become yours too. The combination of vibrant color, generous size, exciting mix-ins, and surprise stuffing creates an unforgettable cookie experience. Whether you’re making them for a special occasion or just because you want something extraordinary, these cookies deliver every single time. The joy on people’s faces when they bite into one of these monsters and discover the hidden stuffing makes every minute of preparation worthwhile.