I’ll be honest with you – when I first heard about making chicken katsu curry in an air fryer, I was skeptical. Could this beloved Japanese comfort food really translate to the convenient countertop appliance that’s taken over my kitchen? After months of testing, tweaking, and perfecting my technique, I can confidently say that air fryer chicken katsu curry isn’t just possible – it’s absolutely phenomenal.
The magic lies in achieving that perfect golden-brown panko crust while keeping the chicken incredibly tender inside, all while preparing a rich, aromatic curry sauce that brings everything together. My air fryer method delivers restaurant-quality results in a fraction of the time, with significantly less oil than traditional deep-frying methods.
Understanding Chicken Katsu Curry
Before diving into my recipe, let me break down what makes this dish so special. Chicken katsu curry combines two distinct culinary traditions – the Japanese technique of katsu (breaded and fried cutlets) with the rich, mild curry sauce that’s become a staple in Japanese cuisine.
Katsu: A cooking technique where meat is coated in flour, egg, and panko breadcrumbs, then fried until golden and crispy. The word “katsu” comes from the English word “cutlet.”
Japanese Curry: Unlike its Indian counterpart, Japanese curry is milder, sweeter, and thicker. It typically contains a blend of spices including turmeric, coriander, and fenugreek, along with vegetables like onions, carrots, and potatoes.
Air Fryer Advantage: Using an air fryer reduces oil consumption by up to 80% while still achieving that coveted crispy exterior. The circulating hot air creates an even golden crust that rivals traditional deep-frying methods.
Essential Ingredients and Equipment
For the Chicken Katsu
| Ingredient | Amount | Purpose | Substitution Options |
|---|---|---|---|
| Chicken breast | 4 pieces (6-8 oz each) | Main protein | Chicken thighs, pork cutlets |
| All-purpose flour | 1 cup | First coating layer | Gluten-free flour blend |
| Large eggs | 3 | Binding agent | Buttermilk, aquafaba |
| Panko breadcrumbs | 2 cups | Crispy coating | Regular breadcrumbs, crushed cornflakes |
| Salt | 1 tsp | Seasoning | Sea salt, kosher salt |
| Black pepper | 1/2 tsp | Seasoning | White pepper |
| Garlic powder | 1 tsp | Flavor enhancement | Fresh minced garlic |
| Cooking spray | As needed | Crispiness aid | Olive oil mist |
For the Curry Sauce
| Ingredient | Amount | Purpose | Substitution Options |
|---|---|---|---|
| Vegetable oil | 2 tbsp | Base for roux | Coconut oil, butter |
| Yellow onion | 1 large, diced | Flavor base | White onion, shallots |
| Garlic cloves | 4, minced | Aromatic base | Garlic powder (1 tsp) |
| Fresh ginger | 1 inch, grated | Aromatic base | Ground ginger (1/2 tsp) |
| Curry powder | 3 tbsp | Primary spice | Garam masala blend |
| All-purpose flour | 3 tbsp | Thickening agent | Cornstarch, arrowroot |
| Chicken broth | 3 cups | Liquid base | Vegetable broth |
| Coconut milk | 1 can (14 oz) | Creaminess | Heavy cream, cashew cream |
| Soy sauce | 2 tbsp | Umami depth | Tamari, coconut aminos |
| Honey | 2 tbsp | Sweetness balance | Maple syrup, brown sugar |
| Apple | 1 medium, grated | Natural sweetness | Pear, additional honey |
| Carrots | 2 medium, diced | Texture and sweetness | Sweet potato |
| Potatoes | 2 medium, cubed | Heartiness | Cauliflower florets |
Equipment Needed
- Air fryer (minimum 5.5-quart capacity)
- Large saucepan
- Meat mallet or rolling pin
- Three shallow bowls for breading station
- Digital thermometer
- Cutting board
- Sharp knife
Step-by-Step Preparation Method
Preparing the Chicken
The foundation of exceptional chicken katsu lies in proper preparation. I’ve learned that taking time with this step makes all the difference in the final result.
First, I place each chicken breast between plastic wrap or parchment paper and gently pound it to an even 1/2-inch thickness. This ensures uniform cooking and prevents the exterior from overcooking while the interior remains undercooked. The key is gentle, consistent pressure – I’m not trying to flatten it completely, just create an even surface.
Next, I season both sides generously with salt, pepper, and garlic powder. I let the seasoned chicken rest at room temperature for 15-20 minutes, allowing the flavors to penetrate and the meat to reach a more even temperature for cooking.
Creating the Perfect Breading Station
My breading station consists of three shallow bowls arranged in assembly-line fashion. The first bowl contains seasoned flour (I mix in a pinch of salt and pepper), the second holds beaten eggs with a tablespoon of water, and the third contains the panko breadcrumbs.
Here’s my technique for flawless breading: I dredge each piece of chicken in flour, ensuring complete coverage while shaking off excess. Then I dip it into the egg mixture, allowing any excess to drip off. Finally, I press the chicken firmly into the panko breadcrumbs, making sure to coat both sides thoroughly. The key is applying gentle pressure to help the breadcrumbs adhere properly.
Air Frying Technique
I preheat my air fryer to 400°F (200°C) for 3-5 minutes. While it’s heating, I lightly spray the breaded chicken with cooking spray – this step is crucial for achieving that golden-brown color and crispy texture.
I place the chicken in the air fryer basket in a single layer, ensuring pieces don’t touch. Depending on the size of your air fryer, you may need to cook in batches. I cook for 10 minutes, then flip the chicken and spray the other side lightly with cooking spray. I continue cooking for another 8-10 minutes until the internal temperature reaches 165°F (74°C) and the exterior is golden brown and crispy.
Crafting the Curry Sauce
While the chicken cooks, I prepare the curry sauce. I heat vegetable oil in a large saucepan over medium heat and add the diced onion. I cook for 5-7 minutes until the onion becomes translucent and slightly caramelized. The key is patience – properly cooked onions form the flavor foundation of the entire sauce.
I add minced garlic and grated ginger, cooking for another minute until fragrant. Then I stir in the curry powder, cooking for 30 seconds to bloom the spices. This brief toasting releases the essential oils and intensifies the flavor profile.
Next, I sprinkle the flour over the mixture and stir constantly for 2-3 minutes to create a roux. This step eliminates the raw flour taste and helps thicken the sauce. I gradually whisk in the chicken broth, ensuring no lumps form. I add the coconut milk, soy sauce, honey, and grated apple, stirring until smooth.
I bring the mixture to a gentle simmer and add the diced carrots and potatoes. I reduce heat to low and simmer for 15-20 minutes, stirring occasionally, until the vegetables are tender and the sauce has thickened to a consistency that coats the back of a spoon.
Nutritional Information and Health Benefits
| Nutrient | Per Serving | Daily Value % |
|---|---|---|
| Calories | 485 | 24% |
| Protein | 38g | 76% |
| Carbohydrates | 42g | 14% |
| Fat | 18g | 28% |
| Fiber | 4g | 16% |
| Sodium | 890mg | 39% |
| Vitamin A | 180% | 180% |
| Vitamin C | 15% | 15% |
| Iron | 12% | 12% |
| Calcium | 8% | 8% |
Based on a 2,000-calorie diet, serves 4
The air fryer method significantly reduces the fat content compared to traditional deep-frying, cutting calories by approximately 200-250 per serving. The curry sauce provides a wealth of antioxidants from the spices, particularly turmeric, which contains curcumin known for its anti-inflammatory properties.
Serving Suggestions and Presentation
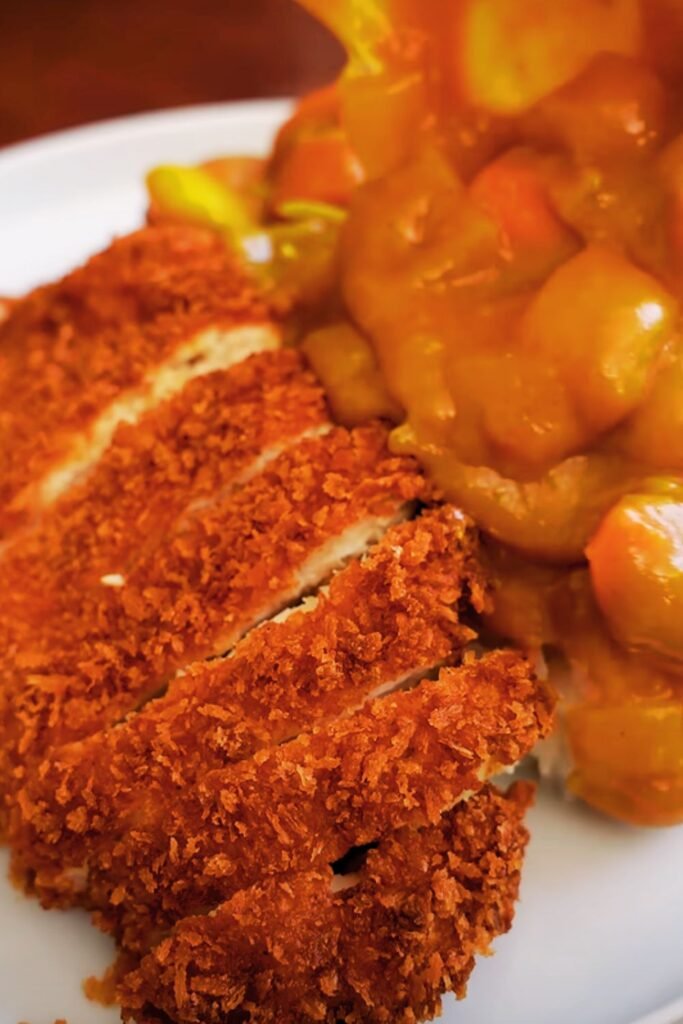
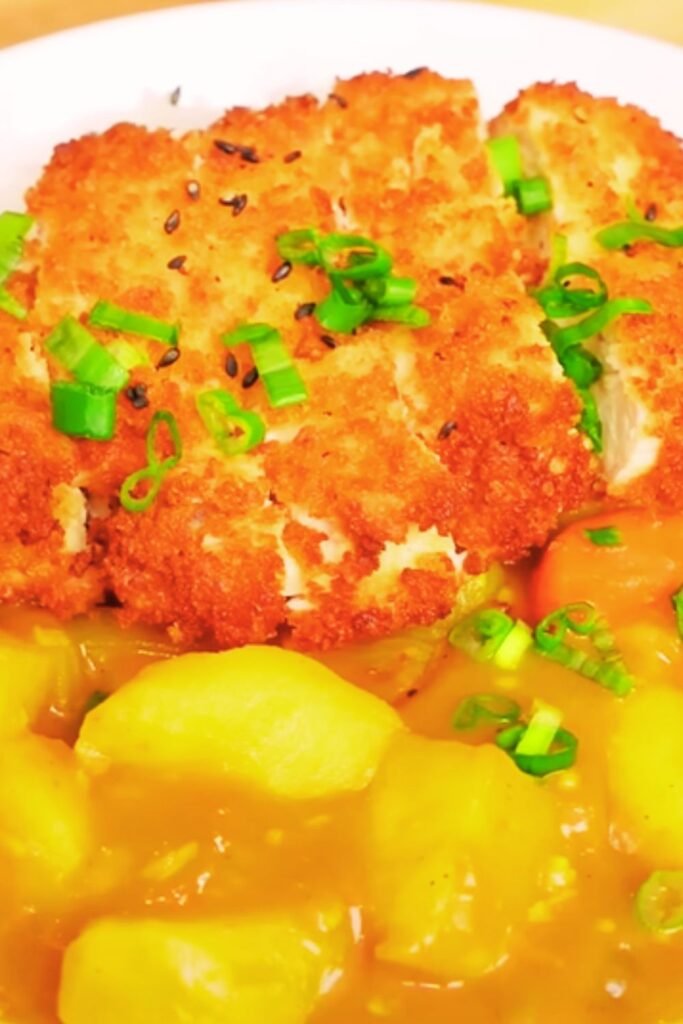
I serve my chicken katsu curry over steamed jasmine rice, which perfectly absorbs the rich curry sauce. The contrast between the crispy chicken and the creamy curry creates a delightful textural experience.
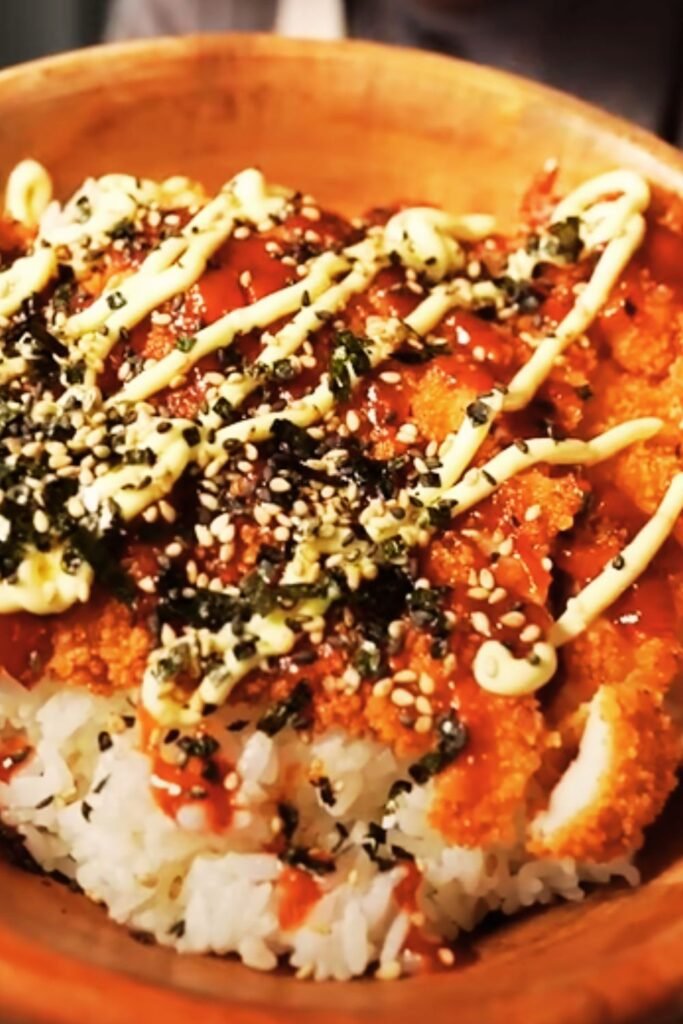
For presentation, I slice the chicken katsu diagonally into strips, fanning them over the rice and ladling the curry sauce alongside. I garnish with a sprinkle of sesame seeds and chopped green onions for color and additional flavor.
Perfect Accompaniments:
- Steamed white or brown rice
- Japanese pickles (tsukemono)
- Miso soup
- Steamed edamame
- Cabbage slaw with sesame dressing
- Steamed broccoli or green beans
Storage and Reheating Instructions
| Storage Method | Duration | Reheating Instructions |
|---|---|---|
| Refrigerator | 3-4 days | Air fryer: 350°F for 3-4 minutes |
| Freezer (chicken only) | 2-3 months | Thaw overnight, then air fry |
| Freezer (curry sauce) | 3-4 months | Thaw and reheat in saucepan |
The chicken katsu maintains its crispiness best when stored separately from the curry sauce. I place the cooled chicken in an airtight container with paper towels to absorb excess moisture. The curry sauce can be refrigerated in a separate container and gently reheated on the stovetop, adding a splash of broth if needed to restore consistency.
Troubleshooting Common Issues
Problem: Chicken isn’t crispy enough Solution: Ensure thorough coating with panko and use cooking spray generously. Don’t overcrowd the air fryer basket.
Problem: Curry sauce is too thick Solution: Gradually whisk in additional chicken broth or coconut milk until desired consistency is reached.
Problem: Curry sauce is too thin Solution: Simmer uncovered for additional 5-10 minutes to reduce, or mix 1 tablespoon cornstarch with 2 tablespoons cold water and stir into sauce.
Problem: Chicken is overcooked Solution: Use a digital thermometer and remove at exactly 165°F. Consider reducing cooking time by 1-2 minutes for smaller pieces.
Recipe Variations and Customizations
Spice Level Adjustments
For those who prefer more heat, I recommend adding 1-2 teaspoons of sriracha or 1/2 teaspoon of cayenne pepper to the curry sauce. For a milder version, reduce the curry powder to 2 tablespoons and add an extra tablespoon of honey.
Protein Alternatives
This recipe works beautifully with pork cutlets, firm tofu, or even cauliflower steaks for vegetarian versions. Adjust cooking times accordingly – pork requires the same timing as chicken, while tofu needs only 8-10 minutes total.
Gluten-Free Adaptation
Replace all-purpose flour with a gluten-free flour blend and use gluten-free panko breadcrumbs. The texture remains remarkably similar to the traditional version.
Cultural Context and Personal Connection
Chicken katsu curry holds a special place in Japanese cuisine, representing the beautiful fusion of Western cooking techniques with Japanese flavors. It’s comfort food at its finest – the kind of dish that brings families together around the dinner table.
My journey with this recipe began during a trip to Tokyo, where I discovered this dish at a small family-run restaurant. The owner, Tanaka-san, shared his philosophy that good food doesn’t require complicated techniques, just quality ingredients and careful attention to detail. That wisdom has guided my approach to this air fryer adaptation.
The beauty of this dish lies in its accessibility. While traditional katsu requires deep-frying skills and significant oil, my air fryer method makes it achievable for home cooks of all skill levels. I’ve served this to skeptical friends who couldn’t believe it wasn’t deep-fried, and to health-conscious family members who appreciated the lighter preparation.
Tips for Success
Through countless iterations, I’ve discovered several key factors that elevate this dish from good to exceptional:
Temperature Control: I always verify my air fryer’s accuracy with an oven thermometer. Even small temperature variations can significantly impact the final result.
Timing is Everything: I prepare all components simultaneously rather than sequentially. While the chicken rests after seasoning, I start the curry sauce. This ensures everything finishes around the same time.
Quality Ingredients Matter: I use authentic Japanese curry powder when possible, as it provides the distinctive flavor profile that makes this dish special. Similarly, panko breadcrumbs create a superior texture compared to regular breadcrumbs.
Don’t Rush the Process: Each step serves a purpose. The resting time for seasoned chicken, the gentle browning of onions, and the proper blooming of spices all contribute to the final flavor profile.
Q&A Section
Q: Can I prepare the chicken katsu ahead of time? A: Yes, you can bread the chicken up to 4 hours in advance and refrigerate it. This actually helps the coating adhere better. Cook directly from the refrigerator, adding 1-2 minutes to the cooking time.
Q: What’s the best way to ensure even cooking in the air fryer? A: The key is uniform thickness – pound the chicken to an even 1/2-inch thickness. Also, don’t overcrowd the basket, and flip the chicken exactly halfway through cooking.
Q: Can I make the curry sauce dairy-free? A: Absolutely! The coconut milk already makes the sauce naturally dairy-free. Just ensure your curry powder blend doesn’t contain any dairy derivatives.
Q: How do I know when the chicken is properly cooked? A: Use a digital thermometer to check the internal temperature reaches 165°F (74°C). The exterior should be golden brown and crispy, and the juices should run clear when pierced.
Q: Can I use frozen chicken for this recipe? A: I recommend thawing the chicken completely first. Frozen chicken won’t pound evenly and may cook unevenly, resulting in overcooked exterior and undercooked interior.
Q: What if I don’t have an air fryer? A: You can bake the breaded chicken at 425°F (220°C) for 20-25 minutes, flipping once halfway through. The texture will be slightly different but still delicious.
Q: How can I make the curry sauce thicker or thinner? A: For thicker sauce, simmer uncovered for additional time or add a cornstarch slurry. For thinner sauce, gradually add more broth or coconut milk until desired consistency is reached.
Q: Can I freeze the completed dish? A: I recommend freezing the components separately. The chicken katsu can be frozen for up to 3 months, and the curry sauce for up to 4 months. The texture of the chicken coating may soften slightly after freezing.
Q: What’s the secret to getting restaurant-quality flavor at home? A: The key is building layers of flavor – properly seasoning the chicken, blooming the spices, and adding the grated apple for natural sweetness. Don’t skip any steps, and taste and adjust seasoning throughout the cooking process.
This air fryer chicken katsu curry represents everything I love about modern cooking – it honors traditional flavors while embracing convenient techniques. The result is a dish that’s both comforting and exciting, familiar yet special enough for entertaining. Whether you’re seeking a weeknight dinner solution or a impressive dish for guests, this recipe delivers restaurant-quality results with home-kitchen accessibility.