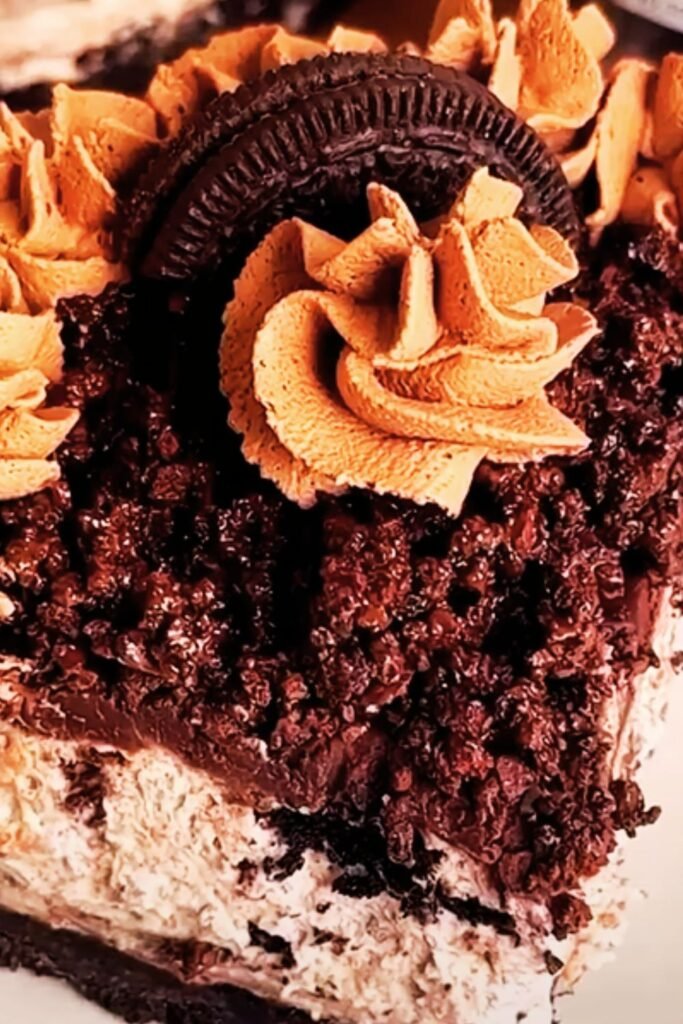
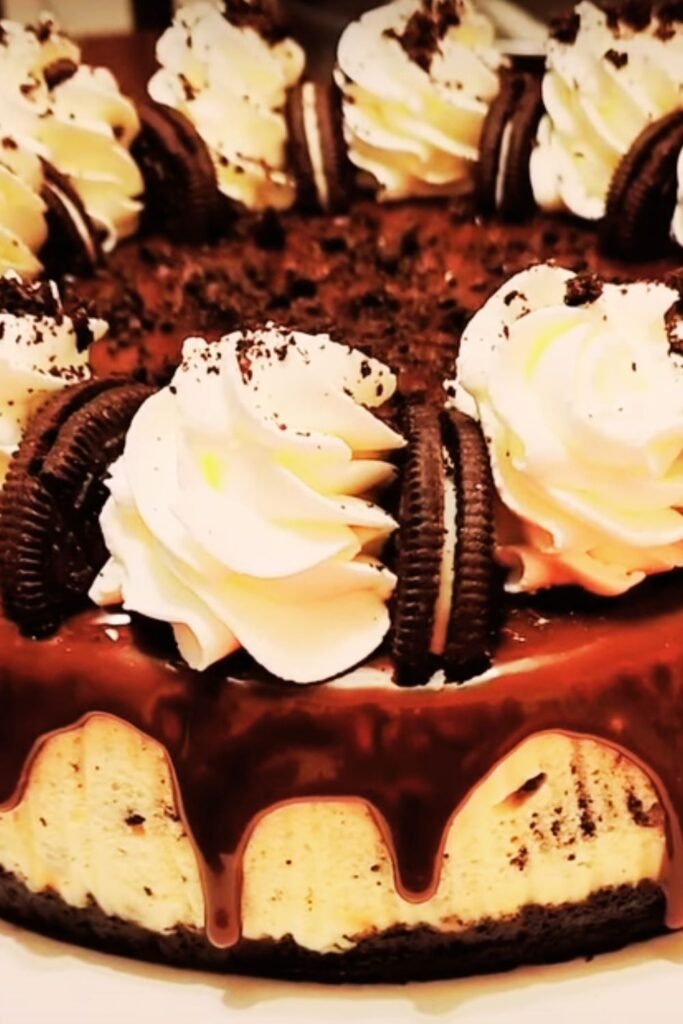
There’s something utterly magical about the combination of Oreos and cheesecake. Whenever I make this recipe for friends and family, it disappears faster than I can slice it! This Oreo cheesecake is the dessert I’m most requested to bring to gatherings, and for good reason. It features a crunchy Oreo cookie crust, a creamy cheesecake filling studded with cookie chunks, a glossy chocolate ganache topping, and a crown of fluffy whipped cream. Each bite delivers multiple textures and flavors that create pure dessert bliss.
I’ve spent years perfecting this recipe, tweaking ingredients and techniques until I achieved the perfect balance. The result is a showstopping dessert that looks like it came from a high-end bakery but can absolutely be made in your own kitchen. Whether you’re celebrating a special occasion or simply craving something indulgent, this Oreo cheesecake delivers on all fronts.
Why This Recipe Works
Before diving into the ingredients and steps, I want to share why this recipe consistently produces an amazing cheesecake:
- Room temperature ingredients: Using room temperature cream cheese, eggs, and sour cream ensures a silky-smooth batter without lumps
- Water bath method: Baking in a water bath provides gentle, even heat that prevents cracks and gives the cheesecake a perfect texture
- Cooling gradually: Allowing the cheesecake to cool slowly in the oven prevents the dramatic temperature change that can cause cracking
- Make-ahead friendly: This cheesecake actually tastes better after chilling overnight, making it perfect for planning ahead
- Triple Oreo action: Oreos appear in the crust, the filling, AND as a garnish for maximum cookie flavor
Ingredients
For the Crust:
- 24 Oreo cookies (whole cookies with filling)
- 4 tablespoons (56g) unsalted butter, melted
For the Cheesecake Filling:
- 32 ounces (4 packages) cream cheese, softened to room temperature
- 1¼ cups (250g) granulated sugar
- ½ cup (120g) sour cream, room temperature
- 2 teaspoons pure vanilla extract
- 4 large eggs, room temperature
- 16 Oreo cookies, roughly chopped
For the Chocolate Ganache:
- 1 cup (175g) semi-sweet chocolate chips
- ½ cup (120ml) heavy cream
For the Whipped Cream Topping:
- 1½ cups (360ml) heavy whipping cream, cold
- ¼ cup (30g) powdered sugar
- 1 teaspoon vanilla extract
For Garnish:
- 8 Oreo cookies, halved or chopped
- Chocolate shavings (optional)
Equipment You’ll Need
I find it helpful to gather all my equipment before starting. Here’s what you’ll need:
- 9-inch springform pan
- Food processor (for crushing Oreos)
- Stand mixer or hand mixer
- Large roasting pan (for water bath)
- Aluminum foil
- Mixing bowls
- Measuring cups and spoons
- Rubber spatula
- Cooling rack
Step-by-Step Instructions
Prepare the Crust:
- Preheat your oven to 325°F (165°C).
- Wrap the outside of a 9-inch springform pan with a double layer of heavy-duty aluminum foil, covering the bottom and extending all the way up the sides. This prevents water from seeping in during the water bath.
- Place 24 Oreo cookies in a food processor and pulse until finely crushed. You can leave the filling in – it helps bind the crust!
- Add the melted butter to the crushed cookies and pulse until well combined.
- Press the mixture firmly into the bottom of the prepared springform pan, using the bottom of a measuring cup to compact it evenly.
- Bake the crust for 10 minutes, then remove from the oven and allow to cool while preparing the filling. Keep the oven on.
Make the Cheesecake Filling:
- In the bowl of a stand mixer fitted with the paddle attachment (or using a hand mixer), beat the softened cream cheese on medium speed until completely smooth and free of lumps, about 4-5 minutes. Scrape down the sides of the bowl as needed.
- Gradually add the sugar and beat until well incorporated and smooth.
- Add the sour cream and vanilla extract, beating until combined.
- Add the eggs one at a time, beating on low speed just until each egg is incorporated. Do not overmix once the eggs are added, as this can incorporate too much air and cause the cheesecake to crack.
- Using a rubber spatula, gently fold in the chopped Oreo cookies.
- Pour the cheesecake batter onto the cooled crust, smoothing the top with a spatula.
Water Bath Baking Method:
- Place the foil-wrapped springform pan in a larger roasting pan.
- Place the roasting pan in the oven and carefully pour hot water into the roasting pan until it reaches about halfway up the sides of the springform pan.
- Bake at 325°F (165°C) for 60-70 minutes, or until the edges are set but the center still has a slight jiggle.
- When done, turn off the oven, crack the oven door open slightly, and let the cheesecake cool in the oven for 1 hour. This gradual cooling helps prevent cracking.
- After an hour, remove the cheesecake from the water bath and place on a cooling rack. Run a thin knife around the edge of the cheesecake to loosen it from the pan. Allow to cool completely at room temperature.
- Once completely cooled, cover and refrigerate for at least 6 hours, preferably overnight.
Make the Chocolate Ganache:
- Place the chocolate chips in a heat-proof bowl.
- Heat the heavy cream in a small saucepan over medium heat until it just begins to simmer (do not boil).
- Pour the hot cream over the chocolate chips and let sit for 2-3 minutes without stirring.
- After a few minutes, whisk the mixture until smooth and glossy.
- Allow the ganache to cool for about 10 minutes, until slightly thickened but still pourable.
- Remove the chilled cheesecake from the refrigerator and carefully pour the ganache over the top, spreading it to the edges with a spatula and allowing some to drip down the sides if desired.
- Return the cheesecake to the refrigerator to let the ganache set, about 30 minutes.
Prepare the Whipped Cream:
- In a chilled mixing bowl, combine the cold heavy cream, powdered sugar, and vanilla extract.
- Using a hand mixer or stand mixer with the whisk attachment, beat the mixture on medium-high speed until stiff peaks form, about 3-4 minutes.
- Transfer the whipped cream to a piping bag fitted with a star tip if desired, or simply dollop it on top of the cheesecake before serving.
Garnish and Serve:
- Just before serving, pipe or dollop the whipped cream around the edge of the cheesecake.
- Arrange halved or chopped Oreo cookies on top of the whipped cream.
- Sprinkle with chocolate shavings if desired.
- Remove the sides of the springform pan and transfer the cheesecake to a serving plate.
Expert Tips for Success
After making this cheesecake dozens of times, I’ve collected some valuable lessons:
- Don’t rush the mixing process: Properly beating the cream cheese until absolutely smooth is crucial. Any lumps now will remain in the final cheesecake.
- Mind the temperature: Room temperature ingredients aren’t just a suggestion—they’re essential for a smooth batter. Take everything out of the fridge at least 2 hours before starting.
- Beware of overmixing: Once you add the eggs, mix just until combined. Overmixing at this stage can incorporate too much air, which can cause the cheesecake to puff up and then crack as it cools.
- Check your seal: Make sure your foil wrap is secure around the springform pan with no tears or holes before adding to the water bath.
- Patience pays off: The overnight refrigeration isn’t just for chilling—it allows the flavors to develop and meld together.
- Clean slicing: For picture-perfect slices, dip your knife in hot water and wipe it clean between each cut.
Storage & Make-Ahead Instructions
This cheesecake is perfect for making ahead of time. Here’s how to properly store it:
Refrigerator:
Store the cheesecake in an airtight container or covered with plastic wrap in the refrigerator for up to 5 days. I find the flavor is actually best on day 2 or 3!
Freezer:
This cheesecake freezes beautifully, either whole or in individual slices.
- For the whole cheesecake: Chill completely in the refrigerator first. Then wrap tightly in plastic wrap, followed by a layer of aluminum foil.
- For individual slices: Flash freeze the slices on a baking sheet for about 1 hour, then wrap each slice in plastic wrap and place in a freezer-safe container.
- Freeze for up to 2 months.
- Thaw overnight in the refrigerator before serving.
Note: If freezing, I recommend adding the whipped cream topping and garnishes after thawing for the freshest presentation.
Nutritional Information
Below is an approximate nutritional breakdown per slice (assuming the cheesecake is cut into 12 slices):
| Nutrient | Amount per Serving |
|---|---|
| Calories | 680 |
| Total Fat | 48g |
| – Saturated Fat | 27g |
| Cholesterol | 185mg |
| Sodium | 340mg |
| Total Carbohydrates | 56g |
| – Dietary Fiber | 2g |
| – Sugars | 40g |
| Protein | 9g |
Please note: This is an estimate and may vary based on specific brands of ingredients used.
Variations to Try
While the classic recipe is amazing on its own, here are some delicious variations I’ve experimented with:
Different Flavors of Oreos
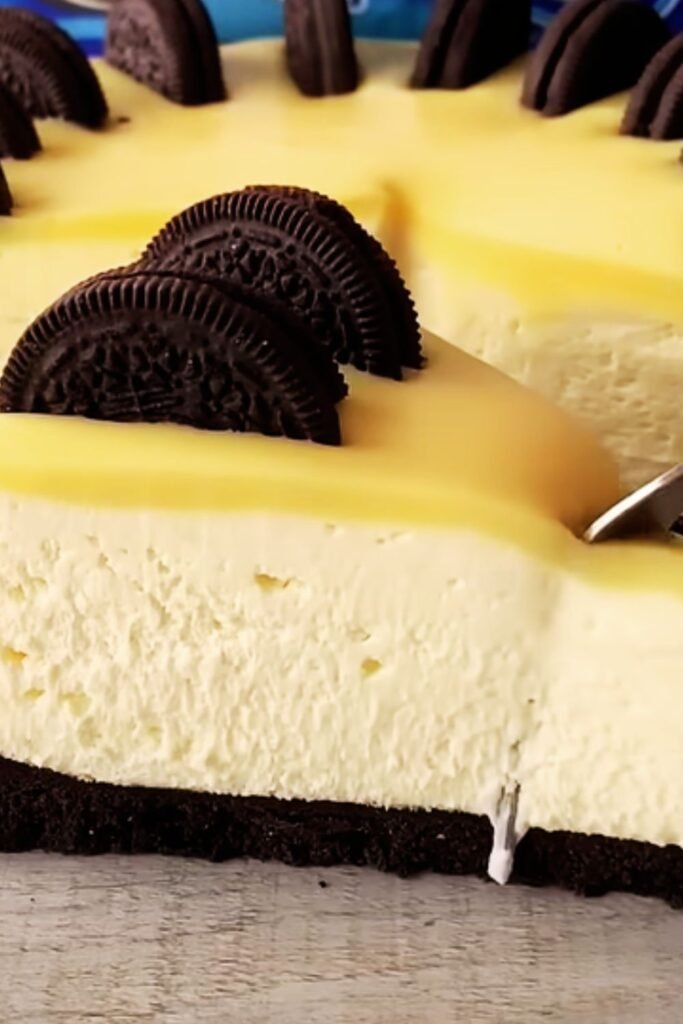
Try using different Oreo varieties like Mint, Peanut Butter, or Golden Oreos for a fun twist.
Flavor Additions
- Coffee Infused: Add 1 tablespoon of espresso powder to the cheesecake batter for a mocha flavor
- Raspberry Swirl: Swirl 1/4 cup of raspberry preserves into the cheesecake batter before baking
- Peanut Butter Layer: Spread a thin layer of peanut butter over the crust before adding the cheesecake batter
Topping Alternatives
- Caramel Drizzle: Replace or complement the chocolate ganache with homemade caramel sauce
- Cookie Butter: Warm 1/2 cup of cookie butter spread until pourable and drizzle over the chilled cheesecake
- Strawberry Compote: Top with a fresh strawberry compote for a fruity contrast
Serving Suggestions
Elevate your dessert experience with these serving ideas:
- Serve with a small scoop of vanilla bean ice cream on the side
- Pair with fresh berries to cut through the richness
- Offer with a hot cup of freshly brewed coffee or espresso
- For special occasions, dust the plate with cocoa powder before placing the slice
- Create a dessert bar with various toppings so guests can customize their slice
Troubleshooting Common Issues
Even experienced bakers run into problems sometimes. Here’s how to fix common cheesecake issues:
Cracked Top
Problem: The cheesecake has cracks on the surface. Solution: A water bath, proper cooling, and not overmixing the batter all help prevent cracks. If cracks do appear, cover them with ganache or whipped cream—no one will ever know!
Soggy Crust
Problem: The crust is soggy instead of crisp. Solution: Make sure your foil wrap is secure with no holes. Also, pre-baking the crust helps it stay crisp.
Lumpy Filling
Problem: The cheesecake filling has lumps. Solution: Always use room temperature cream cheese and beat it thoroughly before adding other ingredients. If you’re in a hurry, cut the cream cheese into cubes to help it soften faster.
Uneven Baking
Problem: The edges are overdone while the center is underbaked. Solution: The water bath should help prevent this. If your oven has hot spots, rotate the pan (carefully!) halfway through baking.
Sunken Center
Problem: The center of the cheesecake sinks after cooling. Solution: This usually means it’s underbaked. Next time, give it a few more minutes in the oven. The center should still jiggle slightly but not be liquid when it’s done.
Frequently Asked Questions
Q: Can I make this cheesecake without a springform pan?
A: While a springform pan is ideal, you can use a regular cake pan lined with parchment paper that extends up and over the sides (to help lift the cheesecake out). Keep in mind that it will be more difficult to remove and may not look as neat.
Q: Is the water bath really necessary?
A: Yes, I highly recommend it! The water bath provides humidity and gentle, even heat that helps prevent cracks and ensures a creamy texture. If you absolutely must skip it, you can try baking at a lower temperature (around 300°F) and placing a pan of water on a rack below the cheesecake.
Q: Can I use low-fat cream cheese?
A: While it’s possible, I don’t recommend it. Full-fat cream cheese provides the rich, creamy texture that makes this cheesecake special. Low-fat versions contain more water and can affect both texture and flavor.
Q: How do I know when the cheesecake is done baking?
A: The edges should be set and slightly puffed, but the center should still have a slight jiggle (about a 2-3 inch circle in the center). It will continue to set as it cools. If you use an instant-read thermometer, the center should register around 150°F.
Q: Can I make mini versions of this cheesecake?
A: Absolutely! Use a muffin tin lined with paper liners. Adjust the baking time to about 20-25 minutes. The water bath isn’t necessary for mini cheesecakes.
Q: My ganache is too thick to pour. What should I do?
A: If your ganache has cooled too much, gently reheat it by placing the bowl over a pot of simmering water (double boiler method) and stirring until it reaches a pourable consistency. Be careful not to overheat it.
Q: Can I make this without the Oreo chunks in the filling?
A: Yes! If you prefer a smooth cheesecake texture without the cookie pieces, simply omit the chopped Oreos from the filling. You’ll still get plenty of Oreo flavor from the crust.
Q: How far in advance can I make this cheesecake?
A: This cheesecake can be made up to 3 days in advance and kept refrigerated. I actually think it tastes better on day 2! Add the whipped cream and garnishes shortly before serving for the freshest presentation.
Final Thoughts
There’s something incredibly satisfying about creating a dessert that not only tastes amazing but also looks spectacular. This Oreo cheesecake hits all the right notes—a crunchy crust, creamy filling, rich ganache, and fluffy whipped cream create a symphony of textures and flavors.
I’ve made this cheesecake for birthdays, holidays, and “just because” occasions, and it never fails to impress. Even if you’re new to making cheesecakes, follow the steps carefully and you’ll create something truly special. The detailed process is absolutely worth the effort when you see the looks on everyone’s faces as you bring this show-stopper to the table.
Whether you’re an Oreo enthusiast or simply love indulgent desserts, this recipe deserves a spot in your collection. Give it a try—I’m confident it will become one of your signature desserts too!