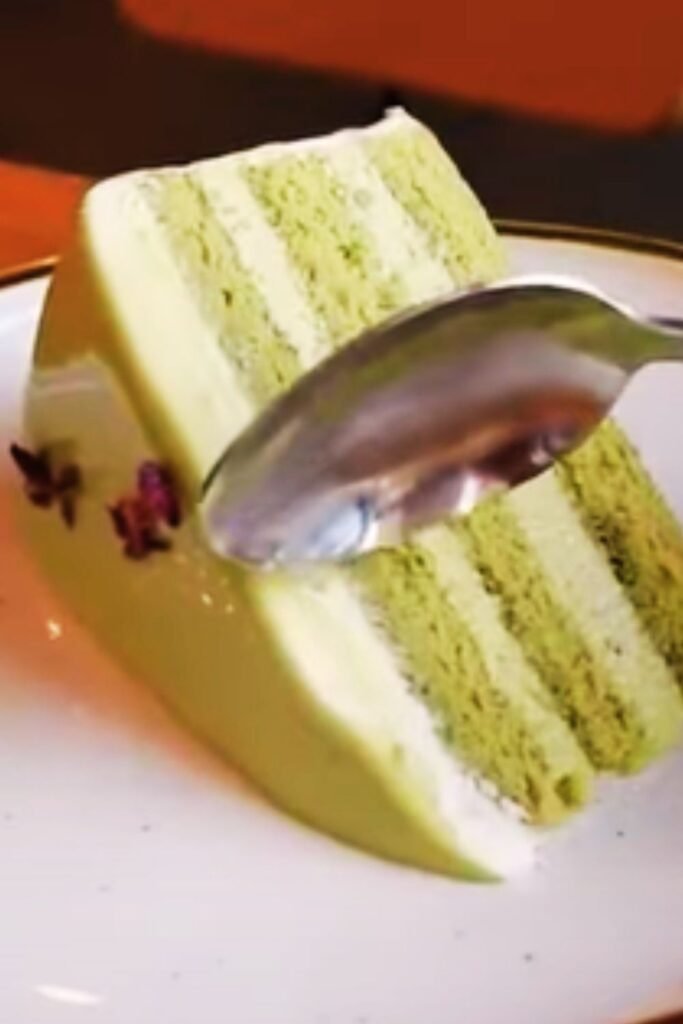
When I first encountered matcha red bean mousse cake at a traditional Japanese tea house in Kyoto, I knew I had discovered something extraordinary. The delicate balance of earthy matcha and sweet red bean paste, combined with the airy texture of mousse, creates a dessert that’s both sophisticated and comforting. This isn’t just another cake recipe—it’s a journey into the heart of Japanese confectionery tradition.
The combination of matcha and red beans (azuki) has been cherished in Japanese cuisine for centuries. What makes this mousse cake particularly special is how it transforms these traditional flavors into a modern, elegant dessert that impresses at dinner parties yet feels familiar enough for everyday enjoyment.
Understanding the Key Ingredients
Before diving into the recipe, let me share what makes each component essential to this cake’s success.
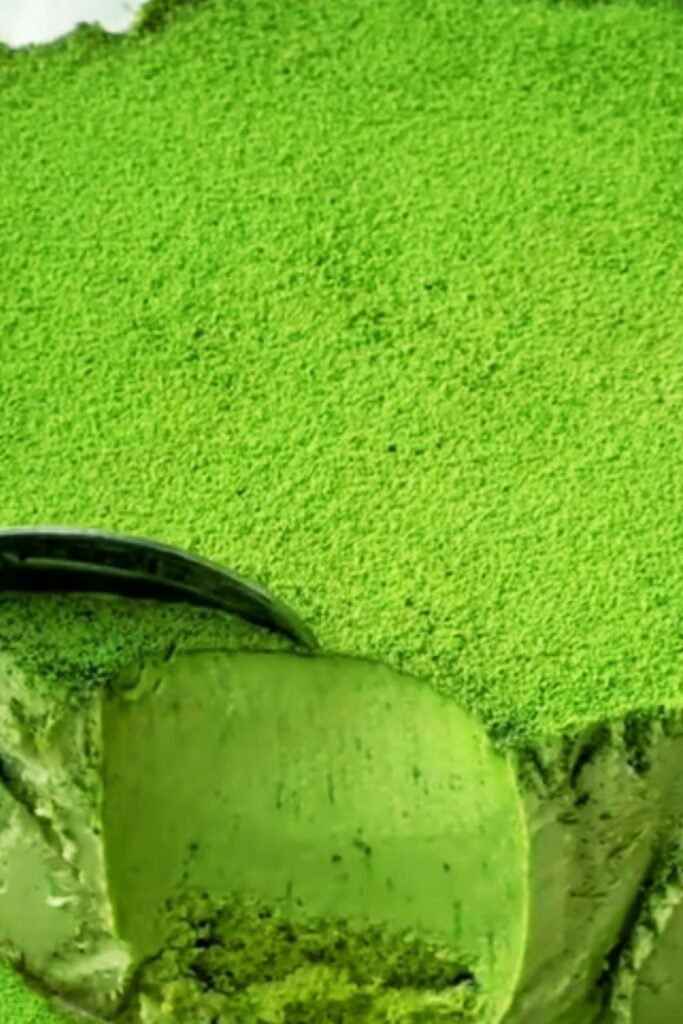
Matcha (抹茶) : Finely ground powder made from specially grown and processed green tea leaves. The quality of matcha dramatically affects the final taste—ceremonial grade offers the most refined flavor, while culinary grade works well for baking.
Red Bean Paste (Anko) : Made from azuki beans that are cooked, sweetened, and mashed. Available in smooth (koshi-an) or chunky (tsubu-an) varieties, each bringing different textures to the mousse.
Gelatin : The setting agent that gives mousse its characteristic texture. I prefer unflavored powdered gelatin for its reliability and neutral taste.
Heavy Cream : Creates the light, airy texture essential to mousse. Must be cold and fresh for proper whipping.
Nutritional Profile and Health Benefits
| Nutrient | Per Slice (1/8 of cake) | Daily Value % |
|---|---|---|
| Calories | 285 | 14% |
| Total Fat | 18g | 23% |
| Saturated Fat | 11g | 55% |
| Cholesterol | 95mg | 32% |
| Sodium | 45mg | 2% |
| Carbohydrates | 28g | 9% |
| Dietary Fiber | 3g | 12% |
| Sugars | 22g | – |
| Protein | 6g | 12% |
| Vitamin A | 485 IU | 10% |
| Calcium | 85mg | 8% |
| Iron | 2.1mg | 12% |
| Antioxidants (EGCG) | 45mg | – |
The matcha in this cake provides powerful antioxidants, particularly EGCG (epigallocatechin gallate), which offers numerous health benefits. Red beans contribute fiber, plant-based protein, and folate, making this dessert more nutritious than typical cakes.
Essential Equipment and Tools
| Equipment | Purpose | Alternative |
|---|---|---|
| Stand Mixer | Whipping cream and mixing | Hand mixer (requires more time) |
| 9-inch Springform Pan | Cake assembly | Regular cake pan lined with parchment |
| Fine-mesh Sieve | Sifting matcha | Tea strainer |
| Digital Scale | Precise measurements | Measuring cups (less accurate) |
| Rubber Spatula | Folding ingredients | Large spoon |
| Small Saucepan | Heating gelatin | Microwave-safe bowl |
| Measuring Spoons | Small ingredient portions | – |
| Whisk | Mixing smaller batches | Fork (less efficient) |
Complete Ingredient List and Substitutions
For the Matcha Sponge Base:
- 4 large eggs (room temperature)
- 1/2 cup (100g) granulated sugar
- 1/3 cup (40g) all-purpose flour
- 2 tablespoons (15g) matcha powder (ceremonial or culinary grade)
- 2 tablespoons (30g) unsalted butter, melted
- 1 tablespoon whole milk
For the Red Bean Mousse:
- 1 cup (250g) smooth red bean paste (anko)
- 1 packet (7g) unflavored gelatin
- 3 tablespoons cold water
- 1 1/2 cups (360ml) heavy cream, cold
- 1/3 cup (65g) granulated sugar
- 1 teaspoon vanilla extract
For the Matcha Mousse:
- 2 tablespoons (15g) matcha powder
- 1/4 cup (60ml) hot water (not boiling)
- 1 packet (7g) unflavored gelatin
- 3 tablespoons cold water
- 1 1/2 cups (360ml) heavy cream, cold
- 1/3 cup (65g) granulated sugar
For Garnish:
- Additional matcha powder for dusting
- Sweetened red bean paste for decoration
- Fresh mint leaves (optional)
Substitution Guide
| Original Ingredient | Substitution | Notes |
|---|---|---|
| Matcha powder | Green tea powder + food coloring | Less authentic flavor |
| Red bean paste | Sweet potato paste | Different but complementary flavor |
| Heavy cream | Coconut cream (chilled) | For dairy-free version |
| Granulated sugar | Coconut sugar | Adds slight caramel notes |
| All-purpose flour | Cake flour | Creates lighter texture |
| Gelatin | Agar powder (1/3 the amount) | For vegetarian version |
Step-by-Step Preparation Guide
Phase 1: Preparing the Matcha Sponge Base
I always start with the sponge base because it needs time to cool completely before assembly.
- Preheat and Prepare: Set your oven to 350°F (175°C). Line a 9-inch round pan with parchment paper, ensuring the paper extends slightly above the rim for easy removal.
- Sift Dry Ingredients: Combine flour and matcha powder in a bowl. Sift together three times to eliminate lumps and ensure even distribution. This step is crucial—matcha clumps easily and can create bitter pockets in your cake.
- Whip Eggs and Sugar: In your stand mixer bowl, combine eggs and sugar. Whip on high speed for 8-10 minutes until the mixture becomes pale, thick, and nearly triples in volume. The mixture should fall in ribbons when lifted with the whisk.
- Fold in Dry Ingredients: Reduce mixer to lowest speed. Gradually add the sifted flour-matcha mixture, mixing just until combined. Overmixing will deflate the eggs and create a dense cake.
- Add Liquid Ingredients: Combine melted butter and milk in a small bowl. Add to the batter and fold gently with a rubber spatula until just incorporated.
- Bake to Perfection: Pour batter into prepared pan and smooth the top. Bake for 18-20 minutes until the cake springs back when lightly touched and pulls slightly from the pan edges.
- Cool Completely: Turn out onto a wire rack immediately. Cool completely before using—this prevents the mousse from melting during assembly.
Phase 2: Creating the Red Bean Mousse
The red bean mousse provides the cake’s sweet, earthy foundation. Getting the texture right requires patience and proper technique.
- Bloom the Gelatin: Sprinkle gelatin over cold water in a small bowl. Let sit for 5 minutes until it becomes spongy and absorbs all the water.
- Prepare Red Bean Base: In a medium saucepan, warm the red bean paste over low heat, stirring constantly until smooth and easily spreadable. If your paste is thick, add 1-2 tablespoons of warm water.
- Dissolve Gelatin: Heat the bloomed gelatin in a small saucepan over low heat, stirring until completely dissolved and clear. Do not boil—this will destroy the gelatin’s setting properties.
- Combine Base Elements: Remove red bean paste from heat. Gradually whisk in the dissolved gelatin until smooth. Add vanilla extract and mix well. Let cool to room temperature, stirring occasionally to prevent skin formation.
- Whip the Cream: In a clean bowl, whip heavy cream and sugar to soft peaks. The cream should hold its shape but still be pourable—overwhipping creates grainy texture in the mousse.
- Fold Together: Add one-third of the whipped cream to the red bean mixture and fold gently to lighten. Add remaining cream in two additions, folding just until no white streaks remain.
Phase 3: Preparing the Matcha Mousse
The matcha mousse requires careful attention to temperature and timing to achieve the perfect consistency.
- Create Matcha Paste: Sift matcha powder into a small bowl. Add hot (not boiling) water gradually, whisking constantly to create a smooth paste without lumps. The water temperature is critical—too hot will make the matcha bitter.
- Bloom Second Gelatin: Repeat the gelatin blooming process with the second packet, using cold water as before.
- Dissolve and Combine: Heat bloomed gelatin until dissolved. Slowly whisk into the matcha paste, ensuring smooth incorporation. Cool to room temperature.
- Whip Cream for Matcha Layer: Whip the second portion of cream and sugar to soft peaks, maintaining the same consistency as the first batch.
- Create Matcha Mousse: Fold whipped cream into matcha mixture using the same technique as the red bean mousse—one-third first, then the remainder in two additions.
Phase 4: Assembly and Setting
Assembly requires working quickly but carefully to maintain the mousse textures while creating distinct layers.
- Prepare Assembly Pan: Line a 9-inch springform pan with plastic wrap, leaving overhang for easy removal. This prevents sticking and creates clean sides.
- Layer the Base: Place the cooled matcha sponge in the bottom of the prepared pan. If it’s slightly larger than the pan, trim edges with a sharp knife.
- Add Red Bean Layer: Pour red bean mousse over the sponge, spreading evenly with an offset spatula. Tap the pan gently on the counter to release air bubbles and level the surface.
- Chill Intermediate Layer: Refrigerate for 30 minutes until the red bean layer is set but still slightly tacky to touch.
- Top with Matcha Mousse: Carefully spread matcha mousse over the set red bean layer, creating smooth, even coverage. The slight tackiness of the red bean layer helps the mousses adhere.
- Final Setting: Cover with plastic wrap and refrigerate for at least 4 hours, preferably overnight. The extended chilling time ensures clean slicing and proper texture development.
Serving and Presentation Tips
Cutting and Plating Techniques
| Technique | Method | Result |
|---|---|---|
| Clean Cuts | Warm knife in hot water between cuts | Sharp, professional edges |
| Portion Control | Use ruler to mark equal sections | Consistent serving sizes |
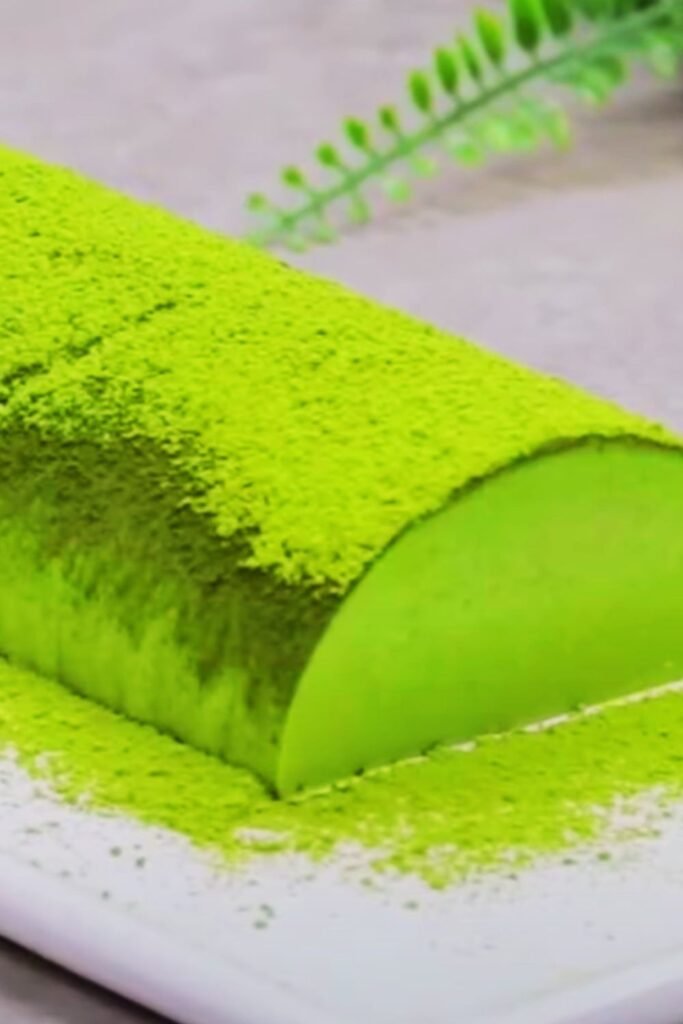
| Garnish Placement | Dust with matcha just before serving | Vibrant color contrast |
| Temperature | Serve slightly chilled, not cold | Optimal flavor release |
Proper presentation elevates this cake from homemade dessert to restaurant-quality creation. I always warm my knife blade in hot water and wipe it clean between each cut—this prevents the mousse from sticking and creates those professional-looking clean edges.
For an elegant presentation, I dust each slice lightly with matcha powder using a fine-mesh sieve. A small dollop of sweetened red bean paste on the side adds visual interest and reinforces the flavor theme.
Flavor Variations and Adaptations
Seasonal Variations
Spring Cherry Blossom: Replace half the red bean paste with sakura (cherry blossom) paste for a delicate floral note that pairs beautifully with matcha.
Summer Yuzu: Add 1 tablespoon of yuzu juice to the matcha mousse for a citrusy brightness that cuts through the richness.
Autumn Persimmon: Incorporate persimmon puree into the red bean layer for a seasonal twist with natural sweetness.
Winter Ginger: Add finely grated fresh ginger to both mousse layers for warming spice that complements the earthy flavors.
Dietary Adaptations
| Dietary Need | Adaptation | Key Changes |
|---|---|---|
| Gluten-Free | Replace flour with almond flour | Use 1/3 cup almond flour + 1 tbsp cornstarch |
| Dairy-Free | Use coconut cream | Chill can overnight, use thick portion only |
| Reduced Sugar | Use stevia or monk fruit | Reduce by 1/3, add extra vanilla for flavor |
| Vegan | Aquafaba + agar | Replace eggs with whipped aquafaba, gelatin with agar |
Storage and Make-Ahead Tips
This cake actually improves with time, making it perfect for entertaining. The flavors meld and intensify over the first 24 hours, creating an even more harmonious taste profile.
Short-term Storage (1-3 days): Keep covered in the refrigerator. The cake maintains optimal texture and flavor during this period.
Extended Storage (up to 1 week): Wrap individual slices in plastic wrap and store in airtight containers. The mousse texture remains stable, though the sponge may become slightly more dense.
Freezing (up to 3 months): Wrap the entire cake or individual slices tightly in plastic wrap, then aluminum foil. Thaw in refrigerator overnight before serving. The texture changes slightly but remains delicious.
Make-Ahead Strategy: Complete the cake up to 2 days before serving. This allows flavors to develop while maintaining the best texture. Add final garnishes just before serving to maintain visual appeal.
Troubleshooting Common Issues
Texture Problems and Solutions
| Problem | Cause | Solution |
|---|---|---|
| Grainy Mousse | Overwhipped cream | Fold in fresh cream to smooth |
| Dense Sponge | Overmixed batter | Use lighter folding technique |
| Mousse Won’t Set | Insufficient gelatin or too warm | Chill longer or remake with more gelatin |
| Layers Separate | Temperature differences | Ensure layers are proper temperature before adding |
| Bitter Matcha Flavor | Water too hot or low-quality matcha | Use 80°C water, invest in better matcha |
Prevention Strategies
The most common mistakes I see involve temperature control and timing. Room temperature ingredients incorporate more easily, while properly chilled cream whips to perfect peaks. Taking time with each step, especially the folding process, makes the difference between good and exceptional results.
Nutritional Benefits and Considerations
Beyond its delicious taste, this cake offers surprising nutritional benefits. Matcha provides powerful antioxidants that may boost metabolism and support heart health. The catechins in matcha, particularly EGCG, have been studied for their anti-inflammatory properties.
Red beans contribute plant-based protein, fiber, and essential minerals like folate and magnesium. Unlike many desserts that provide empty calories, this cake delivers nutrients alongside indulgence.
However, the cream and sugar content means this should be enjoyed in moderation. A standard slice contains about 285 calories, making it comparable to other premium desserts but with added nutritional value from the traditional Japanese ingredients.
Pairing Suggestions and Serving Ideas
Beverage Pairings
Traditional Japanese Teas: Sencha or gyokuro green tea creates a harmonious flavor profile that doesn’t compete with the cake’s delicate tastes.
Coffee Combinations: Light roast coffee or cold brew provides gentle contrast without overwhelming the subtle matcha notes.
Non-Caffeinated Options: Jasmine tea or chamomile offers floral notes that complement both matcha and red bean flavors.
Complementary Desserts
When serving for special occasions, I often create a Japanese-inspired dessert spread. Mochi ice cream, dorayaki (pancake sandwiches), or simple matcha cookies provide textural variety while maintaining the flavor theme.
Fresh fruit like perfectly ripe pears or persimmons cleanse the palate between bites, while their natural sweetness harmonizes with the cake’s flavors.
Cultural Context and Significance
Understanding the cultural background of these ingredients deepens appreciation for this dessert. Matcha ceremonies in Japan emphasize mindfulness and respect for ingredients—principles that apply beautifully to creating this cake.
Red beans hold special significance in Japanese culture, often associated with celebration and good fortune. Combining these traditional elements in a modern mousse cake bridges centuries of culinary tradition with contemporary presentation.
This cake represents what I love most about fusion desserts—they honor traditional flavors while making them accessible to modern palates and techniques. Each bite tells the story of Japanese confectionery evolution.
Questions and Answers
Q. Can I make this cake without a stand mixer? A hand mixer works perfectly well for this recipe. You’ll need to whip the egg mixture for about 12-15 minutes instead of 8-10, and take breaks to prevent the motor from overheating. The key is achieving that ribbon stage where the mixture falls in thick ribbons when lifted.
Q. What’s the difference between ceremonial and culinary grade matcha for this recipe? Ceremonial grade matcha offers more complex, refined flavors with less bitterness, but it’s more expensive. Culinary grade works beautifully in this cake and provides excellent value. I recommend ceremonial grade if you’re serving this for a special occasion and culinary grade for regular enjoyment.
Q. Why does my mousse sometimes turn out grainy? Grainy texture usually results from overwhipped cream or temperature shock. Whip cream only to soft peaks—it should hold its shape but still be pourable. Also, ensure your gelatin mixture has cooled to room temperature before folding with cream to prevent cooking the dairy.
Q. Can I prepare the components separately and assemble later? Absolutely! The sponge cake can be made up to 2 days ahead and stored wrapped at room temperature. The mousses can be prepared and kept covered in the refrigerator for up to 24 hours before assembly. This actually makes the final assembly much easier.
Q. How do I know when the gelatin has properly bloomed? Properly bloomed gelatin absorbs all the water and becomes spongy, almost like a soft solid. It should have no visible liquid water and feel firm to the touch. If there’s still liquid water after 5 minutes, let it sit longer.
Q. What should I do if my red bean paste is too thick? Thin it gradually with warm water, adding just 1 tablespoon at a time until it reaches the consistency of thick yogurt. You can also warm it gently in a saucepan with a little water, stirring constantly until smooth.
Q. Can I use agar instead of gelatin for a vegetarian version? Yes, but use about 1/3 the amount of agar powder compared to gelatin, and it sets at room temperature rather than requiring refrigeration. Agar creates a slightly firmer texture than gelatin, but it works well in this recipe.
Q. How far in advance can I make this cake? This cake is actually better made 1-2 days ahead as the flavors meld beautifully. It can be stored in the refrigerator for up to a week, though the texture is optimal in the first 3-4 days. For longer storage, freeze individual slices for up to 3 months.
Q. Why is my matcha layer bitter? Bitterness usually comes from using water that’s too hot when making the matcha paste, or from low-quality matcha powder. Use water that’s about 80°C (175°F)—hot but not boiling. Also, ensure you’re sifting the matcha to prevent clumps that can create bitter pockets.
Q. Can I make individual portions instead of one large cake? Individual portions work wonderfully! Use 4-6 small glasses or ramekins, layering the components in the same order. Adjust the setting time to about 2-3 hours since the smaller portions set more quickly.
This matcha red bean mousse cake represents everything I love about Japanese-inspired desserts—the perfect balance of flavors, the meditative process of careful preparation, and the joy of sharing something truly special with others. Whether you’re making it for a dinner party or simply treating yourself to something extraordinary, this cake delivers an unforgettable experience that honors both tradition and innovation.