I’ve been making desserts for over a decade, and let me tell you something – there are few combinations more heavenly than chocolate and peanut butter. When I discovered I could create an absolutely stunning pie without even turning on my oven, it felt like discovering a secret superpower in the kitchen. This no-bake chocolate peanut butter pie has become my go-to dessert for everything from summer gatherings to last-minute dinner parties.
The beauty of this dessert lies not just in its incredible taste, but in its simplicity. While traditional pies require precise timing, temperature control, and often leave you sweating in a hot kitchen, this recipe delivers restaurant-quality results with minimal effort. I’ve served this pie to skeptical bakers who couldn’t believe something so delicious required no baking whatsoever.
Understanding the Magic Behind No-Bake Desserts
No-Bake Desserts : Confections that achieve their final texture and stability through chilling rather than baking, relying on ingredients like gelatin, cream cheese, or chocolate to provide structure.
Stabilization : The process by which ingredients firm up and hold their shape when chilled, creating the desired consistency without heat application.
Emulsification : The technique of combining fat-based and water-based ingredients to create a smooth, cohesive mixture that won’t separate.
The science behind no-bake desserts fascinates me. Unlike traditional baked goods that rely on heat to activate proteins and create structure, these desserts depend on the cooling process and the natural properties of specific ingredients. Cream cheese provides richness and stability, while chocolate adds both flavor and structural integrity when it cools and firms up.
Essential Ingredients Breakdown
Creating the perfect no-bake chocolate peanut butter pie requires understanding each ingredient’s role. I’ve experimented with countless variations over the years, and these components work together like a perfectly orchestrated symphony.
Crust Components
The foundation of any great pie starts with the crust. For this no-bake version, I prefer using graham crackers, though I’ve successfully made variations with chocolate wafers and even crushed peanut butter cookies.
| Ingredient | Quantity | Purpose | Substitution Options |
|---|---|---|---|
| Graham Crackers | 1½ cups crushed | Base structure | Chocolate wafers, vanilla wafers |
| Butter | 6 tablespoons melted | Binding agent | Coconut oil, margarine |
| Sugar | 3 tablespoons | Sweetness balance | Brown sugar, honey |
| Salt | Pinch | Flavor enhancement | Sea salt, kosher salt |
Filling Essentials
The filling represents the heart of this dessert. Each ingredient serves a specific purpose, and I’ve learned through trial and error that precision matters here.
| Component | Amount | Function | Quality Tips |
|---|---|---|---|
| Cream Cheese | 16 oz, softened | Primary structure | Must be room temperature |
| Peanut Butter | 1 cup creamy | Flavor base | Use natural or traditional |
| Powdered Sugar | 1½ cups | Sweetening agent | Sift to prevent lumps |
| Heavy Cream | 2 cups | Texture lightener | Must be cold for whipping |
| Vanilla Extract | 2 teaspoons | Flavor enhancer | Pure extract preferred |
Step-by-Step Preparation Guide
My approach to this pie has evolved over years of making it for different occasions. I’ve streamlined the process to ensure consistent results every time.
Crust Preparation
Creating the perfect crust foundation requires attention to detail, but don’t let that intimidate you. I’ve made this crust hundreds of times, and once you get the hang of it, the process becomes second nature.
• Crush the graham crackers: I prefer using a food processor for even texture, though placing crackers in a sealed bag and using a rolling pin works perfectly well • Combine dry ingredients: Mix crushed crackers with sugar and salt in a large bowl • Add melted butter: Pour warm melted butter over the mixture and stir until it resembles wet sand • Press into pan: Using the bottom of a measuring cup, firmly press the mixture into a 9-inch pie pan • Chill the crust: Refrigerate for at least 30 minutes while preparing the filling
Filling Creation Process
The filling requires a specific order of operations that I’ve perfected through countless attempts. Skip steps or rush the process, and you’ll end up with a grainy or separated mixture.
• Soften cream cheese: Remove from refrigerator 2-3 hours before starting, or microwave in 15-second intervals • Beat cream cheese: Using an electric mixer, beat until completely smooth and fluffy • Incorporate peanut butter: Add peanut butter and beat until well combined • Add powdered sugar gradually: Incorporate in three additions to prevent lumps • Include vanilla: Beat in vanilla extract until evenly distributed • Whip heavy cream separately: In a clean bowl, whip cold heavy cream to soft peaks • Fold components together: Gently fold whipped cream into peanut butter mixture in three additions
Advanced Techniques and Pro Tips
After making this pie countless times for various events, I’ve developed techniques that elevate the final result from good to absolutely spectacular.
Temperature Control Mastery
Temperature plays a crucial role in achieving the perfect texture. I always ensure my cream cheese reaches true room temperature – it should give slightly when pressed but not be warm. Cold heavy cream whips better and creates more stable peaks, while the finished filling should be chilled for at least four hours, though overnight produces superior results.
Texture Optimization
The secret to achieving that perfect creamy-yet-stable texture lies in the folding technique. I fold the whipped cream into the peanut butter mixture in three separate additions, using a rubber spatula in a gentle motion that preserves the air bubbles while ensuring even distribution.
Flavor Enhancement Strategies
While the basic recipe produces excellent results, I’ve discovered several enhancement techniques over the years:
• Toast the graham crackers: Lightly toasting crushed graham crackers before mixing adds depth • Add a touch of espresso: One teaspoon of instant espresso powder enhances chocolate flavors • Include cream cheese stabilizer: A packet of unflavored gelatin dissolved in warm water creates extra firmness • Layer the flavors: Creating distinct peanut butter and chocolate layers adds visual appeal
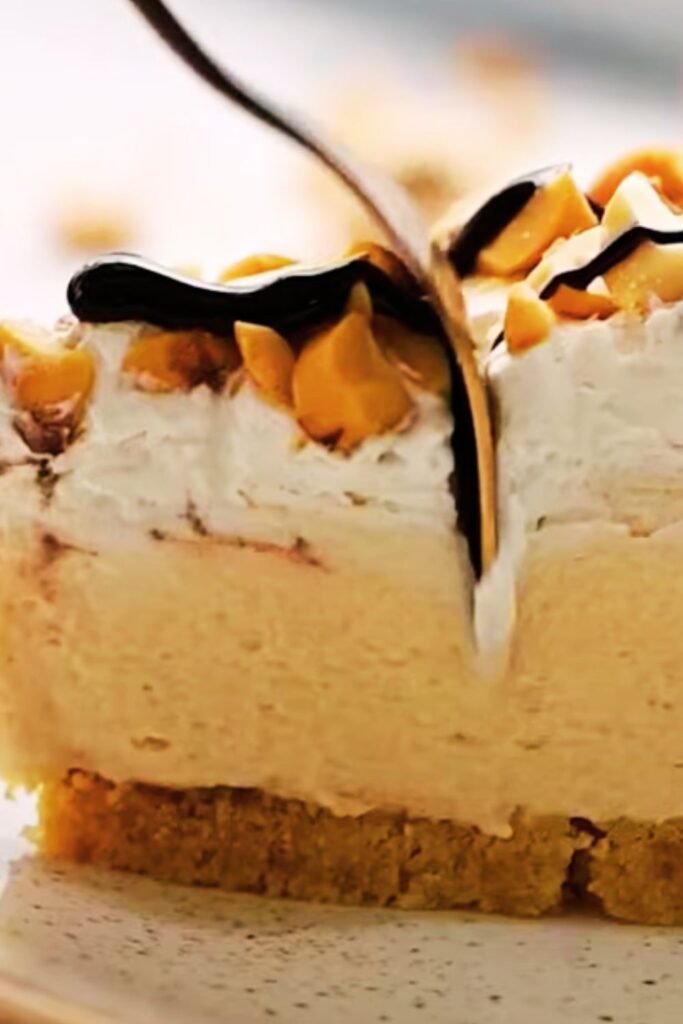
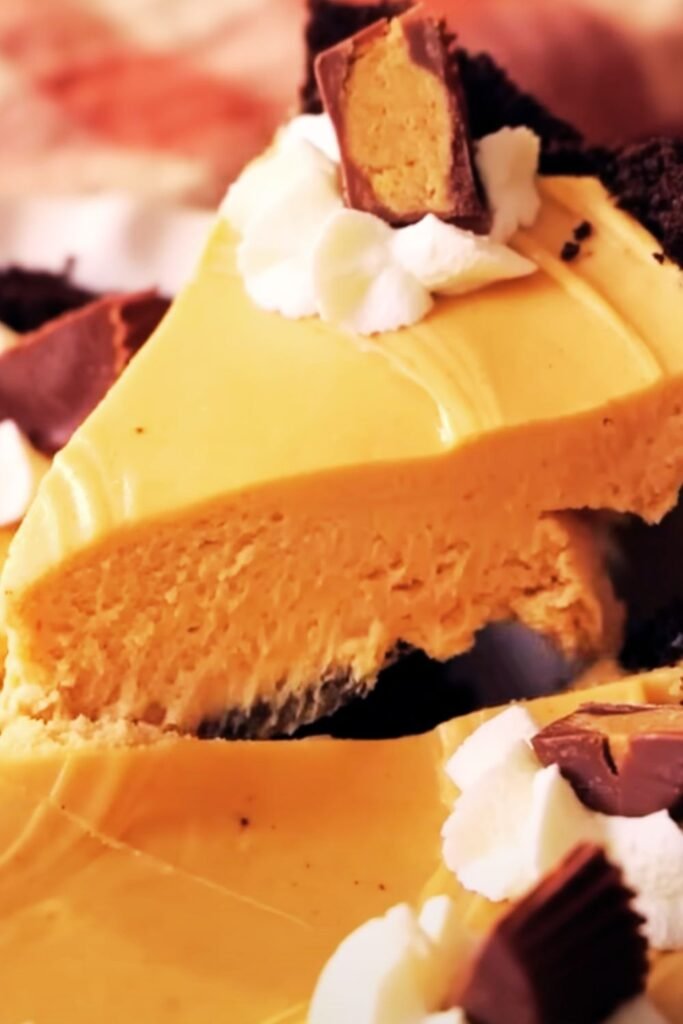
Chocolate Topping Variations
The chocolate element can be incorporated in multiple ways, each creating a different flavor profile and visual presentation.
Classic Chocolate Ganache
| Ingredient | Quantity | Temperature | Technique |
|---|---|---|---|
| Heavy Cream | ½ cup | Hot (not boiling) | Heat until steaming |
| Dark Chocolate | 6 oz chopped | Room temperature | Chop finely for even melting |
| Butter | 2 tablespoons | Room temperature | Add for glossy finish |
Pour hot cream over chopped chocolate, let sit for two minutes, then stir from center outward until smooth. Allow to cool slightly before pouring over chilled pie.
Chocolate Whipped Cream
For a lighter chocolate experience, I sometimes create chocolate whipped cream by adding cocoa powder and powdered sugar to heavy cream before whipping. This creates a mousse-like texture that complements the peanut butter filling beautifully.
Storage and Serving Guidelines
Proper storage makes the difference between a pie that lasts for days and one that deteriorates quickly. I’ve learned these lessons through both success and failure.
Optimal Storage Conditions
This pie requires refrigeration at all times due to the dairy content. I cover it tightly with plastic wrap, ensuring the wrap doesn’t touch the surface to prevent texture damage. The pie maintains peak quality for up to five days when stored properly.
Serving Temperature Recommendations
| Time Out of Refrigerator | Texture Result | Best For |
|---|---|---|
| 0-10 minutes | Very firm | Clean slicing |
| 10-20 minutes | Perfect serving | Optimal eating |
| 20-40 minutes | Softening | Still acceptable |
| Over 40 minutes | Too soft | Return to refrigerator |
I typically remove the pie from refrigeration about 15 minutes before serving. This allows the filling to soften just enough for easy slicing while maintaining its shape.
Troubleshooting Common Issues
Through years of making this pie and helping others perfect their versions, I’ve encountered virtually every possible problem and developed solutions for each.
Grainy Filling Solutions
Problem: Lumpy or grainy texture in the finished filling Causes: Cold cream cheese, under-mixing, or adding powdered sugar too quickly Solutions: Ensure cream cheese reaches true room temperature, beat longer than you think necessary, and add powdered sugar gradually while mixing continuously
Crust Crumbling Problems
Problem: Crust falls apart when slicing Causes: Insufficient butter, inadequate pressing, or not enough chilling time Solutions: Add butter one tablespoon at a time until mixture holds together, press firmly using a flat-bottomed measuring cup, and chill for minimum 30 minutes
Separation Issues
Problem: Filling separates or becomes watery Causes: Over-whipped cream, temperature variations, or ingredient incompatibility Solutions: Whip cream only to soft peaks, maintain consistent cool temperatures throughout process, and ensure all ingredients are at proper temperatures before combining
Creative Variations and Adaptations
My experimentation with this base recipe has led to numerous successful variations that cater to different tastes and dietary requirements.
Dietary Adaptations
Sugar-Free Version: Replace powdered sugar with powdered erythritol or stevia blend, maintaining the same quantity Dairy-Free Alternative: Substitute cream cheese with cashew cream cheese and heavy cream with coconut cream Gluten-Free Option: Use gluten-free graham crackers or create crust from crushed gluten-free cookies
Flavor Variations
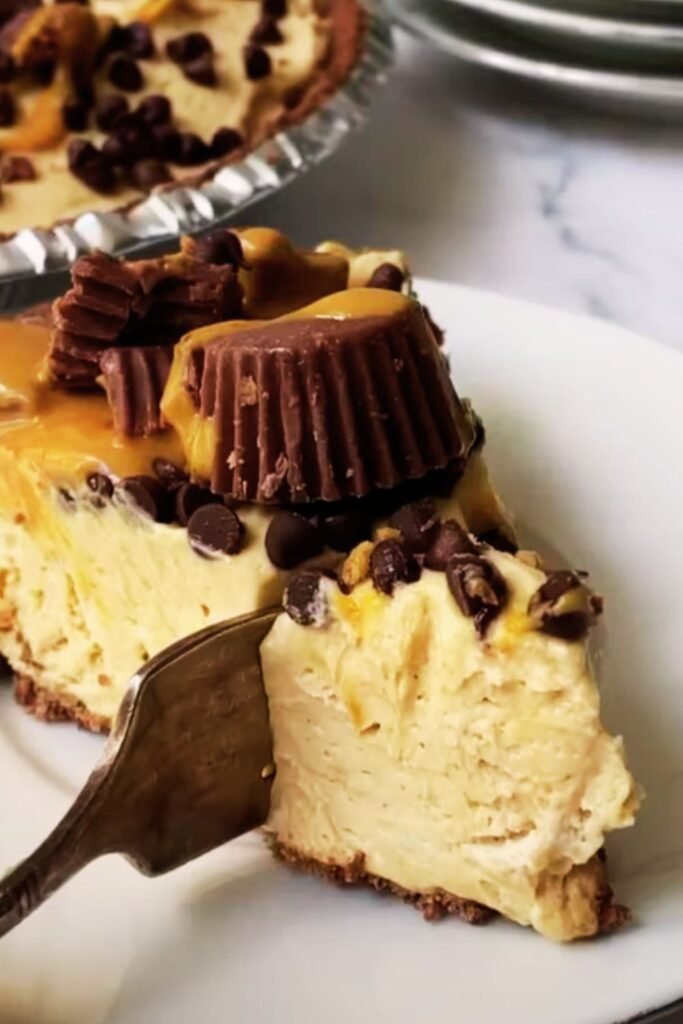
Chocolate Peanut Butter Swirl: Create distinct layers by dividing filling and adding melted chocolate to half Banana Addition: Layer sliced bananas between crust and filling for tropical twist Salted Caramel Version: Drizzle homemade salted caramel between layers and on top Crunchy Element: Fold in chopped peanuts or chocolate chips for texture contrast
Nutritional Considerations and Serving Suggestions
Understanding the nutritional profile helps with portion planning and dietary considerations.
Nutritional Breakdown Per Slice (Based on 8 servings)
| Nutrient | Amount | Daily Value % |
|---|---|---|
| Calories | 485 | 24% |
| Total Fat | 35g | 45% |
| Saturated Fat | 18g | 90% |
| Cholesterol | 95mg | 32% |
| Sodium | 285mg | 12% |
| Carbohydrates | 38g | 14% |
| Protein | 12g | 24% |
Serving Accompaniments
This rich pie pairs beautifully with various accompaniments that provide textural and flavor contrasts:
• Fresh berries: Strawberries or raspberries cut through the richness • Coffee or espresso: The bitterness balances the sweet, creamy filling • Vanilla ice cream: Creates a delightful temperature contrast • Chopped nuts: Add textural interest and complementary flavors • Fresh mint: Provides a bright, cleansing finish
Frequently Asked Questions
Q. Can I make this pie ahead of time for special occasions?
Absolutely! In fact, I prefer making this pie at least one day ahead. The flavors meld beautifully overnight, and the texture becomes even more stable. I’ve successfully made this pie up to three days in advance with excellent results.
Q. What’s the best way to slice this pie cleanly?
I use a sharp knife dipped in warm water and wiped clean between each cut. This prevents the filling from sticking to the blade and creates those beautiful, clean slices you see in professional presentations.
Q. Can I freeze this pie for longer storage?
While freezing is possible, I don’t recommend it as the texture changes significantly. The cream cheese filling becomes grainy when thawed, and the whipped cream loses its light, airy quality. Fresh refrigerated storage produces much better results.
Q. Why did my whipped cream deflate when I folded it in?
This usually happens when the whipped cream is over-beaten or when it’s folded too vigorously. I whip cream only to soft peaks and fold it in gently using a rubber spatula with a lifting motion rather than stirring.
Q. Can I use crunchy peanut butter instead of creamy?
You can, though it changes the texture significantly. Crunchy peanut butter creates a less smooth filling with pleasant textural variation. If using crunchy, I recommend reducing any additional nuts in the recipe to prevent overwhelming texture.
Q. How do I prevent the crust from getting soggy?
The key is ensuring the crust is completely chilled before adding the filling, and making sure the filling isn’t too warm when you pour it in. I also sometimes brush the crust with a thin layer of melted chocolate, which creates a moisture barrier.
Q. What size pie pan works best for this recipe?
I always use a standard 9-inch pie pan. Smaller pans create an overly thick pie that’s difficult to slice cleanly, while larger pans result in a thin pie that doesn’t have the impressive height this dessert deserves.
Q. Can I make individual portions instead of one large pie?
Certainly! I’ve made this in individual mason jars or small tart shells for parties. Adjust the chilling time accordingly – individual portions set faster than one large pie.
This no-bake chocolate peanut butter pie represents everything I love about dessert making: impressive results with manageable effort, incredible flavors that please everyone, and the flexibility to adapt based on personal preferences or dietary needs. Whether you’re avoiding the oven during hot summer months or simply want a reliable dessert that never fails to impress, this recipe delivers every single time. The combination of creamy peanut butter filling, rich chocolate elements, and buttery graham cracker crust creates a dessert experience that rivals any elaborate baked creation, proving that sometimes the simplest approaches yield the most satisfying results.