When I first attempted to make pavlova, I was intimidated by the prospect of creating that perfect crispy shell with a marshmallow-soft interior. After years of perfecting my technique and countless batches, I’ve discovered the secrets to making this stunning dessert that never fails to impress guests. Pavlova isn’t just a dessert—it’s a showstopper that transforms any gathering into something special.
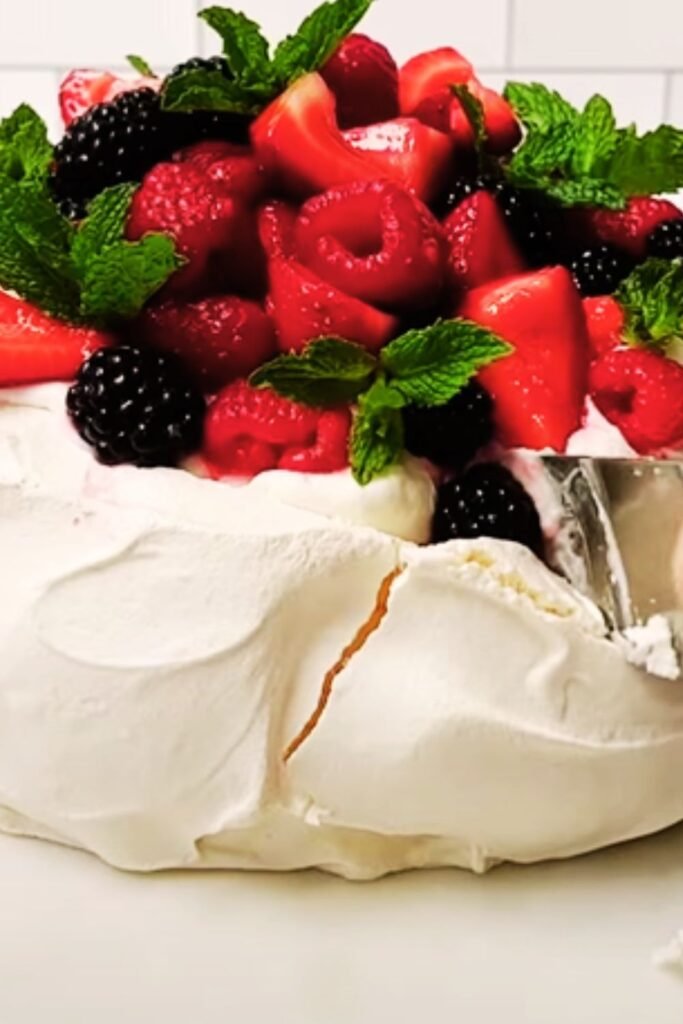
This cloud-like meringue dessert, topped with billowy whipped cream and fresh fruits, represents the perfect marriage of textures and flavors. The contrast between the crisp exterior and pillowy interior creates an experience that’s both elegant and comforting. Today, I’m sharing my foolproof method that guarantees success every time.
What Makes the Perfect Pavlova
The magic of pavlova lies in understanding the science behind meringue construction. Unlike regular meringues that are baked until completely dry, pavlova requires a specific technique that creates that signature texture contrast. The addition of cornstarch and vinegar works as stabilizers, while the lower temperature baking method ensures the interior remains soft and chewy.
Meringue Base : The foundation of any great pavlova starts with properly whipped egg whites that form stiff, glossy peaks without being overbeaten.
Stabilizers : Cornstarch and white vinegar act as insurance policies, preventing the meringue from weeping or collapsing during baking.
Temperature Control : The initial high heat sets the exterior, while the reduced temperature allows gentle cooking of the interior.
Cooling Process : Gradual cooling in the oven prevents sudden temperature changes that cause cracking.
Essential Ingredients and Their Roles
Understanding each ingredient’s purpose transforms pavlova-making from guesswork into a precise science. I’ve learned that quality ingredients make an enormous difference in the final result.
| Ingredient | Amount | Purpose | Quality Tips |
|---|---|---|---|
| Egg Whites | 4 large | Creates structure and volume | Room temperature, completely clean |
| Caster Sugar | 1 cup (220g) | Sweetness and stability | Superfine texture dissolves better |
| Cornstarch | 1 teaspoon | Absorbs moisture, prevents weeping | Sift to remove lumps |
| White Vinegar | 1 teaspoon | Acid stabilizes proteins | White vinegar only, not flavored |
| Vanilla Extract | 1 teaspoon | Flavor enhancement | Pure extract, not imitation |
| Heavy Cream | 1½ cups | Topping base | 35% fat content minimum |
| Powdered Sugar | 2 tablespoons | Sweetens cream | Sift for smooth texture |
| Fresh Fruits | 2-3 cups | Color and flavor contrast | Seasonal, ripe but firm |
Step-by-Step Pavlova Preparation
My method focuses on creating the perfect environment for success. Each step builds upon the previous one, creating a foundation that guarantees impressive results.
Preparing Your Kitchen Environment
Before touching a single ingredient, I ensure my kitchen setup promotes success. Temperature and humidity affect meringue dramatically, so I choose clear, dry days for pavlova-making when possible. All equipment must be scrupulously clean—even a trace of fat prevents proper whipping.
I preheat my oven to 300°F (150°C) and line a baking sheet with parchment paper. Using a 9-inch plate as a template, I trace a circle on the parchment, then flip it over so the pencil marks don’t transfer to the meringue.
Creating the Perfect Meringue Base
The meringue stage determines your pavlova’s success. I separate eggs when they’re cold, as the whites separate more cleanly, then let them come to room temperature for 30 minutes. This temperature allows for maximum volume when whipped.
Using a stand mixer with a whisk attachment, I begin beating the egg whites on medium speed until soft peaks form. This gradual approach prevents overbeating, which creates a grainy texture that won’t hold up during baking.
Once soft peaks appear, I increase to high speed and gradually add the caster sugar, one tablespoon at a time. This slow addition ensures the sugar dissolves completely, creating that glossy, stable meringue. The mixture should feel smooth between your fingers, not gritty.
Incorporating Stabilizers
When the meringue reaches the stiff peak stage and appears glossy, I reduce the mixer speed to low. The cornstarch and vinegar get folded in gently, followed by the vanilla extract. These additions happen quickly to prevent deflating the carefully built structure.
The finished meringue should hold its shape when the whisk is lifted, creating peaks that stand straight without drooping. If it’s not quite there, I continue beating for another minute, checking frequently to avoid overbeating.
Shaping and Baking Techniques
Transferring the meringue to the prepared baking sheet requires a gentle touch. I spoon the mixture onto the parchment circle, creating a disc about 8 inches in diameter. Using the back of a spoon, I create a shallow well in the center, building up the edges slightly to hold the toppings later.
The surface should look smooth and even, with gentle swirls that add visual interest. I avoid making the walls too high, as they may crack during baking.
Into the preheated oven it goes, but immediately I reduce the temperature to 225°F (110°C). This initial blast of heat sets the exterior, while the lower temperature allows gentle cooking. The pavlova bakes for 1 hour and 15 minutes, developing a pale cream color and crisp exterior.
Baking Temperature and Timing Guide
| Phase | Temperature | Time | Visual Cues |
|---|---|---|---|
| Initial Set | 300°F (150°C) | 5 minutes | Slight color change |
| Main Bake | 225°F (110°C) | 1 hour 10 minutes | Pale cream, firm touch |
| Cooling | Oven off, door ajar | 1 hour | Gradual temperature drop |
| Final Cool | Room temperature | 1 hour | Completely cool |
Cooling and Storage Secrets
The cooling process proves just as crucial as the baking. I turn off the oven but leave the pavlova inside with the door slightly ajar. This gradual temperature reduction prevents the sudden shock that causes cracking.
After an hour in the cooling oven, I remove the pavlova and let it finish cooling at room temperature. The base can be made up to two days ahead and stored in an airtight container in a cool, dry place. Humidity is pavlova’s enemy, so I avoid refrigeration until after assembly.
Assembly and Topping Techniques
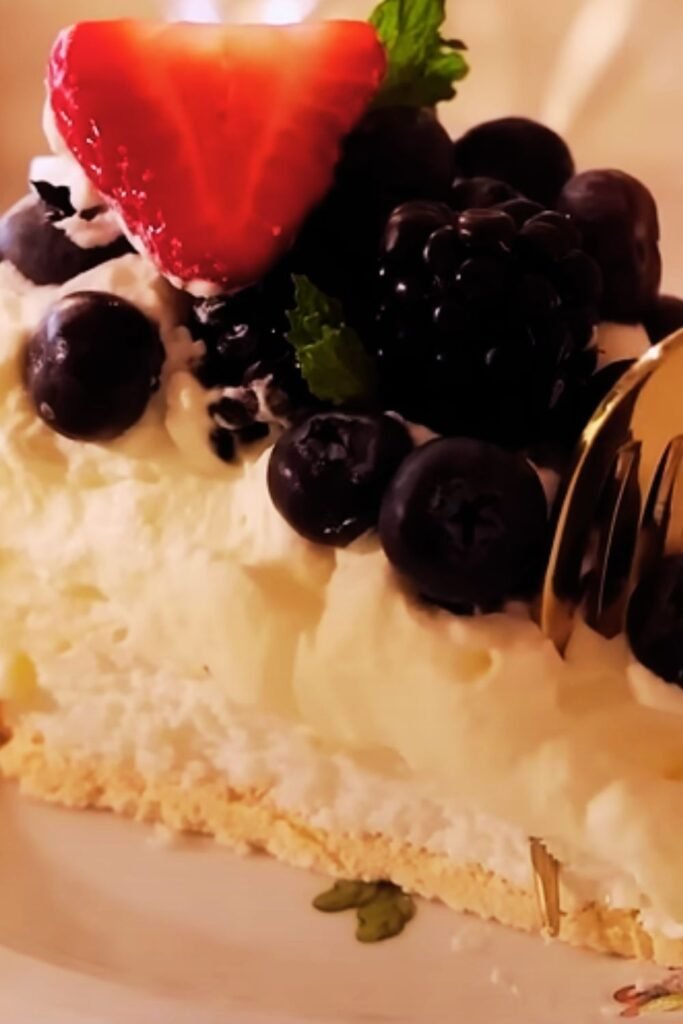
Assembly happens just before serving to maintain the textural contrast that makes pavlova special. I whip the heavy cream with powdered sugar and vanilla until it forms soft peaks—not stiff peaks, which would make spreading difficult.
Gently transferring the pavlova base to a serving plate, I spoon the whipped cream into the center well, spreading it to the edges without covering the meringue walls completely. The cream should look abundant but not overflowing.
Fresh fruit selection depends on the season and personal preference. I arrange berries, sliced stone fruits, or tropical fruits in an artful pattern that showcases their natural colors and shapes. The key is varying heights and colors for visual impact.
Seasonal Fruit Combinations
| Season | Primary Fruits | Complementary Additions | Flavor Profile |
|---|---|---|---|
| Spring | Strawberries, Rhubarb | Mint leaves, Lemon zest | Fresh, tangy |
| Summer | Berries, Peaches, Nectarines | Basil, Lime zest | Bright, juicy |
| Fall | Pears, Figs, Grapes | Toasted nuts, Honey drizzle | Rich, warming |
| Winter | Citrus, Pomegranate, Kiwi | Crystallized ginger | Vibrant, exotic |
Troubleshooting Common Issues
Through my pavlova-making journey, I’ve encountered and solved numerous challenges. Understanding these common problems helps prevent disappointment and builds confidence.
Weeping Meringue : When liquid pools around the base, it usually indicates insufficient baking time or high humidity. I ensure complete baking and choose low-humidity days when possible.
Cracking Surface : Sudden temperature changes cause cracks. Gradual cooling and avoiding drafts prevents this issue. Small cracks add character, but large ones indicate temperature shock.
Collapsed Center : Underbeaten meringue or overmixing after adding stabilizers causes collapse. Proper technique and timing solve this problem.
Chewy Throughout : Overbaking or too-high temperature eliminates the soft interior. Lower temperatures and careful timing maintain the texture contrast.
Flavor Variations and Creative Twists
Once you master the basic technique, pavlova becomes a canvas for creativity. I experiment with different flavors while maintaining the fundamental structure that makes pavlova special.
Chocolate Pavlova : Replacing 2 tablespoons of sugar with cocoa powder creates a rich, sophisticated variation. The chocolate complements berry toppings beautifully.
Lemon Pavlova : Adding lemon zest to the meringue and lemon curd between the cream and fruit layers creates a bright, citrusy dessert perfect for spring.
Coconut Pavlova : Folding in toasted coconut flakes and using coconut cream for topping creates a tropical twist that pairs wonderfully with mango and passion fruit.
Rose Pavlova : A touch of rose water in the meringue and cream, topped with pistachios and rose petals, creates an elegant, Middle Eastern-inspired dessert.
Nutritional Information and Dietary Considerations
Understanding pavlova’s nutritional profile helps with meal planning and dietary accommodations. While it’s certainly a indulgent dessert, it’s surprisingly light compared to many alternatives.
| Component | Calories (per serving) | Carbs (g) | Protein (g) | Fat (g) |
|---|---|---|---|---|
| Meringue Base | 85 | 21 | 2 | 0 |
| Whipped Cream | 120 | 3 | 1 | 12 |
| Fresh Fruits | 25 | 6 | 0 | 0 |
| Total per serving | 230 | 30 | 3 | 12 |
Based on 8 servings per pavlova
The dessert is naturally gluten-free, making it suitable for those with celiac disease or gluten sensitivity. For dairy-free versions, coconut cream whips beautifully and provides similar richness.
Professional Presentation Tips
Presentation elevates pavlova from homemade dessert to restaurant-quality showpiece. I’ve learned several techniques that guarantee impressive results every time.
The serving plate should be large enough to showcase the pavlova without crowding. I choose colors that complement the fruits—white or pale colors work best to highlight the dessert’s natural beauty.
Garnishing with fresh herbs like mint or basil adds color and aroma. A light dusting of powdered sugar just before serving creates an elegant finish. For special occasions, I add edible flowers or a drizzle of fruit coulis for extra sophistication.
Serving Suggestions and Accompaniments
While pavlova stands beautifully on its own, thoughtful accompaniments enhance the experience. I serve it with small spoons rather than forks, as the combination of textures works best when eaten together in each bite.
Coffee or tea provides a nice contrast to the sweetness, while sparkling water with a twist of citrus cleanses the palate between bites. For non-alcoholic options, fruit-infused waters or herbal teas complement the dessert’s fresh flavors.
The portion size should be generous enough to showcase all the components but not so large as to overwhelm. I find that 8 servings from one pavlova provides the perfect balance.
Make-Ahead Strategies
Planning ahead makes pavlova practical for entertaining. The meringue base stores well for up to three days in an airtight container, while the cream can be whipped several hours ahead and refrigerated.
I prepare fruits the morning of serving, storing them separately to prevent juice from making the cream watery. Assembly happens just before serving to maintain the textural contrast that makes pavlova special.
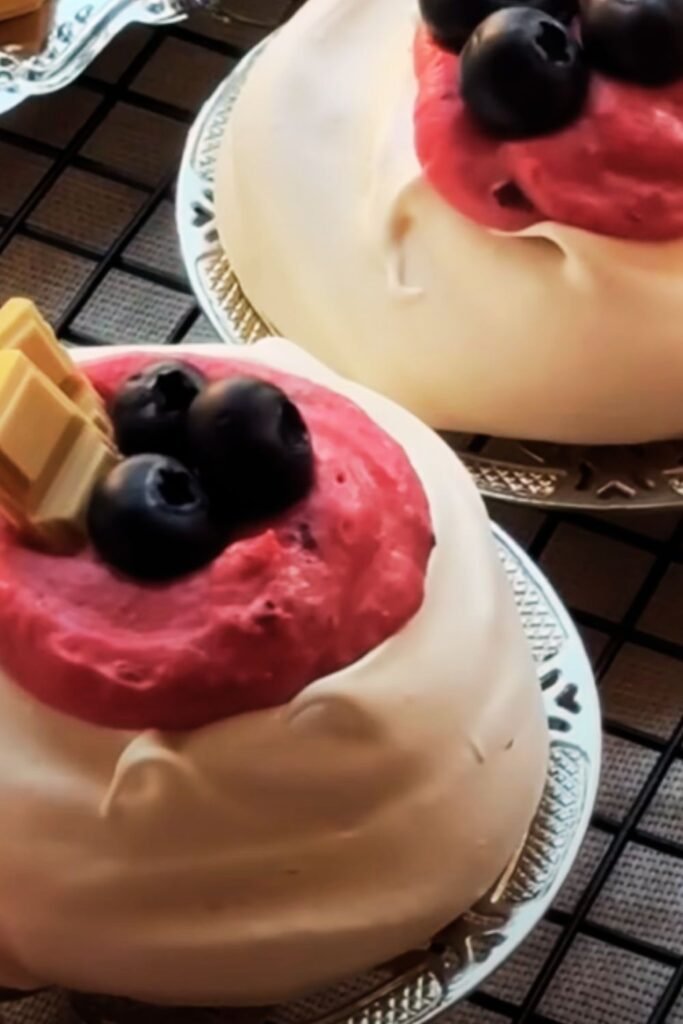
For large gatherings, I sometimes make individual pavlovas, which look elegant and solve portion control issues. The technique remains the same, but baking time reduces to about 45 minutes.
Questions and Answers
Q: Why does my pavlova crack during baking? The most common cause of cracking is sudden temperature changes. I always ensure gradual cooling by leaving the pavlova in the turned-off oven with the door slightly open. Also, avoid opening the oven door during baking, as this can cause temperature fluctuations.
Q: Can I make pavlova on a humid day? Humidity is pavlova’s biggest enemy, as it prevents the meringue from crisping properly and can cause weeping. I try to avoid making pavlova on very humid days, but if necessary, I use a dehumidifier in the kitchen and ensure longer baking times.
Q: How do I know when my meringue is properly whipped? The meringue should form stiff, glossy peaks that hold their shape when the whisk is lifted. When you rub a small amount between your fingers, it should feel smooth, not gritty. If it still feels grainy, continue beating until the sugar completely dissolves.
Q: Can I freeze pavlova? I don’t recommend freezing assembled pavlova, as the cream and fruits don’t freeze well. However, you can freeze the baked meringue base for up to one month. Wrap it carefully in plastic wrap and thaw completely before assembling.
Q: What’s the difference between pavlova and regular meringue? Pavlova contains cornstarch and vinegar, which create the characteristic soft, marshmallow-like interior. Regular meringue is typically baked until completely dry throughout. The baking method also differs—pavlova uses lower temperatures for longer periods.
Q: Why is my pavlova base soggy? Sogginess usually results from underbaking or assembling too early. The base should sound hollow when tapped and lift easily from the parchment. Always wait until completely cool before adding toppings, and serve within a few hours of assembly.
Q: Can I use different types of sugar? Caster (superfine) sugar works best because it dissolves more easily into the egg whites. Regular granulated sugar can work but may not dissolve completely, creating a grainy texture. Avoid brown sugar or other alternatives, as they affect both texture and color.
Q: How do I prevent my pavlova from weeping? Weeping occurs when liquid pools around the base. Ensure complete baking—the base should be crisp and dry. Adding cornstarch helps absorb moisture, and avoiding humid conditions during baking and storage prevents this issue.
Q: What fruits work best for topping? I prefer fruits that aren’t too juicy, as excess liquid can make the cream watery. Berries, sliced stone fruits, and tropical fruits work wonderfully. Avoid very ripe or overripe fruits that might collapse or release too much juice.
Q: Can I make individual pavlovas instead of one large one? Absolutely! Individual pavlovas are elegant and practical for entertaining. Divide the meringue into 6-8 portions, shape them similarly to the large version, and reduce baking time to about 45 minutes. They’re perfect for portion control and look very professional.