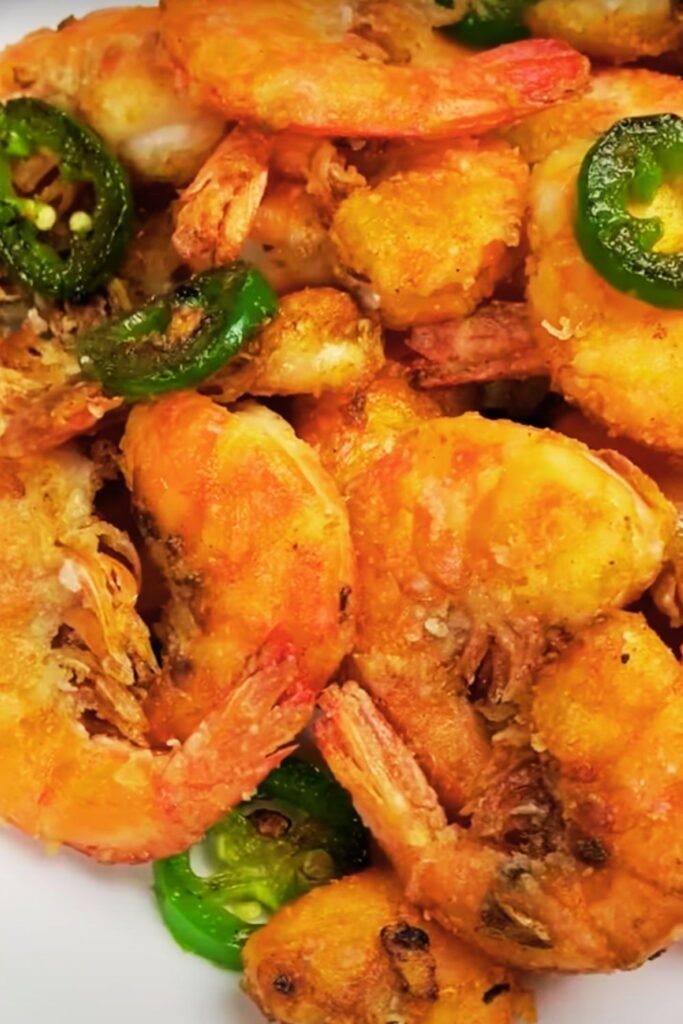
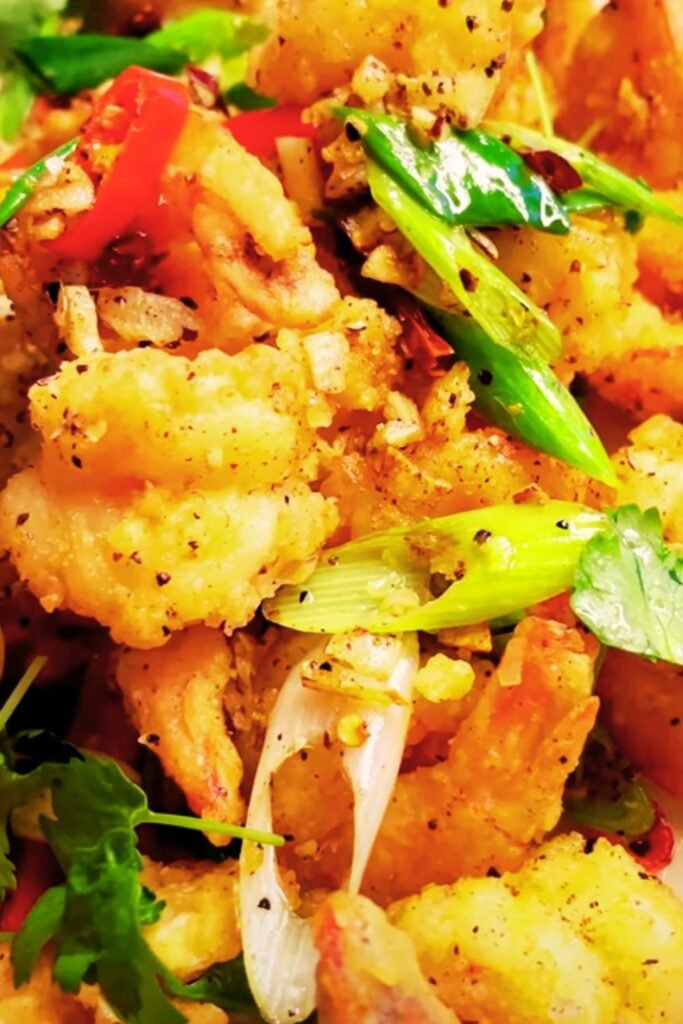
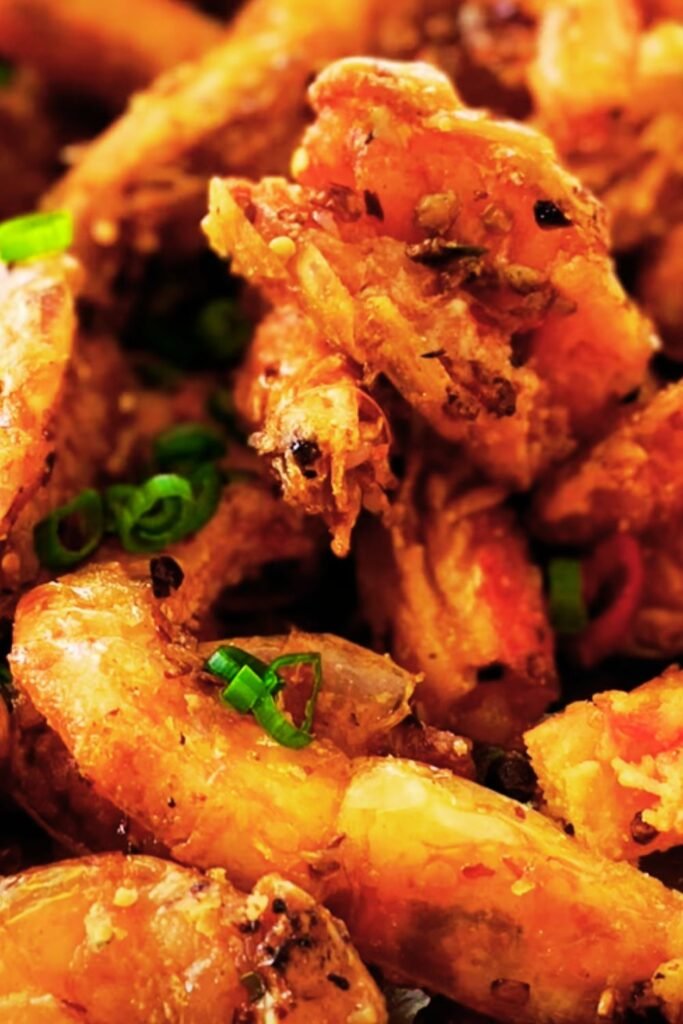
When I first discovered salt and pepper crispy shrimp at my local Chinese restaurant, I knew I had to master this dish at home. The combination of perfectly seasoned, golden-brown shrimp with that signature numbing spice from Sichuan peppercorns creates an absolutely irresistible appetizer or main course. After countless experiments in my kitchen, I’ve perfected a technique that delivers restaurant-quality results every single time.
This dish represents one of the most beloved preparations in Cantonese cuisine, where fresh seafood meets bold, aromatic spices. The beauty lies in its simplicity – premium shrimp elevated by a carefully crafted seasoning blend that creates layers of flavor and texture. I’ve found that the key to authentic salt and pepper shrimp lies not just in the ingredients, but in understanding the precise cooking techniques that create that coveted crispy exterior while maintaining tender, juicy shrimp inside.
What Makes Perfect Salt and Pepper Shrimp
Salt and Pepper Shrimp (椒鹽蝦) : A popular Cantonese dish featuring lightly battered and deep-fried shrimp seasoned with a mixture of salt, white pepper, and aromatic spices
Wok Hei (鑊氣) : The distinctive smoky flavor imparted by cooking at extremely high heat in a well-seasoned wok
Sichuan Peppercorns (花椒) : Aromatic spice that provides a unique numbing sensation and citrusy fragrance essential to authentic seasoning
Cornstarch Coating : Light dusting that creates the characteristic crispy texture while protecting the shrimp from overcooking
The secret to exceptional salt and pepper shrimp starts with selecting the right shrimp and understanding how each component contributes to the final dish. I’ve learned that medium to large shrimp work best – they provide enough surface area for the coating while maintaining that perfect bite-sized portion. The cornstarch coating should be light enough to let the shrimp flavor shine through, yet substantial enough to create that satisfying crunch.
Essential Ingredients Breakdown
Primary Ingredients
| Ingredient | Quantity | Purpose | Selection Tips |
|---|---|---|---|
| Large Shrimp | 1.5 lbs (24-30 pieces) | Main protein | Choose 21-25 count, deveined with shells on |
| Cornstarch | 1/2 cup | Coating for crispiness | Fine texture preferred over coarse |
| Salt | 2 tablespoons | Base seasoning | Sea salt or kosher salt works best |
| White Pepper | 1 tablespoon | Heat and flavor | Freshly ground for maximum potency |
| Sichuan Peppercorns | 2 teaspoons | Aromatic numbing spice | Toast before grinding for enhanced flavor |
| Vegetable Oil | 4 cups | Deep frying medium | High smoke point oils like peanut or canola |
Aromatic Enhancement Ingredients
| Ingredient | Quantity | Purpose | Preparation Notes |
|---|---|---|---|
| Fresh Ginger | 2 inches, minced | Aromatic base | Peel and mince finely |
| Garlic | 4 cloves, minced | Flavor foundation | Crush slightly before mincing |
| Green Onions | 4 stalks | Fresh finish | Separate white and green parts |
| Fresh Chilies | 2-3 pieces | Heat and color | Jalapeño or Thai chilies work well |
| Chinese Rice Wine | 2 tablespoons | Flavor enhancement | Shaoxing wine preferred |
I’ve discovered that the quality of your Sichuan peppercorns makes an enormous difference in the final dish. Look for bright, reddish-brown peppercorns that feel slightly oily to the touch – these indicate freshness and will provide that characteristic numbing sensation that makes this dish so distinctive.
Step-by-Step Preparation Method
Preparing the Shrimp
The foundation of great salt and pepper shrimp begins with proper shrimp preparation. I always start by selecting the freshest shrimp possible – they should smell like the ocean, not fishy, and feel firm to the touch.
- Cleaning Process: Rinse shrimp under cold running water, removing any residual sand or debris
- Deveining: Make a shallow cut along the back and remove the dark vein completely
- Shell Decision: I prefer leaving shells on for maximum flavor and protection during frying
- Drying: Pat completely dry with paper towels – excess moisture prevents proper crisping
Creating the Perfect Seasoning Blend
The salt and pepper mixture is where this dish gets its name and its soul. I’ve refined this blend through numerous trials to achieve the perfect balance.
Traditional Salt and Pepper Mix:
- Toast 2 teaspoons Sichuan peppercorns in a dry pan for 2-3 minutes until fragrant
- Grind toasted peppercorns with 2 tablespoons salt until fine
- Add 1 tablespoon white pepper and mix thoroughly
- Store in airtight container for up to 3 months
The toasting step cannot be skipped – it awakens the essential oils in the peppercorns and creates that complex, aromatic flavor profile that distinguishes authentic salt and pepper seasoning from ordinary pepper and salt.
Coating Technique
| Step | Process | Critical Points | Common Mistakes to Avoid |
|---|---|---|---|
| 1 | Light cornstarch dusting | Even, thin layer | Over-coating creates thick, doughy texture |
| 2 | Gentle tossing method | Coat all surfaces evenly | Aggressive handling damages shrimp |
| 3 | Rest period | 5-10 minutes settling | Skipping allows coating to fall off |
| 4 | Pre-fry shake | Remove excess coating | Thick coating absorbs too much oil |
I’ve learned that the coating should look almost transparent on the shrimp – you should still clearly see the pink color of the shrimp through the cornstarch. This light coating creates the perfect crispy shell without overwhelming the delicate shrimp flavor.
Advanced Cooking Techniques
Oil Temperature Management
Achieving the perfect crispy texture requires precise oil temperature control. I use a combination of visual cues and thermometer readings to ensure consistent results.
Temperature Stages:
- Initial Heating: Bring oil to 350°F (175°C) for optimal frying
- Test Method: Drop a small piece of coating – it should sizzle immediately and float
- Batch Cooking: Maintain temperature between 340-360°F throughout cooking
- Recovery Time: Allow oil to return to temperature between batches
The Two-Stage Frying Method
I’ve adopted a professional technique that involves two separate frying stages, which ensures both crispy exterior and perfectly cooked interior.
First Fry (Blanching):
- Oil temperature: 325°F (163°C)
- Duration: 2-3 minutes per batch
- Purpose: Cook shrimp through without over-browning
- Visual cue: Shrimp turn pink and coating sets
Second Fry (Crisping):
- Oil temperature: 375°F (190°C)
- Duration: 1-2 minutes per batch
- Purpose: Create golden, crispy exterior
- Visual cue: Deep golden color and aggressive bubbling
This method might seem like extra work, but it guarantees that your shrimp will have that perfect contrast between the crunchy coating and tender, juicy interior that makes restaurant-style salt and pepper shrimp so irresistible.
Flavor Enhancement Techniques
Wok Aromatics Method
After frying, the real magic happens in the wok where we build the aromatic flavor base that coats each piece of crispy shrimp.
Aromatic Sequence:
- Heat wok until smoking (this is crucial for wok hei)
- Add 2 tablespoons oil and swirl to coat
- Add minced ginger and garlic – they should sizzle immediately
- Add sliced chilies after 15 seconds
- Add white parts of green onions
- Toss in fried shrimp and seasoning blend
- Finish with green onion tops and rice wine
Seasoning Distribution
| Technique | Method | Timing | Result |
|---|---|---|---|
| Dry Tossing | Add seasoning to hot wok first | Before adding shrimp | Even distribution, prevents clumping |
| Wet Aromatics | Ginger, garlic, chilies in oil | 30 seconds before shrimp | Infused oil flavor |
| Fresh Finish | Green onion tops and wine | Final 15 seconds | Bright, fresh notes |
| Residual Heat | Turn off heat, continue tossing | After all ingredients added | Prevents overcooking |
The key to achieving authentic wok hei is working quickly and maintaining extremely high heat throughout the aromatic cooking process. I never let the wok temperature drop – each ingredient should sizzle aggressively when it hits the metal.
Nutritional Analysis and Health Benefits
Comprehensive Nutritional Breakdown
| Nutrient | Per Serving (6 shrimp) | Daily Value % | Health Benefits |
|---|---|---|---|
| Calories | 185 | 9% | Moderate calorie density |
| Protein | 24g | 48% | Complete amino acid profile |
| Fat | 8g | 12% | Mostly from cooking oil |
| Carbohydrates | 6g | 2% | Primarily from cornstarch coating |
| Sodium | 890mg | 39% | From salt seasoning blend |
| Cholesterol | 175mg | 58% | Natural shellfish content |
| Selenium | 42mcg | 76% | Powerful antioxidant support |
| Vitamin B12 | 1.8mcg | 75% | Essential for nerve function |
| Phosphorus | 240mg | 34% | Bone and teeth health |
| Zinc | 1.4mg | 13% | Immune system support |
Health Considerations
Shrimp provides exceptional nutritional value as a lean protein source rich in essential amino acids. I always emphasize to friends that despite being fried, this dish can fit into a balanced diet when enjoyed in moderation. The selenium content alone makes shrimp a valuable addition to any meal plan, supporting thyroid function and providing antioxidant benefits.
Dietary Modifications:
- Lower Sodium: Reduce salt in seasoning blend by half
- Gluten-Free: Cornstarch coating is naturally gluten-free
- Lighter Version: Use air fryer method at 400°F for 8-10 minutes
- Keto-Friendly: Perfect as-is for low-carb diets
Serving Suggestions and Presentation
Traditional Accompaniments
I’ve found that salt and pepper shrimp shines brightest when served alongside complementary dishes that balance its rich, spicy flavors.
Classic Pairings:
- Steamed jasmine rice to absorb the flavorful oil
- Simple stir-fried vegetables like bok choy or Chinese broccoli
- Cold cucumber salad for refreshing contrast
- Hot and sour soup as a palate cleanser
Modern Presentation Ideas
Appetizer Style:
- Serve in individual bamboo steamer baskets
- Garnish with fresh cilantro and lime wedges
- Provide small dishes of additional seasoning blend
- Include wet wipes for easy eating
Family Style:
- Large platter with fresh lettuce leaves for wrapping
- Multiple small bowls of dipping sauces
- Scattered toasted sesame seeds for extra crunch
- Fresh herbs like Thai basil or mint for brightness
Troubleshooting Common Issues
Texture Problems and Solutions
| Problem | Cause | Solution | Prevention |
|---|---|---|---|
| Soggy Coating | Oil temperature too low | Re-fry at higher temperature | Use thermometer, test with coating scrap |
| Thick, Doughy Texture | Too much cornstarch | Light dusting only | Shake off excess before frying |
| Overcooked Shrimp | Extended frying time | Two-stage frying method | Watch for pink color change |
| Uneven Browning | Overcrowded fryer | Smaller batches | Maximum 8-10 pieces per batch |
| Bland Seasoning | Insufficient salt/pepper blend | Toss while hot for adhesion | Season immediately after frying |
Flavor Balance Issues
Sometimes the seasoning doesn’t distribute evenly, or the heat level isn’t quite right. I’ve developed several techniques to adjust flavors even after cooking.
Quick Fixes:
- Too Salty: Add fresh lime juice and extra green onions
- Not Enough Heat: Sprinkle additional white pepper while shrimp are still warm
- Lacking Aroma: Toast extra Sichuan peppercorns and grind fresh
- Too Oily: Drain on wire rack and blot with paper towels
Storage and Reheating Guidelines
Proper Storage Methods
While salt and pepper shrimp tastes best fresh from the wok, I understand that sometimes you need to prepare ahead or store leftovers.
Refrigeration:
- Cool completely before storing (prevents condensation)
- Store in airtight container up to 3 days
- Separate any fresh garnishes
- Keep seasoning blend in separate container
Freezing (Not recommended but possible):
- Flash freeze on baking sheet before bagging
- Use within 1 month for best quality
- Thaw completely before reheating
- Expect some texture loss
Reheating for Best Results
| Method | Temperature | Time | Texture Result | Best For |
|---|---|---|---|---|
| Oven | 425°F | 5-7 minutes | Crispy exterior restored | Large quantities |
| Air Fryer | 375°F | 3-4 minutes | Excellent crispiness | Small portions |
| Skillet | Medium-high | 2-3 minutes | Good with oil spray | Quick single servings |
| Microwave | Not recommended | – | Soggy results | Avoid if possible |
Never reheat salt and pepper shrimp in the microwave – the coating becomes soggy and loses all its appealing texture. I always use dry heat methods to restore as much crispiness as possible.
Recipe Variations and Regional Adaptations
International Fusion Approaches
Over the years, I’ve experimented with various cultural adaptations of this classic dish, incorporating different spice blends and cooking techniques from around the world.
Mediterranean Style:
- Replace Sichuan peppercorns with dried oregano and lemon zest
- Add fresh rosemary and thyme to the aromatic base
- Finish with extra virgin olive oil and fresh parsley
- Serve with lemon aioli dipping sauce
Southeast Asian Version:
- Include lemongrass and kaffir lime leaves in seasoning
- Add fish sauce for umami depth
- Incorporate fresh Thai basil and cilantro
- Serve with sweet chili dipping sauce
Latin American Twist:
- Use cumin and smoked paprika in place of white pepper
- Add fresh jalapeños and lime zest
- Include fresh cilantro and Mexican oregano
- Serve with avocado crema
Ingredient Substitutions
Sometimes you might not have access to all the traditional ingredients, and I’ve found several successful substitutions that maintain the dish’s essential character.
Spice Alternatives:
- No Sichuan Peppercorns: Use black pepper + a pinch of five-spice powder
- No Chinese Rice Wine: Dry sherry or sake work well
- No White Pepper: Increase black pepper and add pinch of ginger powder
Questions and Answers
Q: Can I use frozen shrimp for this recipe? I absolutely recommend using frozen shrimp, but proper thawing is crucial. Place them in the refrigerator overnight, then pat completely dry before coating. Frozen shrimp often have better texture than “fresh” shrimp that have been sitting at the fish counter for days.
Q: What’s the difference between using shells-on versus peeled shrimp?
Shells-on shrimp retain more flavor and moisture during frying, plus they look more impressive when served. However, peeled shrimp are easier to eat and work better as appetizers. I use shells-on for family dinners and peeled for entertaining.
Q: How can I make this dish less oily? The key is proper oil temperature and good drainage. Use a wire rack over paper towels instead of just paper towels alone. You can also try the air fryer method at 400°F for 8-10 minutes, though the texture will be slightly different.
Q: Can I prepare the seasoning blend in advance? Absolutely! I make large batches and store them in airtight containers. The blend actually improves after a few days as the flavors meld together. It keeps for up to 3 months at room temperature.
Q: What size shrimp works best for this recipe? I prefer 21-25 count shrimp (about 21-25 pieces per pound). They’re large enough to have a good coating-to-shrimp ratio but small enough to cook evenly. Jumbo shrimp can work but may need longer cooking times.
Q: Is there a way to make this dish healthier without sacrificing flavor? Try the air fryer method or use a light spray of oil in a very hot cast iron skillet. You can also reduce the salt content and add more aromatics like fresh ginger and garlic for flavor complexity.
Q: What should I do if my coating keeps falling off during frying? This usually happens when the shrimp are too wet or the coating is too thick. Make sure shrimp are completely dry, use a light dusting of cornstarch, and let them rest for 5-10 minutes before frying.
Q: Can I use this seasoning blend on other seafood? The salt and pepper blend works wonderfully on squid, scallops, fish fillets, and even soft-shell crab. Adjust cooking times based on the thickness and type of seafood you’re using.
This salt and pepper crispy shrimp recipe has become one of my signature dishes, and I hope it brings the same joy to your kitchen that it has brought to mine. The combination of technique, quality ingredients, and proper seasoning creates a dish that rivals any restaurant version. Remember, practice makes perfect – don’t be discouraged if your first attempt isn’t restaurant-perfect. Each time you make it, you’ll develop a better feel for the oil temperature, coating technique, and timing that works best in your kitchen.