I’ll be honest with you – making pancakes for a crowd used to stress me out. Standing over a hot griddle, flipping pancakes one by one while my family impatiently waited at the table, was not my idea of a relaxing weekend morning. That all changed when I discovered sheet pan pancakes, and I’m excited to share this game-changing recipe with you.
Sheet pan pancakes have revolutionized my breakfast routine. Instead of spending precious morning time hovering over a stovetop, I can mix up a batch of batter, pour it onto a sheet pan, and let the oven do all the work. The result? Perfectly fluffy, evenly cooked pancakes that feed a crowd in one go.
What Makes Sheet Pan Pancakes Special
Sheet pan pancakes offer several advantages over traditional stovetop pancakes. First, they’re incredibly convenient – you can feed 8-12 people with minimal effort. Second, they cook evenly, eliminating the guesswork of flipping individual pancakes. Third, they free up your stovetop for other breakfast items like bacon or sausage.
The texture of sheet pan pancakes is slightly different from their stovetop cousins. They’re a bit more cake-like and tender, with a lovely golden top that develops during baking. I’ve found they hold up beautifully to various toppings and mix-ins, making them incredibly versatile.
Essential Ingredients for Perfect Sheet Pan Pancakes
Creating the perfect sheet pan pancake starts with quality ingredients. Here’s what you’ll need:
Dry Ingredients:
- All-purpose flour (2 cups) – The foundation of our pancakes
- Granulated sugar (2 tablespoons) – For subtle sweetness
- Baking powder (2 tablespoons) – Critical for fluffy texture
- Salt (1 teaspoon) – Enhances all flavors
- Baking soda (1/2 teaspoon) – Additional lift and tenderness
Wet Ingredients:
- Buttermilk (1 3/4 cups) – Creates tender, tangy pancakes
- Large eggs (2) – Structure and richness
- Melted butter (1/4 cup) – Flavor and moisture
- Vanilla extract (1 teaspoon) – Aromatic depth
Optional Enhancements:
- Cinnamon (1/2 teaspoon) – Warm spice
- Lemon zest (1 teaspoon) – Bright citrus notes
The quality of your ingredients matters significantly. I always use fresh baking powder – if yours is older than six months, replace it for optimal rise. Fresh buttermilk creates the best texture, though you can make a substitute by adding 1 tablespoon of lemon juice to regular milk.
Step-by-Step Instructions
Preparation Phase
Start by preheating your oven to 425°F (220°C). This higher temperature ensures a beautiful golden top while maintaining a fluffy interior. Generously butter an 18×13-inch sheet pan, making sure to get into all corners. I’ve learned that proper greasing is crucial – any spots you miss will result in stuck pancake pieces.
Mixing the Batter
In a large mixing bowl, whisk together all dry ingredients until well combined. This step is important because it distributes the leavening agents evenly throughout the flour. In a separate bowl, combine buttermilk, eggs, melted butter, and vanilla extract. Whisk these wet ingredients until smooth.
Create a well in the center of your dry ingredients and pour in the wet mixture. Here’s where technique matters: mix just until the ingredients are combined. I cannot stress this enough – overmixing develops gluten, resulting in tough, chewy pancakes. A few lumps are perfectly fine and actually desirable.
Baking Process
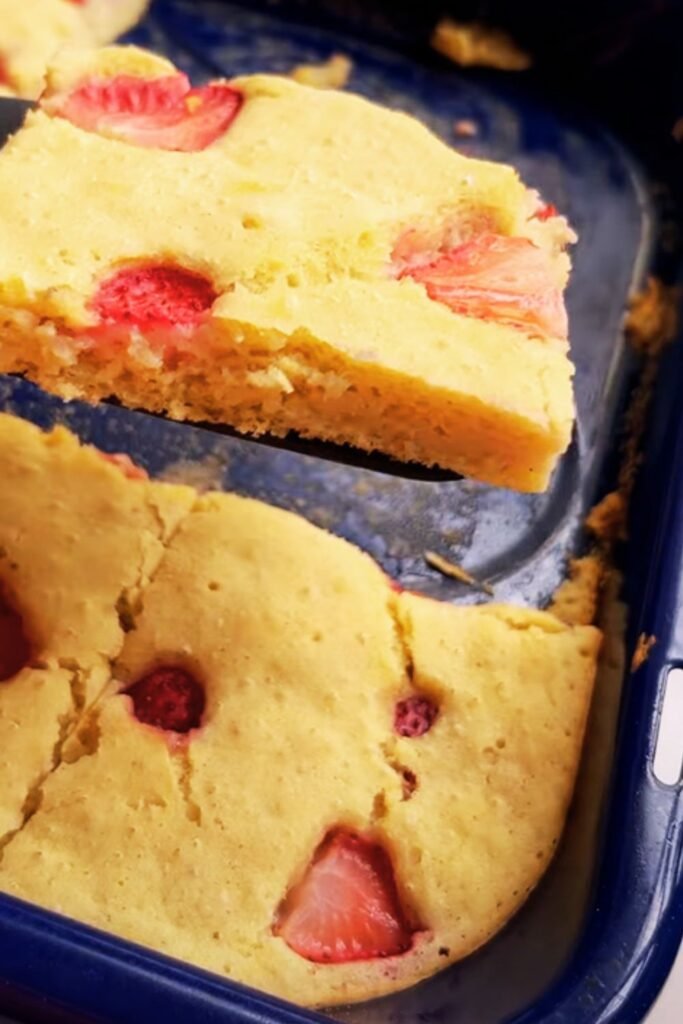
Pour the batter onto your prepared sheet pan, spreading it evenly with an offset spatula. Don’t worry about making it perfectly smooth – slight variations create character. Bake for 15-18 minutes, or until the top is golden brown and a toothpick inserted in the center comes out clean or with just a few moist crumbs.
The pancakes will puff up beautifully in the oven, creating a lovely, cake-like texture. I always check at the 15-minute mark, as oven temperatures can vary. Look for that golden-brown color and slight spring-back when you gently press the center.
Nutritional Information and Serving Details
| Nutritional Component | Per Serving (1/8 of pan) | Daily Value % |
|---|---|---|
| Calories | 285 | 14% |
| Total Fat | 8g | 12% |
| Saturated Fat | 5g | 25% |
| Cholesterol | 65mg | 22% |
| Sodium | 520mg | 23% |
| Total Carbohydrates | 45g | 16% |
| Dietary Fiber | 2g | 7% |
| Sugars | 8g | – |
| Protein | 9g | 18% |
| Calcium | 180mg | 14% |
| Iron | 2.5mg | 14% |
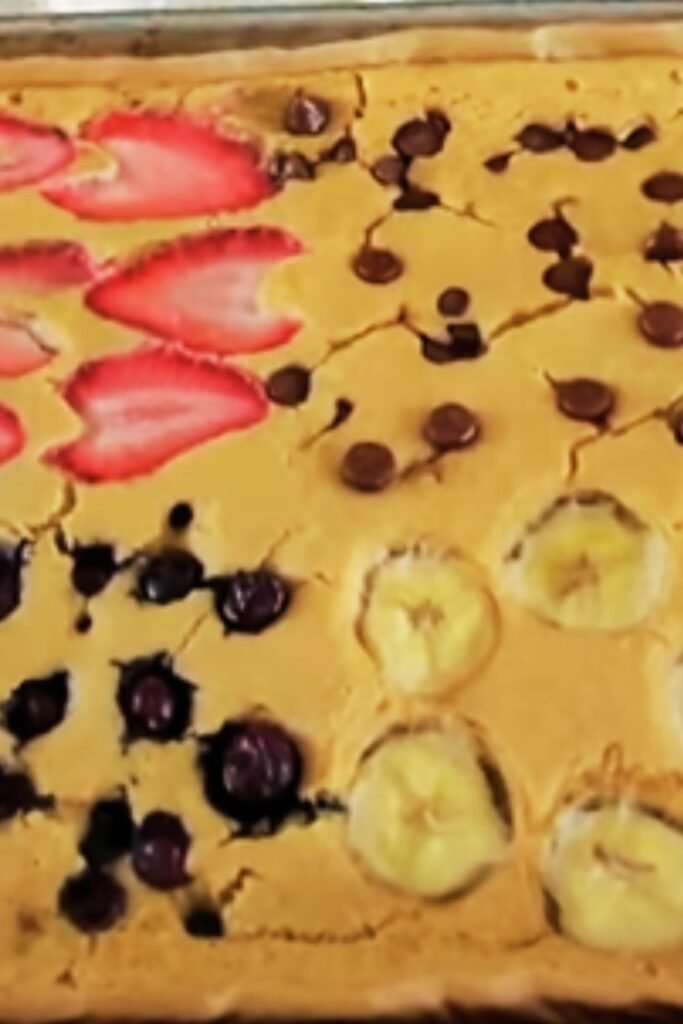
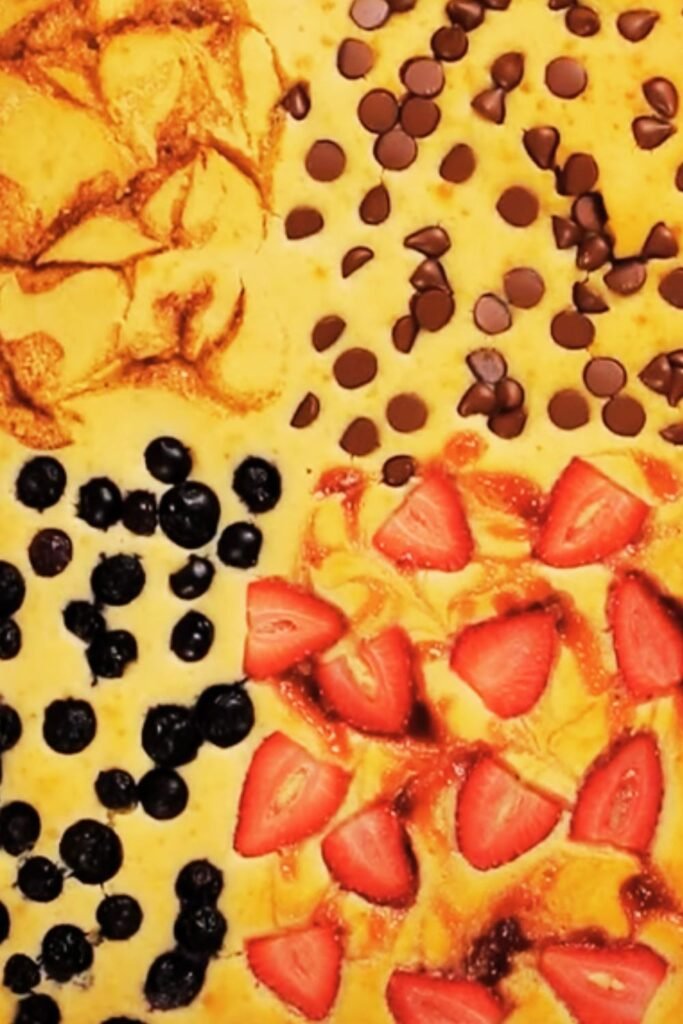
Variation Ideas and Mix-Ins
One of my favorite aspects of sheet pan pancakes is their adaptability. Here are some variations I’ve perfected over the years:
Fruit Variations:
- Blueberry: Fold in 1 1/2 cups fresh or frozen blueberries
- Strawberry: Add 1 cup diced fresh strawberries
- Apple Cinnamon: Include 1 cup diced apples and extra cinnamon
- Banana: Mash 2 ripe bananas into the wet ingredients
Decadent Options:
- Chocolate Chip: Stir in 1 cup mini chocolate chips
- Cinnamon Roll: Swirl cinnamon sugar mixture through batter
- Lemon Ricotta: Add 1/2 cup ricotta and extra lemon zest
Seasonal Specialties:
- Pumpkin Spice: Replace 1/2 cup buttermilk with pumpkin puree, add pumpkin pie spice
- Cranberry Orange: Fresh cranberries with orange zest
Troubleshooting Common Issues
Over the years, I’ve encountered and solved various sheet pan pancake challenges:
Dense, Heavy Pancakes: This usually results from overmixing the batter or expired baking powder. Mix just until combined, and check your leavening agents’ freshness dates.
Uneven Cooking: Ensure your oven is properly preheated and the batter is spread evenly. Rotate the pan halfway through baking if your oven has hot spots.
Sticking to Pan: Always butter the pan thoroughly, including corners. Parchment paper can help, but buttering is usually sufficient.
Dry Texture: Don’t overbake. Check at 15 minutes and remove when golden brown with a slightly springy center.
Storage and Reheating Guidelines
Sheet pan pancakes store beautifully, making them perfect for meal prep. Cool completely before storing in the refrigerator for up to 4 days. For longer storage, wrap individual portions in plastic wrap and freeze for up to 2 months.
| Storage Method | Duration | Reheating Instructions |
|---|---|---|
| Refrigerator | 4 days | Microwave 30-60 seconds or toast in toaster |
| Freezer | 2 months | Thaw overnight, then reheat as above |
| Counter (covered) | 2 days | Best consumed fresh |
For reheating, I prefer using a toaster or toaster oven, which restores some crispness to the exterior. Microwave works for quick reheating but may result in a softer texture.
Serving Suggestions and Toppings
The beauty of sheet pan pancakes lies in their versatility. Cut them into squares and serve with traditional toppings or get creative:
Classic Options:
- Pure maple syrup (my personal favorite)
- Butter and powdered sugar
- Fresh berries with whipped cream
- Greek yogurt with honey
Creative Presentations:
- Cut into fun shapes with cookie cutters
- Layer with fruit and whipped cream for a breakfast trifle
- Serve as a base for breakfast sandwiches
- Top with nut butter and sliced bananas
Special Occasion Ideas:
- Birthday breakfast with candles
- Holiday-themed toppings
- Brunch buffet centerpiece
Make-Ahead Tips and Time-Saving Strategies
I’m always looking for ways to streamline my morning routine, and sheet pan pancakes offer several make-ahead options:
Night Before Preparation: Mix dry ingredients in one bowl, wet ingredients in another. Cover both and refrigerate. In the morning, simply combine and bake.
Freezer-Friendly Batter: Double the recipe and freeze half the batter in a freezer bag. Thaw overnight and bake as directed.
Batch Cooking: Make multiple pans on Sunday for easy weekday breakfasts. Individual portions reheat quickly for grab-and-go mornings.
Cost Analysis and Budget-Friendly Tips
| Ingredient | Approximate Cost | Cost per Serving |
|---|---|---|
| Flour (2 cups) | $0.50 | $0.06 |
| Buttermilk (1 3/4 cups) | $1.25 | $0.16 |
| Eggs (2 large) | $0.50 | $0.06 |
| Butter (1/4 cup) | $0.75 | $0.09 |
| Other ingredients | $0.50 | $0.06 |
| Total | $3.50 | $0.44 |
At roughly 44 cents per serving, sheet pan pancakes are incredibly economical. Compare this to restaurant pancakes at $8-12 per serving, and the savings are substantial.
Budget-Saving Tips:
- Buy ingredients in bulk when possible
- Use regular milk with lemon juice instead of buttermilk
- Make your own vanilla extract for long-term savings
- Stock up on flour and baking powder during sales
Comparison with Traditional Pancakes
| Aspect | Sheet Pan Pancakes | Traditional Pancakes |
|---|---|---|
| Cooking Time | 15-18 minutes total | 20-30 minutes active |
| Serves | 8-12 people | 2-4 people per batch |
| Texture | Cake-like, uniform | Varied, depends on skill |
| Effort Level | Minimal | High (constant attention) |
| Equipment Needed | Sheet pan, oven | Griddle, spatula |
| Consistency | Always uniform | Varies by batch |
The clear winner for feeding groups is sheet pan pancakes. However, traditional pancakes offer more control over individual preferences and that classic pancake experience many people love.
Questions and Answers
Q: Can I use a different size sheet pan for this recipe? A: While this recipe is designed for an 18×13-inch pan, you can adapt it. For a smaller 13×9-inch pan, use half the recipe and reduce baking time to 12-15 minutes. For larger pans, you may need to increase the recipe proportionally.
Q: What’s the best way to ensure even cooking throughout the pancake? A: The key is spreading the batter evenly across the pan and ensuring your oven is properly preheated. I also recommend rotating the pan halfway through baking if your oven has hot spots.
Q: Can I make these pancakes dairy-free? A: Absolutely! Replace buttermilk with non-dairy milk mixed with 1 tablespoon of lemon juice, and use melted coconut oil or vegan butter instead of regular butter.
Q: How do I prevent the pancakes from sticking to the pan? A: Generous buttering is essential. I butter every inch of the pan, including corners. Some people prefer parchment paper, but I find buttering works perfectly when done thoroughly.
Q: Can I add mix-ins directly to the batter? A: Yes, but be gentle when folding them in. For berries, I recommend tossing them in a little flour first to prevent sinking. Add mix-ins after combining wet and dry ingredients but before spreading in the pan.
Q: What’s the ideal oven temperature for sheet pan pancakes? A: I’ve found 425°F (220°C) works perfectly. This temperature creates a golden top while keeping the interior fluffy. Lower temperatures result in pale, less appealing pancakes.
Q: How can I tell when the pancakes are done? A: Look for a golden-brown top and a toothpick that comes out clean or with just a few moist crumbs. The center should spring back lightly when pressed.
Q: Can I prepare the batter the night before? A: While I prefer mixing fresh, you can prepare wet and dry ingredients separately the night before and combine them in the morning. Don’t mix the full batter until ready to bake, as the leavening agents work best when fresh.
Q: What’s the best way to cut and serve sheet pan pancakes? A: Use a sharp knife or pizza cutter to slice into squares. I typically cut into 8-12 portions depending on appetite. Let them cool for 2-3 minutes before cutting to prevent crumbling.
Q: Are there any ingredients I should avoid adding to the batter? A: Avoid anything too wet that might make the batter runny, and be cautious with acidic ingredients that could react with the baking soda. Heavy mix-ins like nuts should be used sparingly to prevent sinking.
Sheet pan pancakes have truly transformed my approach to weekend breakfasts and family gatherings. The convenience, consistency, and crowd-pleasing nature of this recipe make it an essential addition to any home cook’s repertoire. Whether you’re feeding a hungry family, hosting a brunch, or simply want to streamline your morning routine, these pancakes deliver on all fronts.
The versatility of this base recipe means you’ll never get bored. From seasonal fruit additions to decadent chocolate chips, the possibilities are endless. I encourage you to experiment with different flavors and find your family’s favorites.
Remember, cooking should be enjoyable, not stressful. Sheet pan pancakes embody this philosophy perfectly – minimal effort, maximum satisfaction, and delicious results every single time. Give this recipe a try, and I’m confident it will become a regular feature in your breakfast rotation.