Have you ever craved a meal that perfectly balances sweet and savory flavors while still being quick enough for a weeknight dinner? My Sticky Chicken Rice Bowls recipe has become my family’s absolute favorite for those busy evenings when I want something delicious without spending hours in the kitchen.
I’ve spent years perfecting this recipe, adjusting the sauce ratios and cooking techniques until it reached the perfect balance of sticky-sweet glaze and tender chicken. The best part? These bowls are completely customizable with whatever vegetables you have on hand, making them perfect for using up produce before it goes bad.
What Makes These Rice Bowls Special?
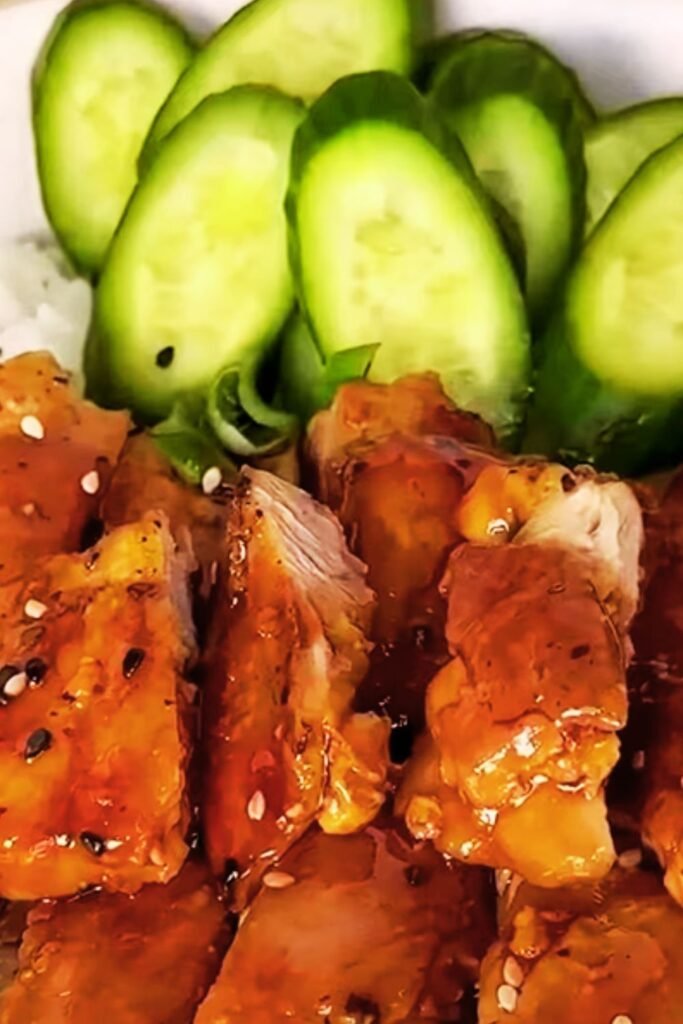
These aren’t your average chicken and rice bowls. The secret lies in the sticky sauce that coats every piece of chicken with a glossy, flavorful glaze. The sauce caramelizes slightly during cooking, creating irresistible bits of flavor that make you want to scrape the pan clean.
I’ve found that marinating the chicken, even briefly, makes a world of difference in the final flavor. The marinade ingredients penetrate the meat, ensuring that each bite is packed with flavor, not just coated on the outside.
Ingredients You’ll Need
For the Chicken and Marinade:
- 1½ pounds boneless, skinless chicken thighs, cut into 1-inch pieces
- 3 tablespoons cornstarch, divided
- 2 tablespoons soy sauce
- 1 tablespoon rice vinegar
- 1 teaspoon sesame oil
- ¼ teaspoon white pepper (black pepper works too)
For the Sticky Sauce:
- ⅓ cup honey
- ¼ cup soy sauce (low-sodium preferred)
- 3 tablespoons brown sugar
- 2 tablespoons rice vinegar
- 1 tablespoon grated fresh ginger
- 4 garlic cloves, minced
- 1 tablespoon sesame oil
- ¼-½ teaspoon red pepper flakes (adjust to your heat preference)
For the Rice Bowls:
- 2 cups jasmine rice, uncooked
- 3 tablespoons vegetable oil, divided
- 1 red bell pepper, thinly sliced
- 1 cup sugar snap peas, strings removed
- 2 medium carrots, julienned
- 3 green onions, sliced diagonally
- 1 tablespoon sesame seeds, for garnish
- Optional: sliced avocado, edamame, kimchi, pickled vegetables
Nutrition Information
I know many of us are conscious about what we’re eating, so here’s a breakdown of what you can expect from each serving of these bowls:
| Nutrient | Amount per Serving |
|---|---|
| Calories | 485 |
| Protein | 32g |
| Carbohydrates | 58g |
| Fiber | 3g |
| Sugar | 18g |
| Fat | 15g |
| Saturated Fat | 3g |
| Sodium | 890mg |
| Iron | 2.5mg |
| Calcium | 45mg |
| Potassium | 520mg |
Note: Nutrition values are approximate and will vary based on specific ingredients and portions used.
Equipment Needed
Before we dive into cooking, let’s make sure you have everything you need:
- Large non-stick skillet or wok
- Rice cooker or medium saucepan with lid
- Mixing bowls (at least 2)
- Measuring cups and spoons
- Sharp knife and cutting board
- Whisk
- Wooden spoon or silicone spatula
Step-by-Step Instructions
Preparing the Rice:
- Rinse the jasmine rice under cold water until the water runs clear.
- Cook according to package instructions, either in a rice cooker or on the stovetop.
- Once cooked, fluff with a fork and keep covered until ready to serve.
Marinating the Chicken:
- In a medium bowl, whisk together 1 tablespoon cornstarch, soy sauce, rice vinegar, sesame oil, and white pepper.
- Add the chicken pieces, toss to coat thoroughly, and let marinate for at least 15 minutes (or up to 4 hours in the refrigerator if preparing ahead).
Preparing the Sticky Sauce:
- In a small bowl, whisk together honey, soy sauce, brown sugar, rice vinegar, grated ginger, minced garlic, sesame oil, and red pepper flakes.
- In a separate small bowl, mix the remaining 2 tablespoons of cornstarch with 2 tablespoons of water to create a slurry.
- Set both mixtures aside.
Cooking the Vegetables:
- Heat 1 tablespoon of vegetable oil in a large non-stick skillet or wok over medium-high heat.
- Add the bell pepper, sugar snap peas, and carrots. Stir-fry for about 3-4 minutes until crisp-tender.
- Transfer the vegetables to a plate and cover to keep warm.
Cooking the Chicken:
- In the same skillet, heat the remaining 2 tablespoons of vegetable oil over medium-high heat.
- Add the marinated chicken pieces in a single layer (work in batches if necessary to avoid overcrowding).
- Cook for 3-4 minutes without stirring to allow the chicken to brown on one side.
- Flip the chicken pieces and continue cooking for another 2-3 minutes until golden brown and cooked through (internal temperature should reach 165°F/74°C).
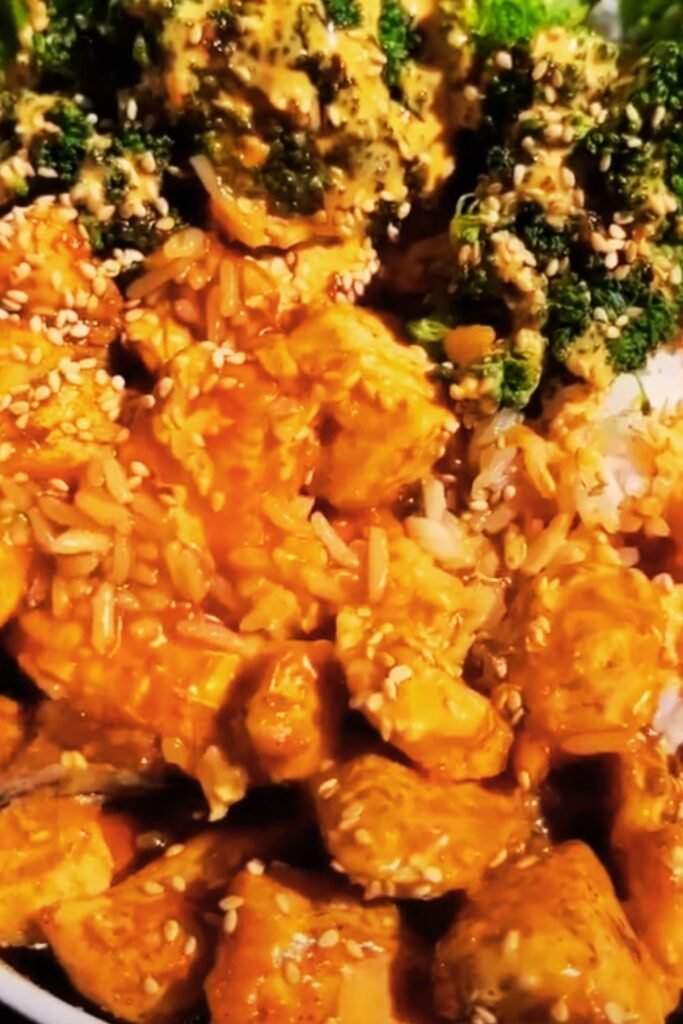
Creating the Sticky Glaze:
- Pour the prepared sauce mixture over the chicken and bring to a simmer.
- Cook for 1 minute, then whisk in the cornstarch slurry.
- Continue cooking, stirring constantly, as the sauce thickens and becomes glossy, about 2-3 minutes.
- If the sauce becomes too thick, add a tablespoon of water at a time until you reach your desired consistency.
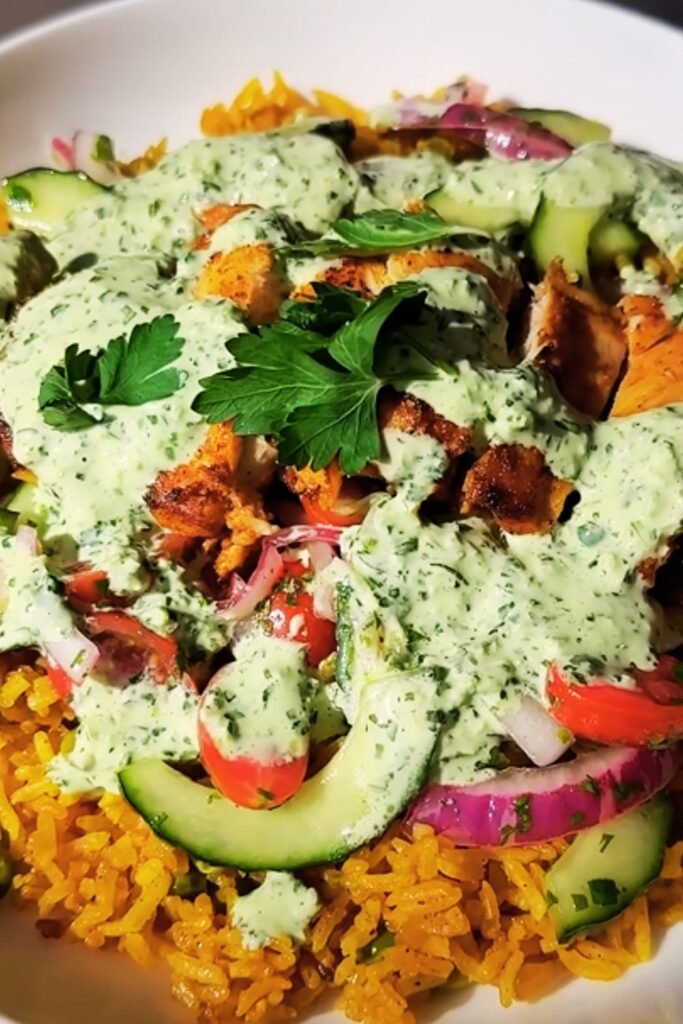
Assembling the Rice Bowls:
- Divide the cooked rice among serving bowls.
- Top with the sticky glazed chicken.
- Arrange the stir-fried vegetables alongside the chicken.
- Garnish with sliced green onions and sesame seeds.
- Add any optional toppings you desire.
Variations to Try
One of the reasons I love this recipe is how versatile it is. Here are some delicious variations I’ve tried over the years:
Protein Options:
- Substitute tofu for a vegetarian version
- Use thinly sliced beef instead of chicken
- Try with salmon or shrimp for a seafood twist
Sauce Variations:
- Add 1 tablespoon of orange zest and juice for a citrusy flavor
- Mix in 2 tablespoons of peanut butter for a satay-inspired sauce
- Substitute maple syrup for honey for a different sweetness profile
Grain Alternatives:
- Use brown rice for added fiber
- Try quinoa for a protein boost
- Cauliflower rice works great for a low-carb option
Make-Ahead and Storage Tips
I know how hectic weeknights can be, so here are some tips to make this recipe even more convenient:
Make-Ahead Components:
- Marinate the chicken up to 24 hours in advance
- Prepare the sauce and store in an airtight container in the refrigerator for up to 3 days
- Chop all vegetables and store in the refrigerator for up to 2 days
- Cook rice ahead of time and refrigerate for up to 3 days
Storage Instructions:
Store leftovers in airtight containers in the refrigerator for up to 4 days. The flavors actually develop nicely overnight, making this a fantastic meal prep option.
Reheating Guidelines:
| Component | Reheating Method | Time | Tips |
|---|---|---|---|
| Rice | Microwave with 1 tbsp water per cup | 1-2 minutes | Cover with damp paper towel |
| Chicken | Microwave at 70% power | 2 minutes | Stir halfway through |
| Vegetables | Microwave | 30-45 seconds | Best reheated separately |
| Complete Bowl | Microwave | 2-3 minutes | Add splash of water or broth |
| Complete Bowl | Stovetop | 4-5 minutes | Add 1-2 tbsp water, low heat, covered |
Time-Saving Tips
If you’re really pressed for time, here are some shortcuts I’ve used on particularly busy evenings:
- Use pre-cut chicken pieces from the grocery store
- Buy pre-cut vegetables from the produce section
- Substitute minced garlic and ginger from a jar
- Use microwaveable rice pouches
- Cook a double batch and freeze half for later use
Serving Suggestions
These sticky chicken rice bowls are a complete meal on their own, but here are some suggestions to round out your dining experience:
- Serve with a side of miso soup for a Japanese-inspired meal
- Add a simple cucumber and rice vinegar salad for freshness
- Offer condiments like sriracha, chili crisp, or extra soy sauce on the side
- For a refreshing beverage, try iced green tea with citrus
- Sparkling water with a splash of yuzu juice makes a perfect accompaniment
Common Mistakes to Avoid
Through years of making this recipe, I’ve encountered a few pitfalls. Here’s how to avoid them:
Overcrowding the Pan
When cooking the chicken, work in batches if necessary. Overcrowding causes the chicken to steam rather than brown, resulting in less flavor and a different texture.
Sauce Too Thin or Too Thick
The cornstarch slurry is critical for achieving that perfect sticky consistency. If your sauce is too thin, add a bit more cornstarch slurry. If it’s too thick, add water a tablespoon at a time.
Rice Issues
Rinsing the rice before cooking removes excess starch and prevents it from becoming gummy. If your rice always seems to come out either too mushy or too dry, invest in an inexpensive rice cooker—it’s a game-changer!
Vegetable Texture
Don’t overcook the vegetables. They should retain some crispness to provide textural contrast to the soft rice and tender chicken.
Cost Breakdown
I’m always conscious about budget-friendly cooking, so here’s an approximate cost analysis of this recipe (prices may vary by location):
| Ingredient | Approximate Cost |
|---|---|
| Chicken thighs | $6.00 |
| Jasmine rice | $1.50 |
| Fresh vegetables | $4.00 |
| Pantry staples (soy sauce, honey, etc.) | $2.50 |
| Total | $14.00 |
| Cost per serving (4 servings) | $3.50 |
This makes it a relatively economical meal, especially considering the quality and flavor you’re getting!
Health Benefits
These chicken rice bowls aren’t just delicious—they’re also packed with nutrients:
- Lean protein from chicken supports muscle health and satiety
- Complex carbohydrates from rice provide lasting energy
- Colorful vegetables contribute antioxidants and essential vitamins
- Ginger and garlic offer anti-inflammatory properties
- Balanced macronutrients make for a satisfying meal
If you’re watching your sodium intake, you can easily modify this recipe by using low-sodium soy sauce and reducing the amount used overall.
Questions and Answers
Over the years, I’ve received many questions about this recipe. Here are the most common ones:
Q: Can I make this recipe gluten-free? Yes! Simply substitute tamari for the soy sauce and double-check that your rice vinegar is gluten-free (most are, but some may contain trace amounts).
Q: How spicy is this dish? With ¼ teaspoon of red pepper flakes, it has a mild heat that most people enjoy. You can adjust this to your preference—omit completely for no heat or increase to ½ teaspoon or more for a spicier kick.
Q: Can I use chicken breasts instead of thighs? Absolutely! Chicken breasts will work, but they tend to dry out more quickly than thighs. If using breasts, reduce the cooking time by about 1-2 minutes and be careful not to overcook.
Q: Is there a substitute for rice vinegar? Apple cider vinegar or white wine vinegar can work in a pinch, though the flavor profile will be slightly different. I recommend adding a pinch of sugar if using these alternatives.
Q: How can I meal prep this recipe? This recipe is perfect for meal prep! Cook everything as directed, then portion into containers with the rice on the bottom, chicken on one side, and vegetables on the other. They’ll keep in the refrigerator for up to 4 days.
Q: My sauce never gets thick enough. What am I doing wrong? Make sure your cornstarch slurry is well mixed before adding it to the hot sauce, and allow it to simmer for at least 2-3 minutes afterward. Also, remember that the sauce will thicken further as it cools.
Q: Can I freeze this dish? Yes, but I recommend freezing the components separately for best results. The sauce and chicken freeze well together for up to 3 months. Rice can be frozen separately, and I suggest using fresh vegetables when reheating rather than freezing them.
Why This Recipe Works
After countless iterations and adjustments, I’ve found that this recipe works so well because:
- The cornstarch in the marinade creates a protective coating that keeps the chicken tender while promoting browning.
- The balance of sweet (honey, brown sugar) and savory (soy sauce, garlic) flavors in the sauce satisfies multiple taste preferences.
- Cooking the components separately ensures that each element is perfectly cooked.
- The sauce reduction method creates a thick, glossy glaze without the need for additional thickeners.
- The combination of textures—tender chicken, slightly crisp vegetables, and fluffy rice—makes each bite interesting.
I genuinely hope you enjoy this recipe as much as my family does. It’s become our go-to for busy weeknights when we want something satisfying and delicious without too much fuss. The leftovers (if there are any!) taste even better the next day as the flavors continue to meld.
Whether you’re cooking for a family or meal prepping for the week ahead, these Sticky Chicken Rice Bowls are sure to become a regular part of your recipe rotation. Happy cooking!
Final Thoughts
Creating a delicious, balanced meal doesn’t have to be complicated or time-consuming. These Sticky Chicken Rice Bowls prove that with a few quality ingredients and some simple techniques, you can create restaurant-worthy food in your own kitchen.
I’d love to hear how this recipe works for you and what variations you try! The beauty of bowl-style meals is their flexibility—they can evolve based on what you have on hand or what your family enjoys.
Remember that cooking should be enjoyable, not stressful. Don’t worry if your bowls don’t look picture-perfect; what matters most is the flavor and the joy of sharing a homemade meal.