When I first attempted making pork schnitzel at home, I was intimidated by what seemed like a complex European dish. However, after years of perfecting my technique and sharing countless plates with family and friends, I’ve discovered that creating restaurant-quality schnitzel in your own kitchen is surprisingly straightforward. This golden, crispy delight has become one of my most requested recipes, and I’m thrilled to share every secret I’ve learned along the way.
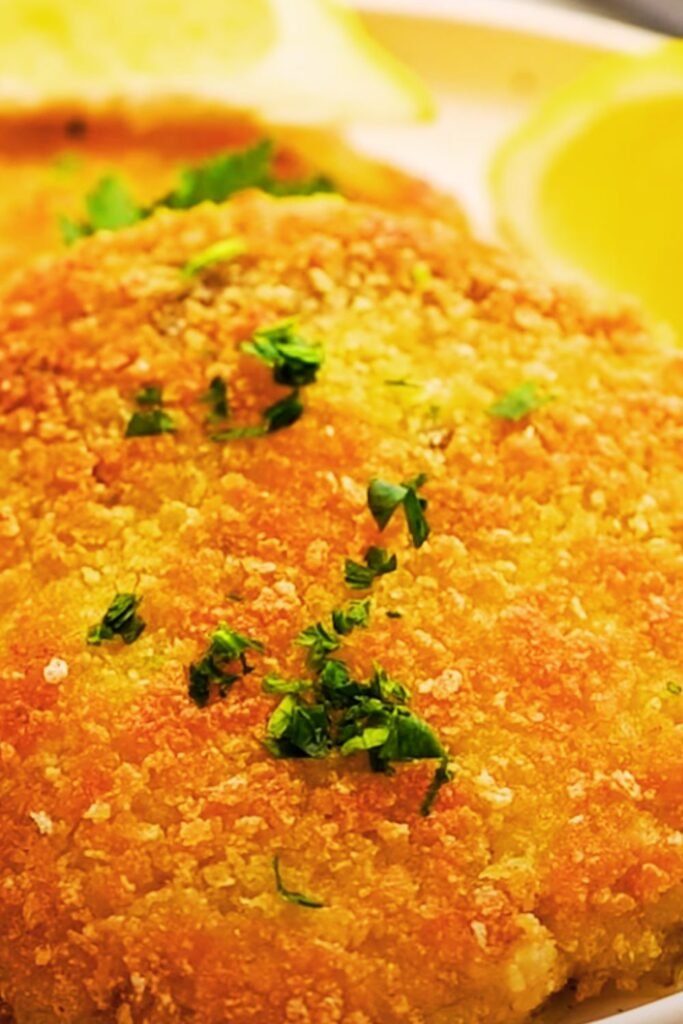
Pork schnitzel represents comfort food at its finest – tender meat encased in a perfectly seasoned, golden-brown coating that delivers an irresistible crunch with every bite. My approach focuses on simplicity without sacrificing flavor, making this dish accessible to cooks of all skill levels while ensuring consistently delicious results.
Understanding Pork Schnitzel: The Foundation of Excellence
Schnitzel: A traditional European dish consisting of meat that has been pounded thin, breaded, and pan-fried until golden brown and crispy.
Cutlet: The flattened piece of meat used as the base for schnitzel, typically pounded to uniform thickness for even cooking.
Breadcrumb coating: The protective layer that creates the signature crispy exterior while keeping the meat inside tender and juicy.
Pounding technique: The process of flattening meat using a meat mallet or rolling pin to achieve uniform thickness and break down muscle fibers for tenderness.
The beauty of pork schnitzel lies in its versatility and forgiving nature. Unlike some cuts of pork that require precise temperature monitoring, schnitzel cooks quickly and provides clear visual cues when it’s ready. The key lies in proper preparation and understanding the relationship between each component.
Essential Ingredients and Their Roles
My schnitzel recipe relies on carefully selected ingredients that work together to create the perfect balance of flavor and texture. Each component serves a specific purpose in achieving that coveted crispy exterior and tender interior.
Primary Ingredients Table
| Ingredient | Quantity | Purpose | Quality Tips |
|---|---|---|---|
| Pork cutlets (boneless) | 4 pieces (6 oz each) | Main protein base | Choose cuts 3/4 inch thick, well-marbled |
| All-purpose flour | 1 cup | First coating layer | Creates adhesion base for egg wash |
| Large eggs | 3 eggs | Binding agent | Room temperature eggs coat more evenly |
| Panko breadcrumbs | 2 cups | Crispy outer coating | Japanese-style creates superior texture |
| Vegetable oil | 1/2 cup | Frying medium | High smoke point prevents burning |
| Salt | 2 teaspoons | Flavor enhancement | Sea salt or kosher salt preferred |
| Black pepper | 1 teaspoon | Seasoning base | Freshly ground for best flavor |
| Paprika | 1 tablespoon | Color and mild flavor | Sweet paprika works best |
| Garlic powder | 1 teaspoon | Aromatic depth | Avoid garlic salt to control sodium |
Optional Enhancement Ingredients
| Ingredient | Quantity | Purpose | Notes |
|---|---|---|---|
| Parmesan cheese (grated) | 1/4 cup | Breadcrumb enrichment | Mix into panko for extra flavor |
| Lemon zest | 1 lemon | Brightness in coating | Adds fresh citrus notes |
| Fresh herbs (parsley, thyme) | 2 tablespoons | Aromatic complexity | Finely chopped, mixed into breadcrumbs |
| Dijon mustard | 2 tablespoons | Egg wash enhancement | Creates tangy depth |
Step-by-Step Preparation Method
My systematic approach ensures consistent results every time. I’ve refined this process through countless batches, identifying the critical points that make the difference between good and exceptional schnitzel.
Preparation Phase
- Set up your workspace: I arrange three shallow dishes in assembly-line fashion – flour mixture in the first, beaten eggs in the second, and seasoned breadcrumbs in the third. This organization prevents cross-contamination and streamlines the breading process.
- Prepare the pork cutlets: Place each cutlet between plastic wrap or parchment paper. Using a meat mallet or rolling pin, gently pound to 1/4-inch thickness. I work from the center outward, ensuring even thickness throughout.
- Season generously: I season both sides of each cutlet with salt and pepper, allowing them to rest for 10 minutes. This brief resting period helps the seasoning penetrate the meat while drawing out slight moisture for better breading adhesion.
Breading Station Setup
Flour mixture: Combine flour with half the salt, pepper, and paprika. This seasoned flour creates the foundational layer that helps subsequent coatings adhere properly.
Egg wash: Beat eggs with a tablespoon of water until completely smooth. I sometimes add a teaspoon of Dijon mustard for extra flavor complexity.
Breadcrumb mixture: Combine panko breadcrumbs with remaining seasonings, garlic powder, and any optional ingredients like Parmesan or herbs.
The Breading Process
- First coating: Dredge each cutlet in seasoned flour, ensuring complete coverage while shaking off excess. The flour layer should be thin but comprehensive.
- Egg wash application: Dip the floured cutlet into the egg mixture, allowing excess to drip off. I use tongs to maintain clean hands throughout this process.
- Final breadcrumb coating: Press the cutlet firmly into the breadcrumb mixture, ensuring adherence on both sides. I gently press with my palms to create good contact without compacting the breadcrumbs.
- Resting period: Place breaded cutlets on a wire rack for 15 minutes. This crucial step allows the coating to set, preventing it from sliding off during cooking.
Cooking Techniques for Perfect Results
The cooking phase requires attention to temperature control and timing. I’ve learned that patience during this stage yields dramatically better results than rushing the process.
Pan Preparation and Oil Temperature
I use a large, heavy-bottomed skillet that provides even heat distribution. The oil should be heated to 350°F (175°C) – I test this by dropping a small piece of breadcrumb into the oil. If it sizzles immediately and floats, the temperature is perfect.
Cooking Process Table
| Step | Duration | Temperature | Visual Cues | Action Required |
|---|---|---|---|---|
| Initial searing | 3-4 minutes | Medium-high heat | Golden brown edges | Don’t move cutlet |
| First flip | 1 minute | Same heat | Even golden color | Flip carefully with tongs |
| Second side cooking | 3-4 minutes | Same heat | Matching golden color | Monitor oil temperature |
| Final check | 30 seconds | Reduced heat | Internal temp 145°F | Rest immediately |
Critical Cooking Points
- Don’t overcrowd: I cook no more than two cutlets at once to maintain oil temperature and ensure even cooking.
- Maintain oil level: The oil should come halfway up the cutlet sides. Too little oil creates uneven browning; too much can cause splattering.
- Temperature monitoring: I use an instant-read thermometer to ensure the internal temperature reaches 145°F (63°C) for food safety.
- Immediate draining: As soon as each cutlet finishes cooking, I transfer it to a paper towel-lined plate to remove excess oil while maintaining crispiness.

Serving Suggestions and Accompaniments
The versatility of pork schnitzel makes it suitable for various meal contexts, from casual family dinners to elegant entertaining. My favorite serving approaches highlight the dish’s crispy texture while complementing its rich flavors.
Traditional European Accompaniments
German-style presentation: I serve schnitzel with warm potato salad, red cabbage, and lingonberry preserves. This combination provides textural contrast and balances the richness of the fried cutlet.
Austrian influence: Spaetzle or egg noodles create a hearty base that soaks up any pan juices or sauce additions.
Vegetable pairings: Steamed green beans, roasted Brussels sprouts, or sautéed mushrooms add color and nutritional balance to the plate.
Modern Serving Ideas
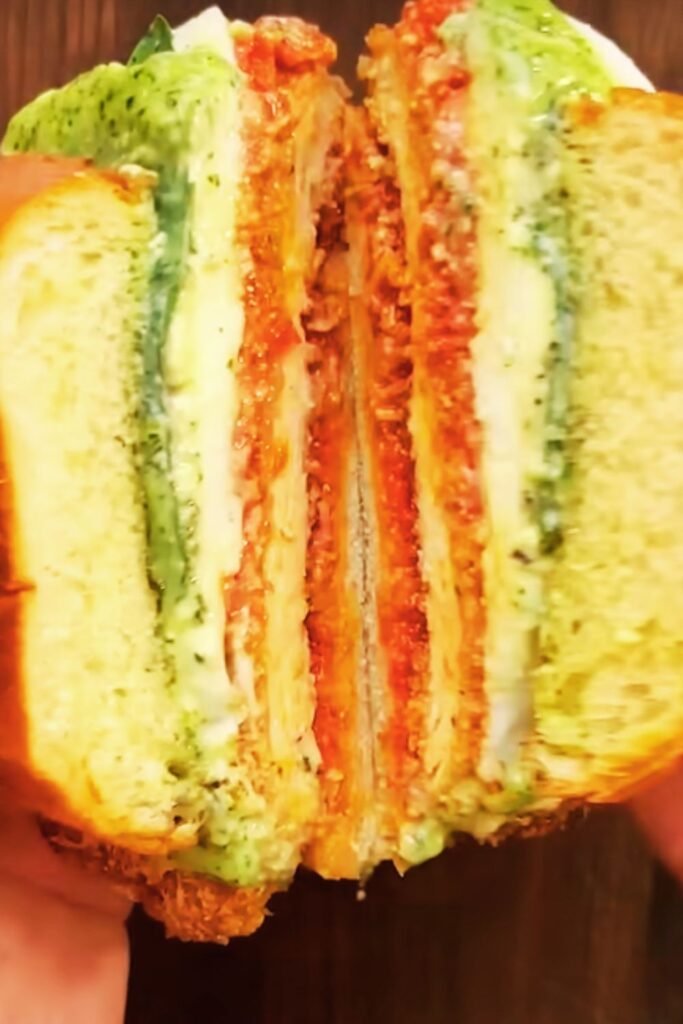
- Schnitzel sandwiches: Serve on crusty rolls with arugula, tomatoes, and garlic aioli
- Salad toppers: Slice and serve over mixed greens with warm bacon vinaigrette
- Pasta integration: Cut into strips and toss with creamy mushroom pasta
Sauce Options Table
| Sauce | Flavor Profile | Preparation Time | Best Pairing |
|---|---|---|---|
| Lemon butter sauce | Bright, rich | 5 minutes | Classic schnitzel |
| Mushroom gravy | Earthy, savory | 15 minutes | Heavier sides |
| Herb cream sauce | Fresh, tangy | 10 minutes | Light vegetables |
| Mustard cream | Sharp, creamy | 8 minutes | Roasted potatoes |
Nutritional Information and Health Considerations
Understanding the nutritional profile of pork schnitzel helps in meal planning and portion control. While this is undoubtedly an indulgent dish, it can fit into a balanced diet when enjoyed mindfully.
Nutritional Breakdown (Per Serving)
| Nutrient | Amount | % Daily Value | Notes |
|---|---|---|---|
| Calories | 485 | 24% | Based on 6 oz serving |
| Protein | 42g | 84% | High-quality complete protein |
| Fat | 22g | 34% | Includes cooking oil absorption |
| Carbohydrates | 28g | 9% | Primarily from breadcrumb coating |
| Fiber | 2g | 8% | From panko breadcrumbs |
| Sodium | 680mg | 30% | Can be reduced with less salt |
| Iron | 2.1mg | 12% | Essential for blood health |
| Zinc | 3.8mg | 35% | Important for immune function |
Healthier Preparation Options
I’ve developed several modifications that maintain the dish’s appeal while reducing certain nutritional concerns:
Baking method: Spray breaded cutlets with cooking oil and bake at 425°F for 20-25 minutes, flipping once halfway through.
Air fryer adaptation: Cook at 375°F for 12-15 minutes, spraying lightly with oil and flipping once.
Portion control: Serve smaller cutlets (4 oz) with larger portions of vegetables and lighter sides.
Troubleshooting Common Issues
Through my years of making schnitzel, I’ve encountered and solved virtually every problem that can arise. These solutions will help you avoid common pitfalls and achieve consistent success.
Problem-Solution Reference
| Issue | Likely Cause | Prevention | Solution |
|---|---|---|---|
| Coating falls off | Insufficient resting time | Rest 15 minutes after breading | Re-bread if caught early |
| Soggy coating | Oil temperature too low | Maintain 350°F oil temperature | Increase heat gradually |
| Burned exterior, raw interior | Heat too high | Use medium-high heat | Lower temperature, cook longer |
| Tough meat | Insufficient pounding | Pound to 1/4 inch thickness | Can’t fix after cooking |
| Uneven cooking | Cutlets different thickness | Pound uniformly | Adjust cooking times |
| Greasy final product | Oil absorption issues | Proper draining immediately | Blot with paper towels |
Advanced Troubleshooting Tips
Coating adhesion problems: If your coating consistently slides off, try letting the breaded cutlets rest in the refrigerator for 30 minutes before cooking. This extended rest period helps the coating bond more securely to the meat.
Oil temperature fluctuations: I use a deep-fry thermometer clipped to the pan side to monitor temperature continuously. When adding cutlets, the temperature naturally drops; maintain heat but avoid increasing it too aggressively.
Moisture management: Pat cutlets completely dry before seasoning and breading. Excess surface moisture prevents proper coating adhesion and can cause oil to splatter dangerously.
Storage and Reheating Guidelines
Proper storage extends the enjoyment of your schnitzel and maintains food safety standards. My tested methods preserve both texture and flavor for the best possible leftover experience.
Storage Methods Table
| Storage Type | Duration | Temperature | Container | Quality Notes |
|---|---|---|---|---|
| Refrigerator | 3-4 days | 40°F or below | Airtight container | Coating softens gradually |
| Freezer | 2-3 months | 0°F or below | Freezer bags | Wrap individually |
| Room temperature | 2 hours maximum | Below 90°F | Covered plate | Food safety concern |
Reheating Techniques
Oven method (recommended): Preheat to 375°F, place schnitzel on wire rack over baking sheet, heat for 10-12 minutes until crispy.
Air fryer revival: 350°F for 4-5 minutes delivers excellent results for restoring crispiness.
Stovetop refresh: Light oil in skillet over medium heat, warm for 2-3 minutes per side.
Microwave (emergency only): Use 50% power for 30-second intervals, though this significantly compromises texture.
Variations and Creative Adaptations
The basic schnitzel technique adapts beautifully to different proteins and flavor profiles. I’ve experimented extensively with variations that maintain the dish’s core appeal while offering exciting new experiences.
Protein Alternatives
Chicken schnitzel: Use boneless, skinless chicken breasts pounded thin. Reduce cooking time by 1-2 minutes per side.
Turkey cutlets: Naturally lean, requires careful temperature monitoring to prevent overcooking.
Veal schnitzel: Traditional Wiener Schnitzel preparation, premium option with delicate flavor.
International Flavor Profiles
Italian-inspired: Add dried basil, oregano, and Parmesan to breadcrumbs, serve with marinara sauce.
Asian fusion: Include sesame seeds in coating, serve with soy-ginger dipping sauce.
Mexican variation: Season with cumin, chili powder, and lime zest, serve with avocado crema.
Questions and Answers
Q: What’s the best cut of pork for schnitzel? I prefer boneless pork loin chops or pork tenderloin medallions. These cuts pound well, cook evenly, and provide excellent tenderness. Avoid cuts with significant marbling that might cause uneven cooking.
Q: Can I make schnitzel ahead of time? Yes! I often bread cutlets up to 4 hours in advance and refrigerate them. This actually improves coating adhesion. However, I don’t recommend cooking them ahead as the coating loses its crispiness.
Q: Why does my oil foam when cooking schnitzel? Foaming typically indicates excess moisture in the breading or oil that’s too hot. Ensure cutlets are properly drained after the egg wash, and maintain steady oil temperature around 350°F.
Q: How do I know when the oil is the right temperature without a thermometer? Drop a small piece of bread or breadcrumb into the oil. If it sizzles immediately and floats to the surface, the temperature is correct. If it browns within 30 seconds, the oil is too hot.
Q: Can I use regular breadcrumbs instead of panko? While possible, panko breadcrumbs create a superior texture with better crunch and lighter feel. If using regular breadcrumbs, expect a denser coating that may not achieve the same level of crispiness.
Q: What should I do if my schnitzel is browning too quickly? Reduce the heat immediately and cover the pan loosely with foil to prevent further browning while allowing the interior to cook through. This usually indicates the oil temperature is too high.
Q: How can I make this dish gluten-free? Substitute the all-purpose flour with rice flour or gluten-free flour blend, and use gluten-free breadcrumbs. The cooking process remains identical.
Q: Is it safe to reuse the cooking oil? If the oil hasn’t darkened significantly and doesn’t smell off, you can strain and reuse it once more for similar cooking. Store it in the refrigerator and use within one week.
Q: Why is my meat tough despite proper cooking? Insufficient pounding is the most common cause. The cutlets should be uniformly 1/4 inch thick. Also, avoid overcooking, which can make any protein tough and dry.
Q: Can I bake schnitzel instead of frying? Absolutely! Spray breaded cutlets with cooking oil and bake at 425°F for 20-25 minutes, flipping once. While the texture differs slightly from fried versions, it’s still delicious and healthier.
This comprehensive approach to pork schnitzel ensures success whether you’re preparing it for the first time or looking to refine your technique. The key lies in understanding each step’s purpose and maintaining consistency throughout the process. With practice, you’ll develop the confidence to make adjustments based on your preferences while maintaining the dish’s essential character.
Remember that cooking is as much about enjoyment as technique. Take time to appreciate the sizzle of the pan, the golden color development, and the satisfaction of creating something delicious from simple ingredients. Each schnitzel you make builds your skills and understanding, leading to even better results with every attempt.