I’ve been making meringues for over a decade, and I can tell you that mastering this seemingly simple dessert is both an art and a science. There’s something magical about transforming just egg whites and sugar into those cloud-like, crispy confections that melt on your tongue. Today, I’m sharing everything I’ve learned about creating perfect meringues every single time.
When I first started baking, meringues intimidated me. The thought of whipping egg whites to the perfect consistency while avoiding the dreaded collapse seemed impossible. But after countless batches and plenty of trial and error, I’ve discovered the secrets that guarantee success. Whether you’re a complete beginner or looking to refine your technique, this comprehensive guide will transform your meringue-making skills.
Understanding Meringue: The Foundation of Excellence
Before diving into my foolproof recipe, let me explain what makes meringue so special. At its core, meringue is a foam created by whipping air into egg whites, with sugar providing structure and sweetness. The magic happens when proteins in the egg whites unfold and trap air bubbles, creating that distinctive light, airy texture we all love.
French Meringue : The simplest and most common type, made by gradually adding sugar to whipped egg whites
Italian Meringue : Created by adding hot sugar syrup to whipped egg whites, resulting in a more stable foam
Swiss Meringue : Made by heating egg whites and sugar together before whipping, producing a silky, stable result
My recipe focuses on French meringue because it’s the most accessible for home bakers and produces consistently excellent results when you follow my techniques.
My Foolproof Meringue Recipe
Ingredients
| Ingredient | Amount | Purpose | Quality Notes |
|---|---|---|---|
| Large egg whites | 4 (about 120ml) | Creates the foam structure | Room temperature works best |
| Caster sugar | 225g (1 cup) | Provides sweetness and stability | Superfine sugar dissolves better |
| Cream of tartar | 1/4 teaspoon | Stabilizes the foam | Optional but highly recommended |
| Vanilla extract | 1/2 teaspoon | Adds flavor | Pure extract preferred over artificial |
| Pinch of salt | 1/8 teaspoon | Enhances flavor balance | Fine table salt works perfectly |
Essential Equipment
| Equipment | Purpose | My Recommendations |
|---|---|---|
| Stand mixer or hand mixer | Whipping egg whites | Stand mixer preferred for consistency |
| Large mixing bowl | Contains ingredients during mixing | Glass or metal bowls work best |
| Rubber spatula | Folding and scraping | Flexible silicone spatula ideal |
| Baking sheets | Holding meringues during baking | Heavy-duty sheets prevent warping |
| Parchment paper | Non-stick surface | Never use wax paper in the oven |
| Piping bag (optional) | Shaping meringues | Large star tip creates beautiful swirls |
Visit Amazon for any required items
Step-by-Step Instructions: My Time-Tested Method
Preparation Phase
I always start by preparing my workspace because timing is crucial with meringues. Preheat your oven to 100°C (212°F) – yes, that low temperature is intentional. Line two large baking sheets with parchment paper, ensuring the paper lies flat without wrinkles.
The most critical step that many bakers overlook is ensuring everything is completely clean and grease-free. I wipe down my mixing bowl and beaters with white vinegar or lemon juice, then dry thoroughly. Even the tiniest trace of fat will prevent your egg whites from whipping properly.
Separating the Eggs
I separate my eggs when they’re cold because the whites and yolks separate more cleanly. However, I let the whites come to room temperature before whipping – this takes about 30 minutes. Room temperature whites whip faster and achieve greater volume than cold ones.
Here’s my foolproof separation technique: crack each egg over a small bowl, letting the white fall in while keeping the yolk in the shell half. Transfer the white to your main mixing bowl only after confirming it’s completely yolk-free. If you break a yolk, save that egg for another use rather than risk contaminating your meringue.
The Whipping Process
Start whipping your egg whites on medium speed until they become foamy. I add the cream of tartar and salt at this stage because they help stabilize the foam structure. Continue whipping until soft peaks form – this means the peaks bend over when you lift the beaters.
Now comes the crucial part: adding the sugar. I add it gradually, about one tablespoon at a time, while the mixer runs on medium-high speed. This gradual addition ensures the sugar dissolves completely, preventing a gritty texture. I wait about 30 seconds between each addition, listening for the sound of the mixer to change as the meringue thickens.
After all the sugar is incorporated, I increase the speed to high and whip until stiff, glossy peaks form. The meringue should be so thick that you can turn the bowl upside down without it moving. I add the vanilla extract during the final minute of whipping.
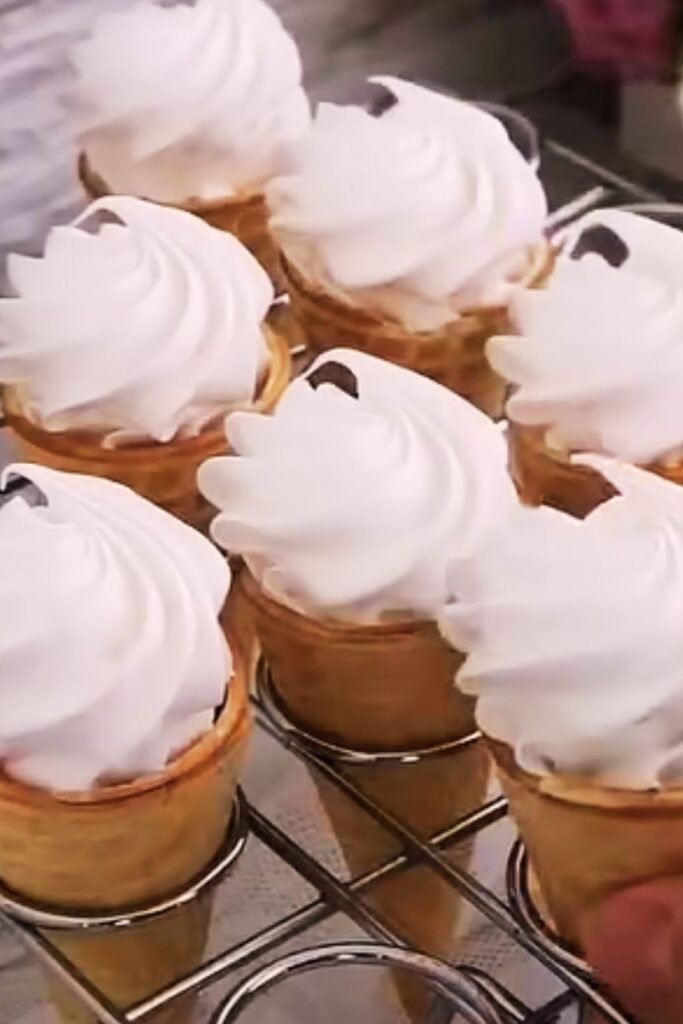
Shaping Your Meringues
I have several favorite ways to shape meringues, depending on the occasion:
Classic Dollops: Using two large spoons, I create rustic mounds about 2 inches apart on the prepared baking sheets. This method is quick and creates charmingly imperfect results.
Piped Rosettes: For more elegant presentations, I transfer the meringue to a piping bag fitted with a large star tip. I pipe spiral rosettes, starting from the center and working outward.
Meringue Nests: I create shallow wells perfect for filling with cream and berries by piping circles and building up the edges.
Kiss-Shaped Drops: Small, bite-sized meringues perfect for parties, piped using a round tip or simply spooned in small portions.
Visit Amazon for any required items
Baking: The Art of Low and Slow
My baking method focuses on dehydrating rather than cooking the meringues. I bake them at 100°C (212°F) for 2-3 hours, depending on size. Small meringues take about 2 hours, while larger ones need up to 3 hours.
The key is patience. I never open the oven door during the first hour because sudden temperature changes can cause collapse. After the initial hour, I check every 30 minutes. Perfect meringues should lift easily from the parchment paper and sound hollow when tapped on the bottom.
I turn off the oven and let the meringues cool completely inside with the door slightly ajar. This gradual cooling prevents cracking and ensures the perfect texture throughout.
Troubleshooting Common Problems
Weeping Meringues
Problem: Sticky, syrupy beads forming on the surface Solution: This happens when sugar doesn’t dissolve completely. I always rub a small amount of meringue between my fingers – if it feels gritty, I continue whipping until smooth.
Collapsed Meringues
Problem: Meringues deflate during or after baking Causes: Underwhipped egg whites, contamination with fat, or temperature shock Prevention: Ensure equipment is completely clean and achieve proper stiff peaks before baking
Cracked Surfaces
Problem: Meringues develop cracks during baking Solution: Lower oven temperature and extend baking time. Avoid opening the oven door too frequently.
Chewy Texture
Problem: Meringues are tough rather than crisp Cause: Usually underbaking or high humidity Solution: Extend baking time and ensure complete cooling in the oven
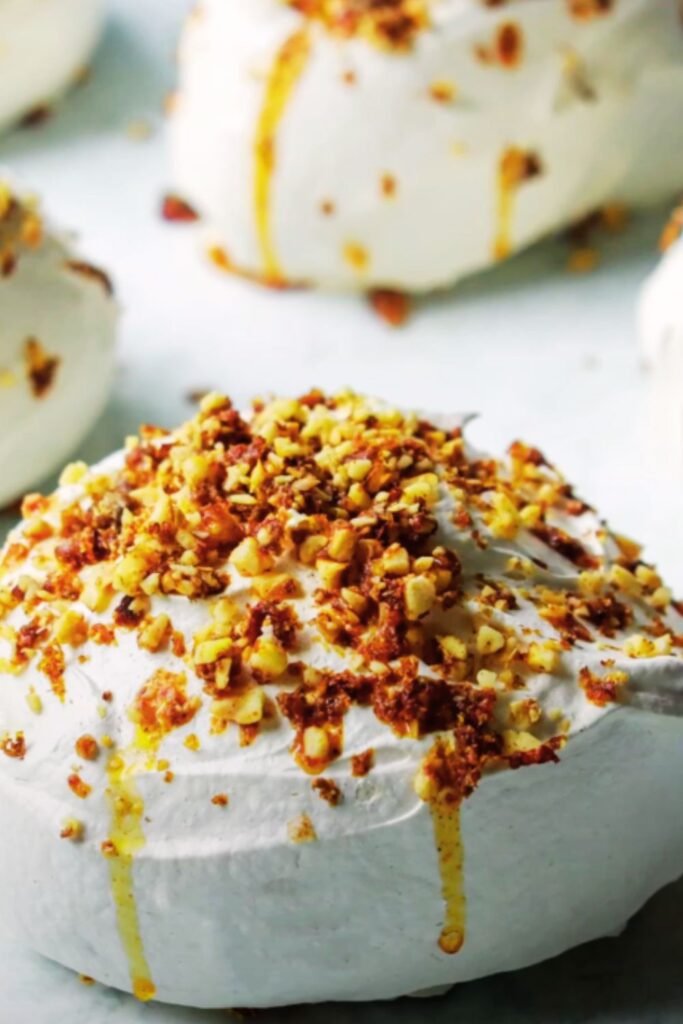
Flavor Variations I Love
| Variation | Addition Method | Flavor Profile |
|---|---|---|
| Chocolate | 2 tbsp cocoa powder, sifted with sugar | Rich, deep chocolate |
| Coffee | 1 tbsp instant espresso dissolved in 1 tsp water | Bold coffee flavor |
| Lemon | Zest of 2 lemons + 1 tsp extract | Bright, citrusy |
| Almond | 1 tsp almond extract + 2 tbsp ground almonds | Nutty, sophisticated |
| Rose | 1 tsp rose water + pink food coloring | Floral, elegant |
| Coconut | 3 tbsp desiccated coconut folded in gently | Tropical, textured |
Visit Amazon for any required items
Storage and Serving Suggestions
Properly stored meringues can last up to two weeks, making them perfect for entertaining. I keep mine in airtight containers at room temperature, never in the refrigerator where humidity can make them soggy.
For serving, I love creating elegant dessert platters with fresh berries, whipped cream, and chocolate shavings. Meringues also make excellent bases for pavlovas or can be crushed and folded into ice cream for added texture.
My favorite serving combinations include:
- Classic: Fresh strawberries and vanilla-scented whipped cream
- Tropical: Passion fruit pulp and toasted coconut flakes
- Elegant: Lemon curd and fresh raspberries
- Decadent: Dark chocolate ganache and candied orange peel
- Seasonal: Spiced apple compote and cinnamon cream
The Science Behind Perfect Meringues
Understanding the science helps me achieve consistent results every time. Egg whites contain proteins that unfold when whipped, creating a network that traps air bubbles. Sugar serves multiple purposes: it sweetens, stabilizes the foam, and helps create the characteristic crispy exterior.
Temperature control is crucial because too much heat cooks the proteins too quickly, causing collapse. The low, slow baking method I use allows moisture to evaporate gradually while maintaining the delicate structure.
Humidity is meringue’s enemy. I avoid making meringues on rainy days and always ensure my storage containers are completely dry before use.
Professional Tips from My Experience
After years of perfecting my technique, here are the insights that make the biggest difference:
Room Temperature Matters: Cold egg whites won’t whip properly, and hot kitchens can cause premature collapse. I aim for a kitchen temperature around 20°C (68°F).
Quality Ingredients: I always use the freshest eggs possible and pure vanilla extract. The difference in flavor is remarkable.
Timing is Everything: I never let whipped egg whites sit before adding sugar. The foam structure begins breaking down immediately.
Practice Patience: Rushing any step – from whipping to baking to cooling – compromises the final result.
Weather Awareness: High humidity days require longer baking times and extra attention to storage.
Visit Amazon for any required items
Questions and Answers
Q: Can I make meringues without cream of tartar? A: Absolutely! While cream of tartar helps stabilize the foam, you can substitute it with an equal amount of lemon juice or white vinegar. The acid serves the same stabilizing function.
Q: Why did my meringues turn brown in the oven? A: Your oven temperature is too high. Meringues should remain white or very pale. I recommend using an oven thermometer to verify your actual temperature, as many ovens run hot.
Q: Can I make meringues ahead of time for a party? A: Yes! This is one of my favorite make-ahead desserts. Store completely cooled meringues in airtight containers for up to two weeks. Just avoid humid conditions.
Q: What’s the difference between soft and hard meringues? A: The difference lies in the sugar ratio and baking method. My recipe creates hard meringues that are crisp throughout. Soft meringues use less sugar and are typically used as toppings that aren’t fully dried out.
Q: Can I use liquid egg whites from a carton? A: While possible, I don’t recommend it. Fresh egg whites whip better and create more stable foams. If you must use carton whites, make sure they’re at room temperature and whip longer than usual.
Q: Why do my meringues stick to the parchment paper? A: This usually indicates underbaking. Properly baked meringues should lift cleanly from parchment. If they stick, return them to the oven for another 15-30 minutes.
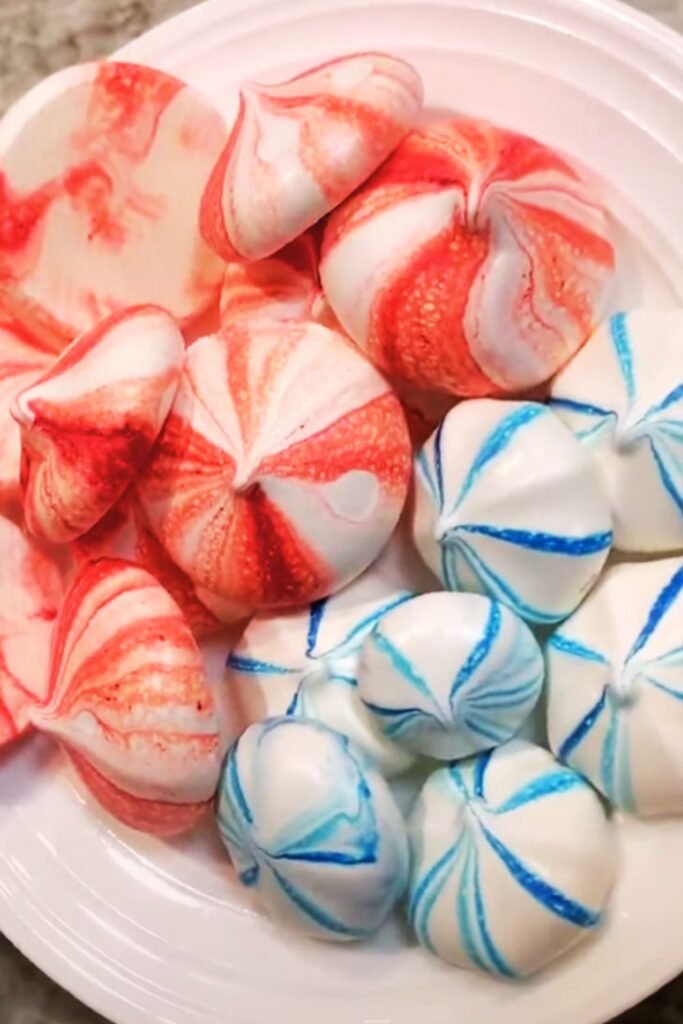
Q: Can I add food coloring to my meringues? A: Yes! I use gel food coloring because it won’t add extra liquid that could destabilize the foam. Add it gradually during the final whipping stage until you achieve your desired color.
Q: What should I do if I overwhip my meringue? A: Overwhipped meringue becomes grainy and starts to separate. Unfortunately, there’s no way to fix this – you’ll need to start over with fresh egg whites.
Q: Can I make chocolate meringues? A: Definitely! I sift cocoa powder with the sugar before adding it gradually. Start with 2 tablespoons of cocoa powder for subtle chocolate flavor, or use up to 1/4 cup for rich chocolate meringues.
Q: How do I know when my meringues are completely done? A: Perfect meringues sound hollow when tapped on the bottom and lift easily from the parchment paper. The exterior should be completely dry to the touch, and they should feel light for their size.
Making perfect meringues has become second nature to me after years of practice, but I remember how challenging it seemed initially. The key is understanding that meringue-making is as much about technique and patience as it is about ingredients. Every time I watch those simple egg whites transform into glossy, stable peaks, I’m reminded why I fell in love with baking in the first place.
The beauty of mastering meringues lies not just in the final product, but in the confidence it builds. Once you’ve conquered the delicate balance of proteins, sugar, and air that creates these ethereal treats, you’ll find yourself reaching for this recipe again and again. Whether you’re creating an elegant dessert for dinner guests or a simple sweet treat for your family, these meringues never fail to impress.
I encourage you to embrace the process, learn from any mistakes, and most importantly, enjoy the journey of creating something truly special from such humble ingredients. Happy baking!