There’s something magical about the perfect potato side dish. As someone who’s tested countless potato recipes in my home kitchen, I can confidently say that smashed potatoes reign supreme when you’re craving that ideal balance of textures and flavors. They deliver everything you could possibly want: crispy edges, creamy centers, and endless opportunities for flavor customization.
I first discovered smashed potatoes at a small neighborhood bistro years ago and immediately knew I needed to recreate them at home. After many (delicious) testing sessions, I’ve perfected a technique that delivers restaurant-quality results every single time. The secret lies in a two-stage cooking process that might seem time-consuming but is actually quite hands-off and absolutely worth the wait.
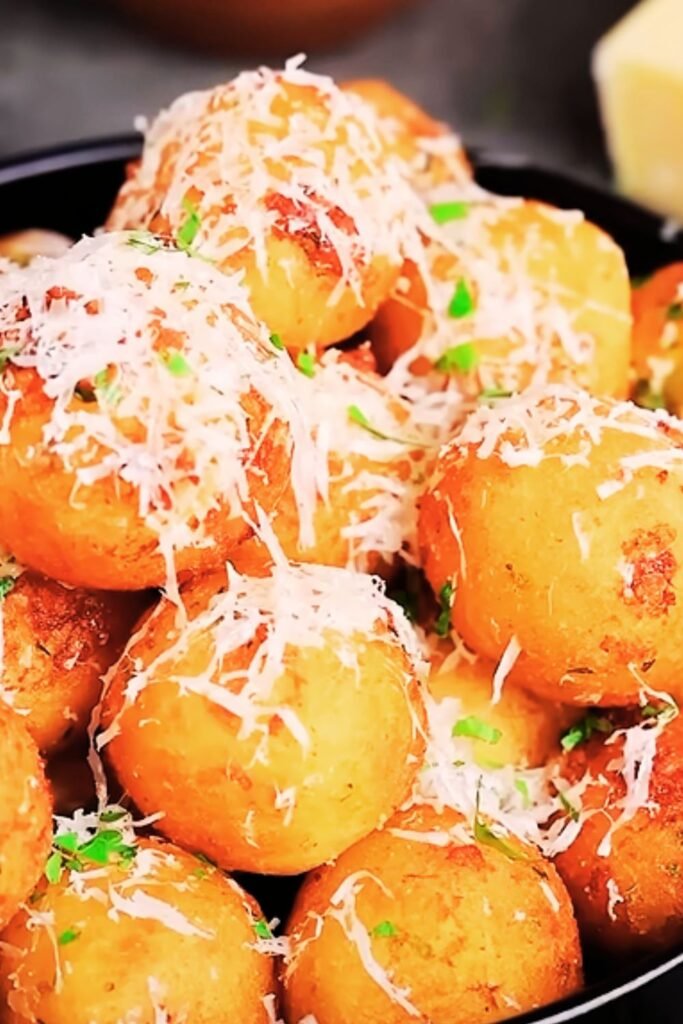
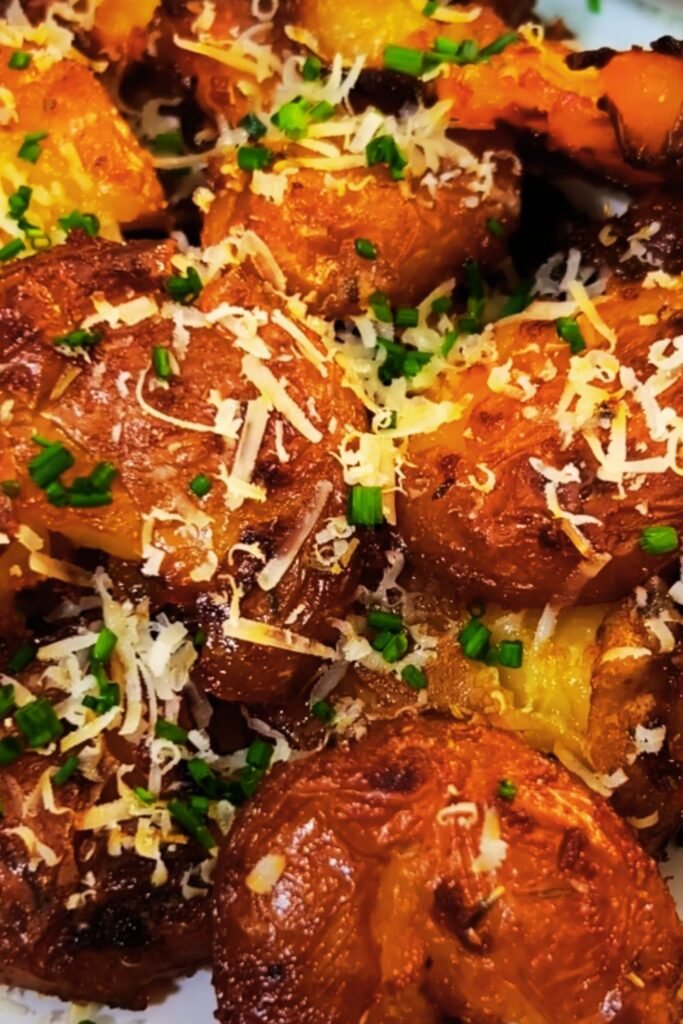
What makes these smashed potatoes so special? First, they’re boiled until perfectly tender, then gently flattened to increase their surface area before being roasted at high heat until irresistibly crispy. The final touch is a generous coating of garlic-herb butter that seeps into all the nooks and crannies, creating flavor in every bite. Whether served alongside a Sunday roast or as a crowd-pleasing appetizer with dipping sauces, these potatoes never fail to impress.
The Science Behind Perfect Smashed Potatoes
Before diving into the recipe, let’s talk about what makes this technique so effective. Understanding the science helps ensure perfect results every time:
Potato Selection Matters:
- Baby potatoes or small Yukon Golds are ideal because of their naturally creamy texture and thin skins
- Their high moisture-to-starch ratio allows for that perfect crispy-outside, creamy-inside contrast
- The smaller size means more surface area for crisping once smashed
The Two-Stage Cooking Process:
- Initial boiling cooks the potatoes through while preserving moisture
- Smashing increases surface area dramatically, creating more opportunities for crisping
- High-heat roasting after smashing creates the Maillard reaction (browning) that delivers flavor and texture
Fat Distribution:
- Oil on the baking sheet prevents sticking and begins the crisping process
- Adding butter later incorporates flavor without burning (butter has a lower smoke point than oil)
- The smashed shape creates valleys that capture and hold seasonings and fat
Essential Ingredients
| Ingredient | Amount | Purpose | Notes |
|---|---|---|---|
| Baby potatoes | 2 pounds | Main ingredient | Yukon Gold, red, or fingerling varieties all work well |
| Olive oil | 3 tablespoons | Aids browning and prevents sticking | Use a good quality extra virgin olive oil for better flavor |
| Butter | 4 tablespoons | Creates rich flavor and helps with browning | Unsalted allows better control of overall salt content |
| Garlic | 4-6 cloves | Provides aromatic foundation | Fresh is vastly superior to pre-minced in this recipe |
| Fresh rosemary | 2 tablespoons | Provides aromatic, woodsy notes | Can substitute thyme or oregano if preferred |
| Fresh parsley | ¼ cup | Adds bright, fresh finish | Flat-leaf (Italian) parsley has more flavor than curly |
| Kosher salt | 1 tablespoon (divided) | Enhances all flavors | Diamond Crystal brand is recommended for its flake size |
| Black pepper | 1 teaspoon | Adds gentle heat and dimension | Freshly ground provides significantly better flavor |
| Flaky sea salt | To taste | Finishing texture and flavor | Optional but highly recommended for the final presentation |
Equipment You’ll Need
- Large pot for boiling
- Colander for draining
- Large baking sheet (preferably rimmed)
- Parchment paper or silicone baking mat
- Small saucepan for melting butter
- Flat-bottomed glass or measuring cup for smashing
- Pastry brush for applying butter mixture
Step-by-Step Instructions
Part 1: Prepare and Boil the Potatoes
- Select and Wash: Choose potatoes that are roughly the same size (about 2 inches in diameter is ideal) to ensure even cooking. Thoroughly wash them under cold water to remove any dirt or debris.
- Season the Water: Fill a large pot with cold water. Add 2 teaspoons of kosher salt. Starting with cold water helps the potatoes cook evenly from the inside out.
- Boil Gently: Add potatoes to the cold salted water and bring to a boil over medium-high heat. Once boiling, reduce to a simmer and cook until the potatoes are fork-tender but not falling apart, about 15-20 minutes depending on size.
- Drain Carefully: Drain the potatoes in a colander and let them steam dry for about 5 minutes. This step is crucial for achieving maximum crispiness later.
Part 2: Smash and Season
- Preheat and Prepare: While the potatoes are boiling, preheat your oven to 425°F (220°C). Line a large baking sheet with parchment paper or a silicone baking mat and drizzle with 2 tablespoons of olive oil, spreading it evenly across the surface.
- Arrange: Place the drained potatoes on the oiled baking sheet, leaving about 2 inches between each potato to allow for spreading and proper air circulation.
- Smash Gently: Using the flat bottom of a glass, measuring cup, or even a potato masher, gently press down on each potato until it’s flattened to about ½-inch thickness. The goal is to break the skin and flatten the potato while keeping it in one piece. Don’t worry if some break apart more than others – those pieces will become extra crispy!
- Season First Round: Drizzle the smashed potatoes with the remaining tablespoon of olive oil and sprinkle with 1 teaspoon kosher salt and ½ teaspoon black pepper.
Part 3: Roast to Perfection
- First Roast: Place the baking sheet in the preheated oven and roast for 20 minutes.
- Prepare Garlic-Herb Butter: While the potatoes begin roasting, melt 4 tablespoons of butter in a small saucepan over medium-low heat. Once melted, add the minced garlic and 1 tablespoon of chopped rosemary. Cook for about 1 minute until fragrant, being careful not to brown the garlic. Remove from heat and stir in half of the chopped parsley and the remaining ½ teaspoon each of salt and pepper.
- Apply Butter Mixture: After the initial 20 minutes of roasting, remove the potatoes from the oven. Using a pastry brush, generously coat each potato with the garlic-herb butter mixture, making sure to get the butter into all the nooks and crannies.
- Final Roast: Return the potatoes to the oven and roast for an additional 15-20 minutes, or until the edges are deeply golden and crispy and the garlic is fragrant but not burnt.
Serving Suggestions
These smashed potatoes are versatile enough to complement almost any main dish. Here are my favorite ways to serve them:
As a Side Dish:
- Alongside roasted chicken or beef tenderloin for a Sunday dinner
- With grilled steak and a simple green salad for an elevated weeknight meal
- Next to baked fish for a delicious contrast in textures
- With poached eggs and hollandaise for a decadent brunch option
As an Appetizer:
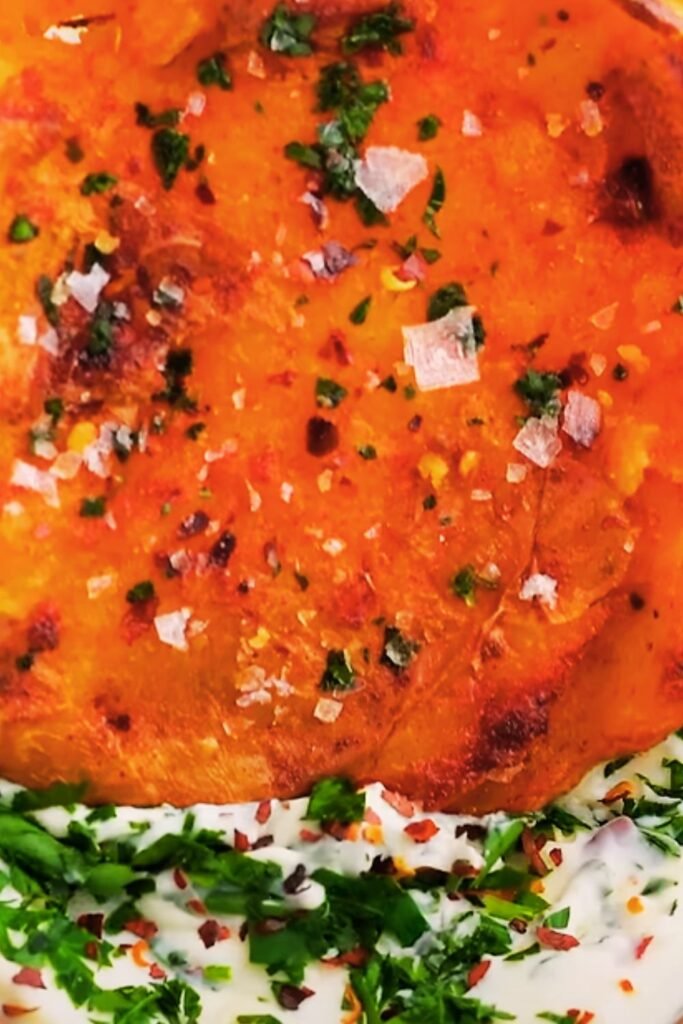
- Served on a platter with various dipping sauces like:
- Sour cream mixed with chives
- Truffle aioli
- Sriracha mayo
- Classic ranch dressing
Garnish Ideas:
- Extra fresh herbs (parsley, chives, dill)
- Finely grated Parmesan cheese
- Crumbled bacon
- A sprinkle of smoked paprika
- A drizzle of high-quality olive oil
- Lemon zest for brightness
Variations to Try
Once you’ve mastered the basic technique, there are countless ways to customize these potatoes:
Different Herb Combinations:
- Mediterranean: Rosemary, thyme, and oregano
- French: Tarragon, chervil, and parsley
- Italian: Basil, oregano, and thyme
- Fresh and bright: Dill, chives, and lemon zest
Cheese Options:
- Sprinkle with Parmesan during the last 5 minutes of baking
- Add crumbled blue cheese right after baking for a tangy contrast
- Top with shredded cheddar and return to oven just until melted
- Crumble feta cheese over the hot potatoes right before serving
Spice Variations:
- Cajun spices for a Southern twist
- Za’atar and sumac for Middle Eastern flair
- Curry powder and garam masala for Indian-inspired flavors
- Chili powder, cumin, and coriander for a Southwestern take
Add-Ins:
- Mix roasted garlic cloves into the butter
- Add caramelized onions on top
- Incorporate crispy bacon bits into the butter mixture
- Add finely chopped sun-dried tomatoes to the herb butter
Troubleshooting Common Issues
| Problem | Possible Cause | Solution |
|---|---|---|
| Potatoes sticking to the pan | Not enough oil on the baking sheet | Be generous with the initial oil layer and consider using parchment paper |
| Potatoes not crispy enough | Insufficient drying after boiling | Let potatoes steam-dry longer after boiling and before smashing |
| Burnt garlic flavor | Garlic added too early | Add garlic to butter mixture later or use a lower oven temperature |
| Potatoes too dry in the center | Overcooked during roasting | Reduce second roasting time by 5 minutes |
| Uneven crispiness | Potatoes of different sizes | Select potatoes of similar size for even cooking |
| Too soft to smash properly | Overboiled potatoes | Reduce boiling time and test with a fork for just-tender doneness |
| Not enough flavor | Insufficient seasoning | Season at multiple stages: water, after smashing, and after cooking |
Make-Ahead and Storage Tips
While these potatoes are best served fresh from the oven, here are some ways to prepare components ahead of time:
Prep-Ahead Options:
- Boil and smash the potatoes up to 24 hours ahead, then refrigerate on the baking sheet, covered with plastic wrap
- Prepare the garlic-herb butter up to 3 days in advance and refrigerate; bring to room temperature before using
Reheating Leftovers:
- Reheat in a 375°F oven for 10-15 minutes until hot and crispy again
- Avoid microwave reheating which will make them soggy
- A cast-iron skillet works well for reheating smaller portions
Freezing:
- Freeze after the boiling and smashing stage (before roasting)
- Arrange on a baking sheet, freeze until solid, then transfer to a freezer bag
- Cook from frozen by adding 10-15 minutes to the roasting time
The Nutritional Breakdown
| Nutrient | Amount per Serving | % Daily Value* |
|---|---|---|
| Calories | 215 | – |
| Total Fat | 12g | 15% |
| Saturated Fat | 5g | 25% |
| Cholesterol | 20mg | 7% |
| Sodium | 390mg | 17% |
| Total Carbohydrate | 24g | 9% |
| Dietary Fiber | 3g | 11% |
| Total Sugars | 1g | – |
| Protein | 3g | 6% |
| Vitamin C | 20mg | 22% |
| Calcium | 30mg | 2% |
| Iron | 1.8mg | 10% |
| Potassium | 580mg | 12% |
*Based on a 2,000 calorie diet *Serving size: Approximately 4 smashed potatoes (about 1/4 of recipe)
Why These Smashed Potatoes Work Every Time
I’ve made these potatoes for countless dinner parties, family gatherings, and quiet dinners at home. Here’s why they’ve become my signature side dish:
- They’re forgiving: Even if you slightly overcook or undercook them, they’ll still taste delicious.
- They’re a crowd-pleaser: I’ve never met anyone who doesn’t love the combination of crispy and creamy textures.
- They’re adaptable: You can adjust the seasonings to complement whatever main dish you’re serving.
- They look impressive: Despite being simple to make, they have a restaurant-quality presentation that elevates any meal.
- They’re economical: Potatoes remain one of the most budget-friendly side dishes you can make, even when dressed up with quality ingredients.
The combination of the crispy exterior, creamy interior, and that garlicky, herby butter makes these potatoes irresistible. The technique might seem fussy at first glance, but once you try it, you’ll see how straightforward it really is. And the payoff is enormous—these aren’t just good potatoes; they’re the potatoes people will ask you to make again and again.
Frequently Asked Questions
Q: Can I use larger potatoes and cut them down to size? While you can, I don’t recommend it. Baby potatoes have a higher skin-to-flesh ratio and a creamier texture that works perfectly for this technique. If you must use larger potatoes, cut them into 2-inch pieces before boiling, but be aware that they may not hold together as well when smashed.
Q: My potatoes fell apart when I tried to smash them. What went wrong? They were likely slightly overboiled. The potatoes should be fork-tender but still firm enough to hold their shape. Next time, start checking for doneness a few minutes earlier, and be gentler when smashing them.
Q: Can I use dried herbs instead of fresh? Yes, but reduce the quantity to about 1/3 of what the recipe calls for with fresh herbs. Dried herbs are more potent than fresh. Also, add dried herbs to the butter earlier to allow them to rehydrate and release their flavors.
Q: How can I make these potatoes ahead for a dinner party? Boil and smash the potatoes up to a day ahead, then refrigerate them on the baking sheet. About 45 minutes before serving, continue with the roasting steps. They may take an extra 5 minutes to crisp up coming from the refrigerator.
Q: My garlic burned and tasted bitter. How can I prevent this? Garlic can burn easily at high temperatures. Try adding the garlic to the butter just 30 seconds before removing it from the heat, or reduce your oven temperature by 25 degrees for the final roasting stage.
Q: Can I make these in an air fryer? Absolutely! After boiling and smashing, air fry at 400°F for about 10-12 minutes, brush with the garlic-herb butter, then air fry for an additional 5 minutes. You may need to work in batches depending on your air fryer size.
Q: Are these potatoes gluten-free? Yes, this recipe is naturally gluten-free, making it perfect for those with celiac disease or gluten sensitivity.
Q: How many potatoes should I plan per person? For a side dish, I recommend planning about 4-5 small potatoes (about 1/4 pound) per person. If serving as an appetizer, 3-4 per person is usually sufficient.
Final Tips for Potato Perfection
After making these potatoes hundreds of times, I’ve discovered a few extra tricks that take them from great to extraordinary:
- Salt the water generously: It should taste like seawater. This seasons the potatoes from the inside out.
- Let them cool slightly after boiling: Giving the potatoes 5-10 minutes to cool slightly after draining makes them easier to smash without falling apart.
- Don’t rush the smashing: Take your time to ensure each potato is flattened evenly without completely destroying its structure.
- Create texture: The more uneven the surface of each smashed potato, the more crispy edges you’ll get.
- Rotate the pan halfway through: Most ovens have hot spots, so rotating the baking sheet ensures even browning.
- Finish with flaky salt: A sprinkle of Maldon or fleur de sel right after they come out of the oven adds both flavor and textural contrast.
- Serve immediately: These potatoes are at their absolute best within 10 minutes of coming out of the oven.
Whether you’re cooking for a special occasion or just looking to elevate your weeknight dinner, these smashed potatoes deliver incredible flavor and texture with minimal effort. The combination of crispy edges, creamy centers, and garlicky, herby butter makes them utterly irresistible. Give them a try, and I guarantee they’ll become a regular feature in your cooking repertoire!