There’s something magical about the perfect lemon tart. That first bite—where the buttery, crumbly crust meets the silky-smooth lemon filling—creates a moment of pure culinary bliss. The delicate balance of sweet and tart flavors dances on your taste buds, making this dessert an absolute showstopper at any gathering.
I’ve spent years perfecting this classic lemon tart recipe, testing countless variations until I found the ideal combination of ingredients and techniques. Today, I’m thrilled to share my ultimate version with you. This isn’t just any lemon tart; it’s the epitome of what this iconic French pastry should be—elegant, refreshing, and utterly irresistible.
What Makes This Lemon Tart Special
Before we dive into the recipe, let me tell you what sets this lemon tart apart:
- A shortcrust pastry that strikes the perfect balance between buttery and sturdy
- A lusciously smooth lemon filling with just the right amount of tartness
- Simple ingredients that create extraordinary flavor
- Step-by-step instructions that even a beginner can follow
- Foolproof techniques to prevent common pitfalls like cracks or a soggy bottom
Whether you’re making this for a special occasion or simply treating yourself to something delightful, this recipe won’t disappoint. Let’s get started!
Essential Ingredients
For the Shortcrust Pastry:
- 250g (2 cups) all-purpose flour
- 125g (½ cup + 1 tablespoon) cold unsalted butter, cubed
- 100g (¾ cup) powdered sugar
- 1 large egg yolk
- 2-3 tablespoons ice-cold water
- ¼ teaspoon salt
- 1 teaspoon vanilla extract (optional)
- Zest of 1 lemon (optional, for extra lemony crust)
For the Lemon Filling:
- 4 large eggs
- 2 large egg yolks
- 150g (¾ cup) granulated sugar
- Zest of 3 unwaxed lemons (about 2 tablespoons)
- 180ml (¾ cup) freshly squeezed lemon juice (approximately 4-5 lemons)
- 120g (½ cup) cold unsalted butter, cubed
- Pinch of salt
For Garnish (Optional):
- Fresh berries (raspberries, blueberries, or strawberries)
- Thin lemon slices
- Fresh mint leaves
- Powdered sugar for dusting
- Whipped cream
Essential Equipment
Before starting, make sure you have these tools on hand:
- 9-inch (23cm) tart pan with removable bottom
- Food processor (or pastry cutter)
- Mixing bowls
- Fine-mesh sieve
- Microplane or zester
- Rolling pin
- Pie weights or dried beans
- Parchment paper
- Whisk
- Heat-resistant bowl for double boiler setup
The Detailed Recipe
Part 1: Creating the Perfect Shortcrust Pastry
- Prepare your ingredients: Ensure your butter is cold and cut into small cubes. This is crucial for a flaky crust. Measure out the flour and powdered sugar precisely.
- Mix dry ingredients: In a food processor, pulse together the flour, powdered sugar, and salt until combined. If doing this by hand, whisk these ingredients in a large bowl.
- Cut in the butter: Add the cold butter cubes to the flour mixture. Pulse in short bursts until the mixture resembles coarse breadcrumbs with some pea-sized pieces of butter still visible. If working by hand, use a pastry cutter or your fingertips to work the butter into the flour, being careful not to overwork or warm the dough.
- Add the wet ingredients: Add the egg yolk, vanilla extract (if using), and lemon zest (if using). Pulse a few times until just combined. With the food processor running, gradually add ice water, one tablespoon at a time, until the dough just begins to come together. You may not need all the water.
- Form the dough: Turn the mixture onto a clean, lightly floured surface. Gently bring the dough together with your hands, handling it as little as possible. Form it into a disk about 1-inch thick, wrap in plastic wrap, and refrigerate for at least 1 hour or up to 2 days. This resting period allows the gluten to relax and the butter to firm up.

- Roll out the dough: After chilling, let the dough sit at room temperature for about 5-10 minutes to make it easier to roll. On a lightly floured surface, roll the dough into a circle about 12 inches in diameter and 1/8-inch thick.
- Transfer to tart pan: Carefully drape the dough over your rolling pin and transfer it to the tart pan. Gently press the dough into the corners and up the sides of the pan. Don’t stretch the dough as this will cause shrinkage during baking.
- Trim and chill: Trim the excess dough by rolling your rolling pin over the top of the tart pan. Prick the bottom several times with a fork to prevent air bubbles. Place the tart shell in the freezer for 15-20 minutes while you preheat your oven to 375°F (190°C).
- Blind bake: Line the chilled tart shell with parchment paper and fill with pie weights or dried beans. Bake for 15 minutes, then carefully remove the parchment and weights, and return to the oven for another 10-12 minutes until the crust is golden but not browned. Let cool completely before filling.
Part 2: Creating the Silky Lemon Filling
- Prepare your ingredients: Before starting, measure all ingredients and have them ready. Zest the lemons before juicing them—it’s much easier that way. Strain the lemon juice to remove any pulp or seeds.
- Create the base: In a heat-resistant bowl that fits over a saucepan (to create a double boiler), whisk together the eggs, egg yolks, and sugar until well combined but not frothy.
- Add flavor: Stir in the lemon zest, lemon juice, and pinch of salt.
- Cook the filling: Place the bowl over a saucepan of simmering water (make sure the bottom of the bowl doesn’t touch the water). Cook the mixture, stirring constantly with a wooden spoon or silicone spatula, until it thickens enough to coat the back of a spoon—about 10-15 minutes. The temperature should reach around 170°F (77°C) if you have a thermometer.
- Watch for thickening signs: The mixture is ready when you can draw your finger across the back of the spoon and it leaves a clear path. Don’t let it boil or the eggs will scramble.
- Incorporate butter: Remove from heat and immediately add the cold butter cubes, a few at a time, whisking until each addition is completely melted and incorporated before adding more.
- Strain for silkiness: Pour the filling through a fine-mesh sieve into a clean bowl, pressing gently with a spatula to remove any bits of cooked egg or lemon zest. This step is crucial for achieving that perfectly smooth texture.
- Cool slightly: Let the filling cool for about 10 minutes, stirring occasionally to prevent a skin from forming.
Part 3: Assembling and Finishing the Tart
- Fill the tart shell: Pour the slightly cooled lemon filling into the cooled tart shell. Smooth the top with an offset spatula if needed.
- Chill to set: Refrigerate the tart for at least 4 hours or preferably overnight to allow the filling to set completely.
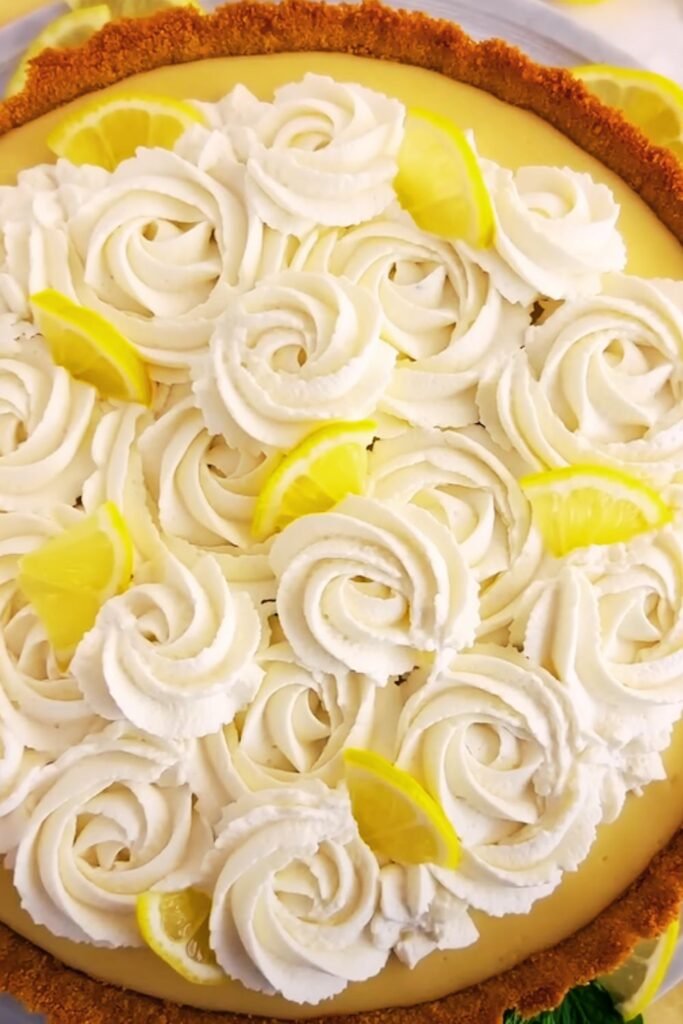
- Garnish before serving: Just before serving, dust the tart with powdered sugar through a fine sieve. For an extra special presentation, add fresh berries, thin lemon slices, or mint leaves.
- Serve with pride: Remove the tart from the refrigerator about 20 minutes before serving to take the chill off and allow the flavors to bloom.
Troubleshooting Common Issues
| Problem | Possible Cause | Solution |
|---|---|---|
| Soggy tart bottom | Underbaked crust or filling too hot | Ensure crust is well-baked and golden before adding filling. Let filling cool slightly before adding to crust. |
| Cracked filling | Overbaking or cooling too quickly | Remove tart from oven when filling still has a slight wobble in center. Cool at room temperature before refrigerating. |
| Shrinking crust | Stretching dough or not chilling enough | Don’t stretch dough when placing in pan. Chill thoroughly before baking. |
| Tough crust | Overworking the dough | Handle dough minimally and with light touch. Stop processing as soon as dough comes together. |
| Runny filling | Undercooked curd or incorrect measurements | Cook until properly thickened and coats back of spoon. Double-check measurements of eggs and liquid. |
| Bitter taste | Too much zest or white pith included | Use only the colored part of the lemon zest, avoiding white pith. |
| Eggy taste | Overcooking filling or not enough lemon | Don’t let filling boil. Ensure proper amount of lemon juice and zest for balanced flavor. |
| Filling won’t set | Not chilled long enough or too much liquid | Allow at least 4 hours of refrigeration, preferably overnight. Check recipe measurements. |
Tips for Lemon Tart Perfection
For the Crust:
- Always use cold butter and minimal handling for the flakiest result
- If the dough becomes too soft at any point, simply chill it again
- A metal tart pan conducts heat better than ceramic or glass
- For a perfectly even crust, freeze the shaped dough for 15 minutes before baking
- If you notice the crust edges browning too quickly during blind baking, cover them with foil
For the Filling:
- Fresh lemon juice is non-negotiable—bottled juice will severely impact the flavor
- Room temperature eggs incorporate more easily and cook more evenly
- The double boiler method prevents the eggs from scrambling
- Strain the filling twice if needed for the smoothest result
- Adding butter at the end creates richness and helps the filling set
For Serving:
- A warm, dry knife makes clean slices—run it under hot water and wipe dry between cuts
- Store leftovers covered in the refrigerator for up to 3 days
- The tart does not freeze well as the texture of the filling will change
- For a professional look, use a kitchen torch to briefly warm the surface before serving
Variations to Try
While the classic lemon tart is perfection in its simplicity, here are some delicious variations you might enjoy:
- Meyer Lemon Tart: Replace regular lemons with Meyer lemons for a sweeter, more fragrant filling.
- Lemon-Lime Tart: Substitute half of the lemon juice with lime juice for a different citrus profile.
- Lemon Raspberry Tart: Add a layer of raspberry preserves on the bottom of the crust before pouring in the lemon filling.
- Brûléed Lemon Tart: Sprinkle the top with a thin layer of sugar and use a kitchen torch to create a caramelized crust.
- Coconut Lemon Tart: Add 1/4 cup of coconut cream to the filling and garnish with toasted coconut flakes.
- Herb-Infused Lemon Tart: Add fresh thyme or lavender to the filling while cooking, then strain out before assembling.

Serving Suggestions
A slice of this lemon tart is beautiful on its own, but you can elevate the experience with these serving ideas:
- A dollop of lightly sweetened whipped cream
- A scoop of vanilla bean ice cream for a hot-cold contrast
- Fresh mixed berries macerated with a touch of sugar
- A drizzle of raspberry or blueberry coulis
- A sprinkle of candied lemon peel
- A hot cup of Earl Grey tea or espresso
Nutritional Information
| Nutrient | Amount per Slice (1/8 of tart) |
|---|---|
| Calories | 385 kcal |
| Total Fat | 24g |
| Saturated Fat | 14g |
| Cholesterol | 185mg |
| Sodium | 120mg |
| Total Carbohydrates | 38g |
| Fiber | 1g |
| Sugar | 23g |
| Protein | 6g |
| Vitamin C | 15% DV |
| Calcium | 4% DV |
| Iron | 6% DV |
Storage Tips
This tart is best enjoyed within 2-3 days of making it. Here’s how to store it properly:
- Refrigeration: Cover with plastic wrap, ensuring the wrap doesn’t touch the surface of the filling. Store in the refrigerator for up to 3 days.
- Room Temperature: The tart should not sit at room temperature for more than 2 hours.
- Freezing: This tart doesn’t freeze well as the texture of the filling becomes grainy when thawed.
Make-Ahead Options
If you’re planning for an event, you can prepare components ahead:
- The tart dough can be made and refrigerated for up to 2 days or frozen for up to 1 month.
- The baked tart shell can be prepared 1 day in advance and stored at room temperature, covered.
- The complete tart can be made up to 1 day before serving, kept refrigerated.
Frequently Asked Questions
Q: Can I use bottled lemon juice instead of fresh?
I strongly advise against it. Fresh lemon juice has a vibrant, complex flavor that bottled juice simply can’t match. Since lemons are the star ingredient here, using fresh juice makes a tremendous difference in the final taste.
Q: My filling curdled while cooking. What went wrong?
The most likely cause is that the mixture got too hot. Always use a double boiler and never let the water boil vigorously beneath. Keep the heat gentle and stir constantly. If you do notice small bits of curdled egg, simply strain the mixture more thoroughly.
Q: Can I make this tart gluten-free?
Absolutely! Substitute the all-purpose flour with a good quality gluten-free flour blend that contains xanthan gum. You may need to add an extra tablespoon of water to the dough as gluten-free flours tend to absorb more moisture.
Q: How do I know when the filling is cooked enough?
The filling should coat the back of a spoon and when you run your finger through it, it should leave a clear path that doesn’t immediately fill in. If you have a thermometer, it should reach around 170°F (77°C). Remember, it will continue to thicken as it cools.
Q: Can I reduce the sugar in this recipe?
You can reduce the sugar by about 25% without affecting the set of the filling, but remember that sugar balances the tartness of the lemons. I wouldn’t recommend reducing it further as it plays a role in both flavor and texture.
Q: Why did my tart crust shrink during baking?
Shrinkage typically happens when the gluten in the dough is overworked or when the dough is stretched rather than gently pressed into the pan. Always chill the dough thoroughly before baking and use pie weights during the initial blind bake.
Q: How can I tell if my lemons will yield a good amount of juice?
Look for lemons that feel heavy for their size and have a slight give when gently squeezed—this indicates juiciness. Room temperature lemons yield more juice than cold ones, so take them out of the refrigerator in advance. Rolling them firmly on the counter before juicing also helps.
Q: My tart filling didn’t set properly. What went wrong?
The most common reason is undercooking the filling. It needs to reach the proper temperature to activate the egg proteins that help it set. Another possibility is inaccurate measurements—too much liquid or too few eggs can prevent proper setting.
Final Thoughts
Creating the perfect lemon tart is an exercise in balance—balancing flavors, textures, and techniques. The bright, refreshing taste of this classic dessert makes it perfect for any season and any occasion. I find it particularly delightful in spring and summer when the vibrant yellow color matches the sunny atmosphere.
What I love most about this recipe is how it transforms simple ingredients into something truly spectacular. The contrast between the crisp, buttery crust and the smooth, tangy filling creates a sensory experience that’s hard to beat. And while it looks impressive enough for special occasions, it’s actually quite straightforward to make once you understand the key techniques.
Remember that patience is key when making a lemon tart. From chilling the dough properly to allowing the filling adequate time to set, rushing any step will compromise the final result. But trust me, the wait is absolutely worth it when you take that first perfect bite.
I hope you’ll try this recipe and experience the joy of creating this classic French pastry at home. I’d love to hear how it turns out for you!